Free Plush Puppy Pattern
No potty training needed with this cutie! Download the free dog pattern pages and follow the step by step instructions to make your own collection of colorful plush pups.
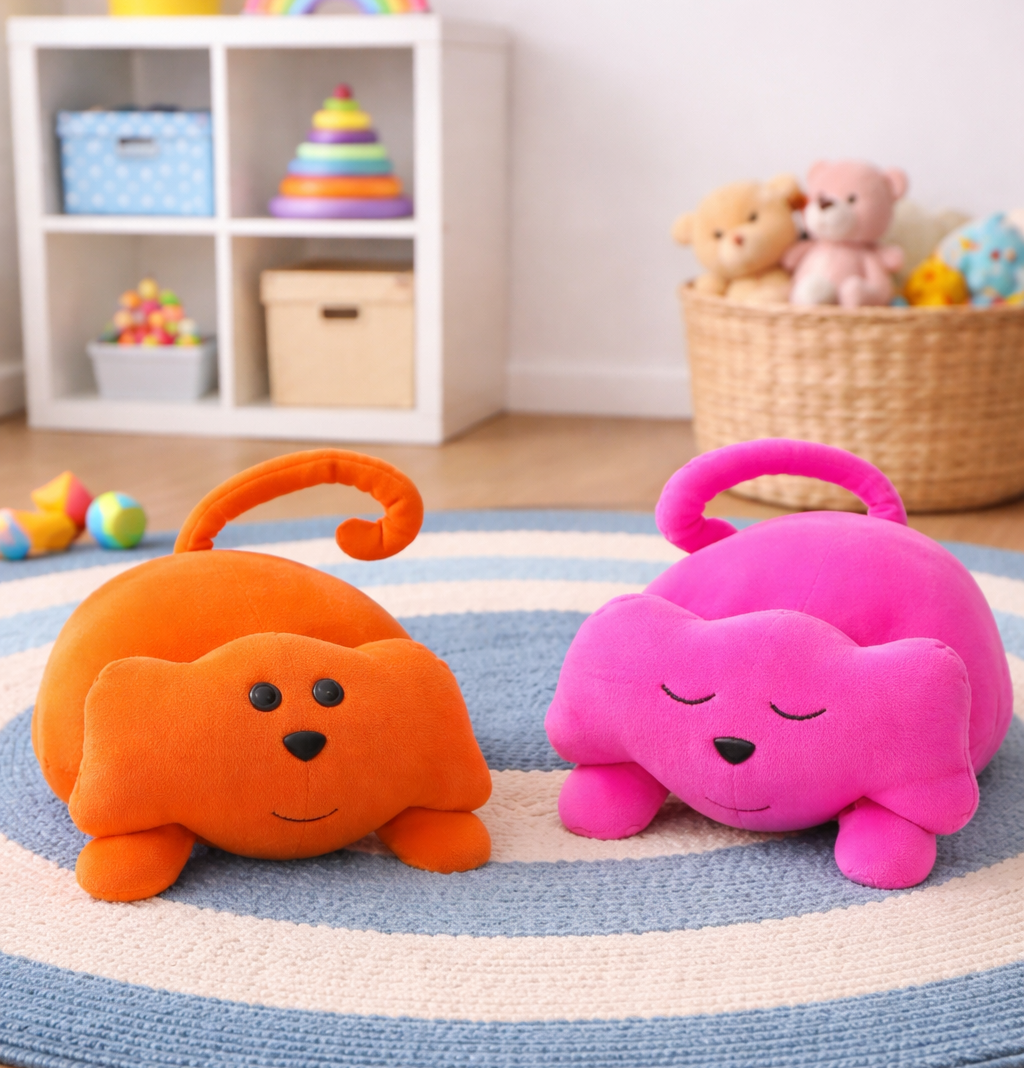
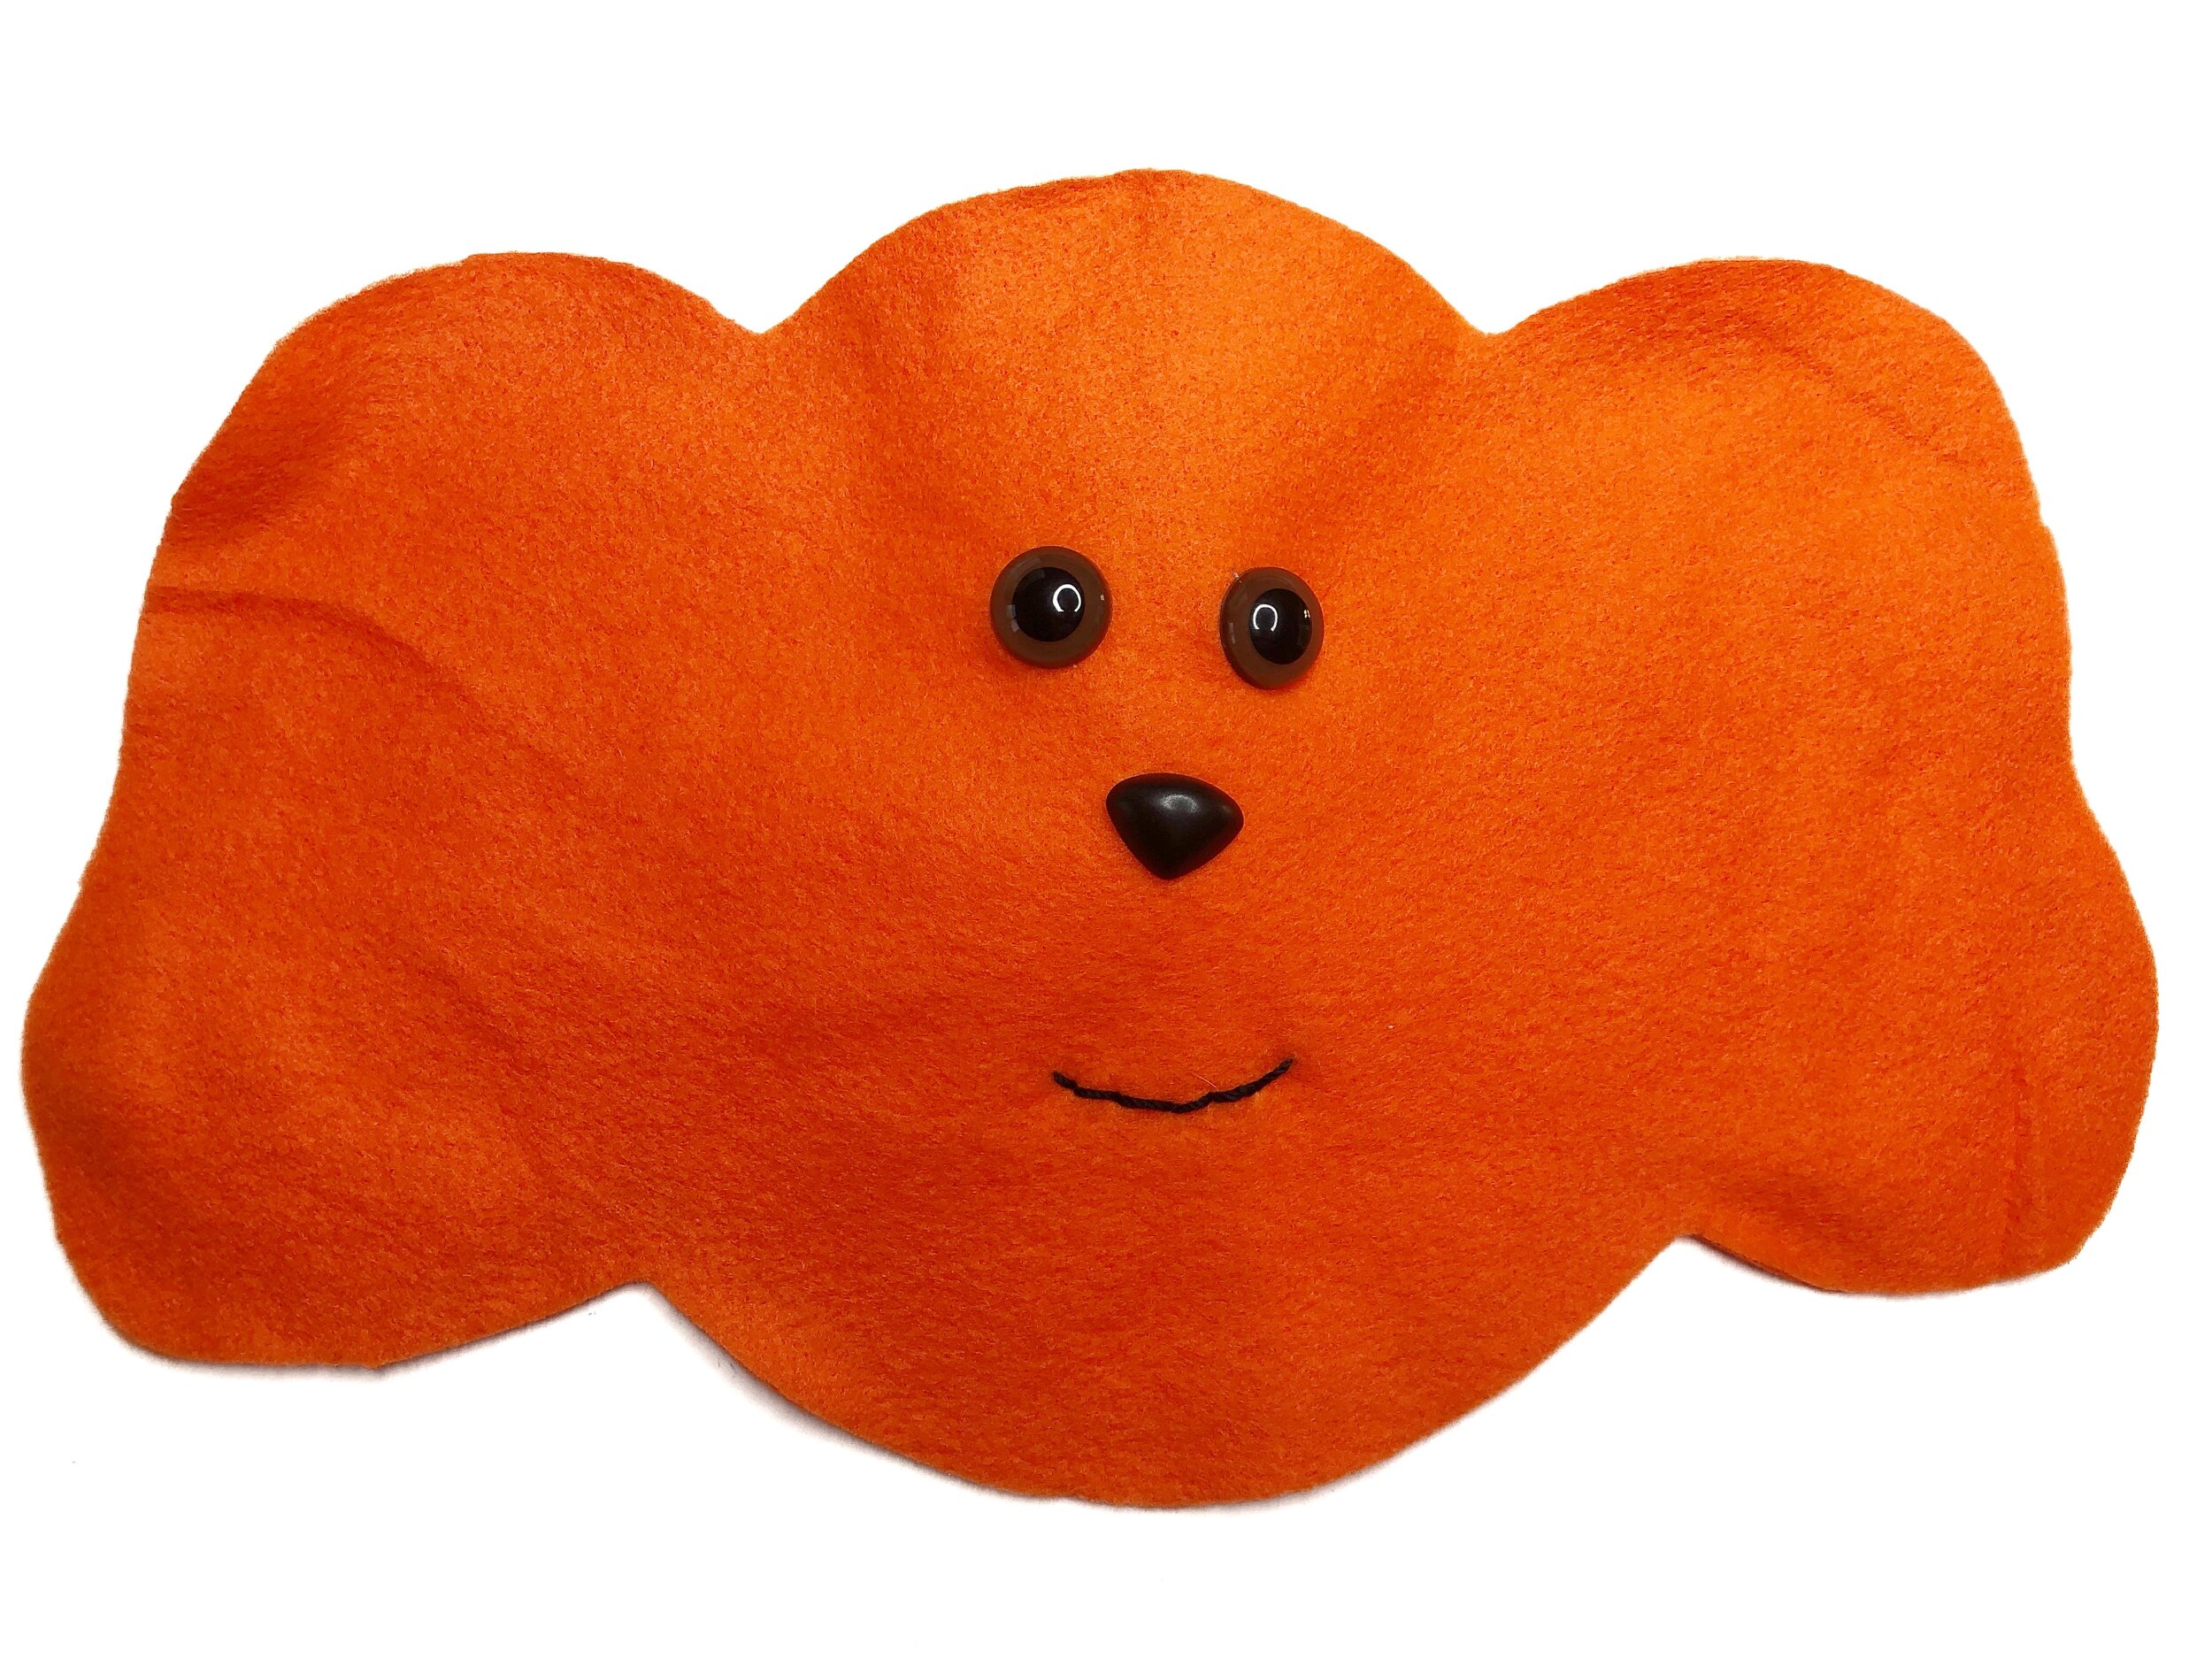
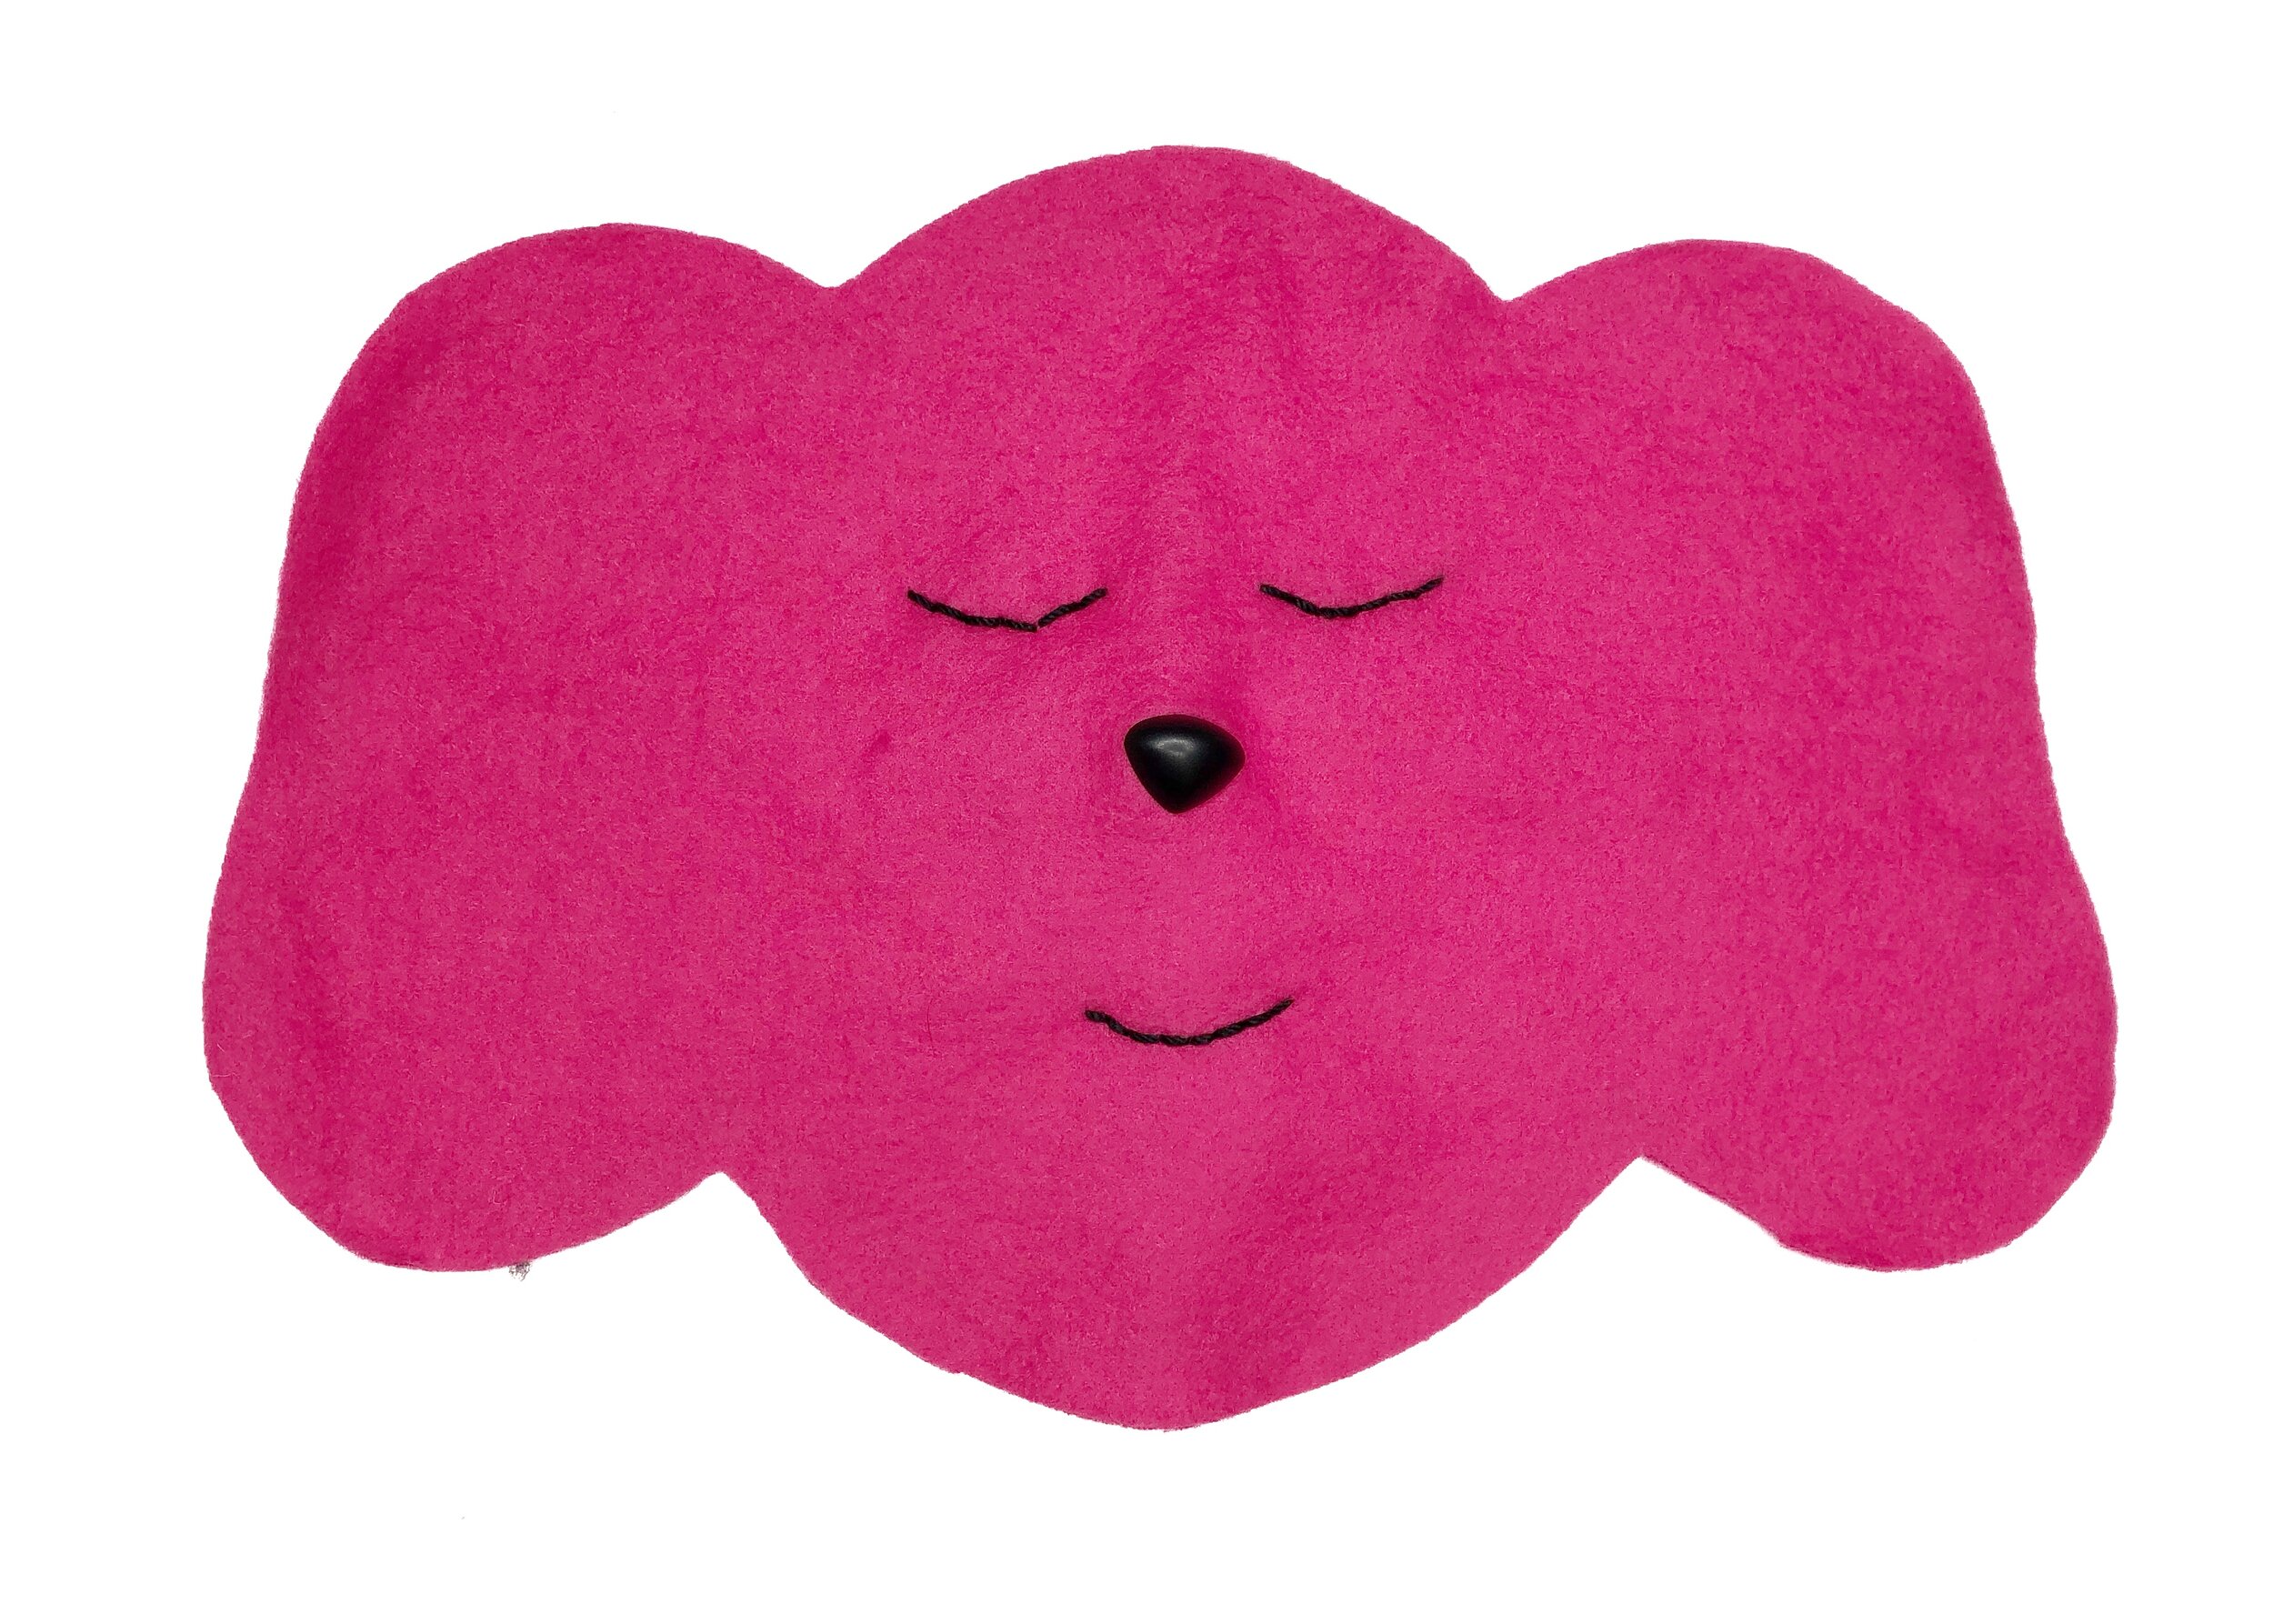
The sky is the limit on colors and patterns when you make your own stuffed animals. This adorable puppy is made from soft fleece fabric which is available in a variety of solids colors and well as decorated patterns. The pattern pages include face templates to make a sleeping or awake face.
Size: Your new pup will be 12” long when finished, excluding the tail.
Sewing skill level: Beginner. Basic sewing and sewing machine skills needed.
Due to the shape of the puppy, the seams have not been included with the pattern pieces. You will add the seam when tracing and cutting.
Pattern Pieces
Click here to download the puppy pattern pieces. Pages print on standard 8 1/2” x 11” paper sizes. The body and head patterns print on multiple pages so they need to be taped together. Match up the letters and use them as a guide to tapes the pages together.

Supply List
1/2 yard fleece fabric
polyester stuffing
18mm plastic animal eyes (for awake face only)
18mm plastic animal nose
black embroidery floss or crotchet thread and needle for mouth and sleeping face
hot glue gun and glue sticks
Instructions
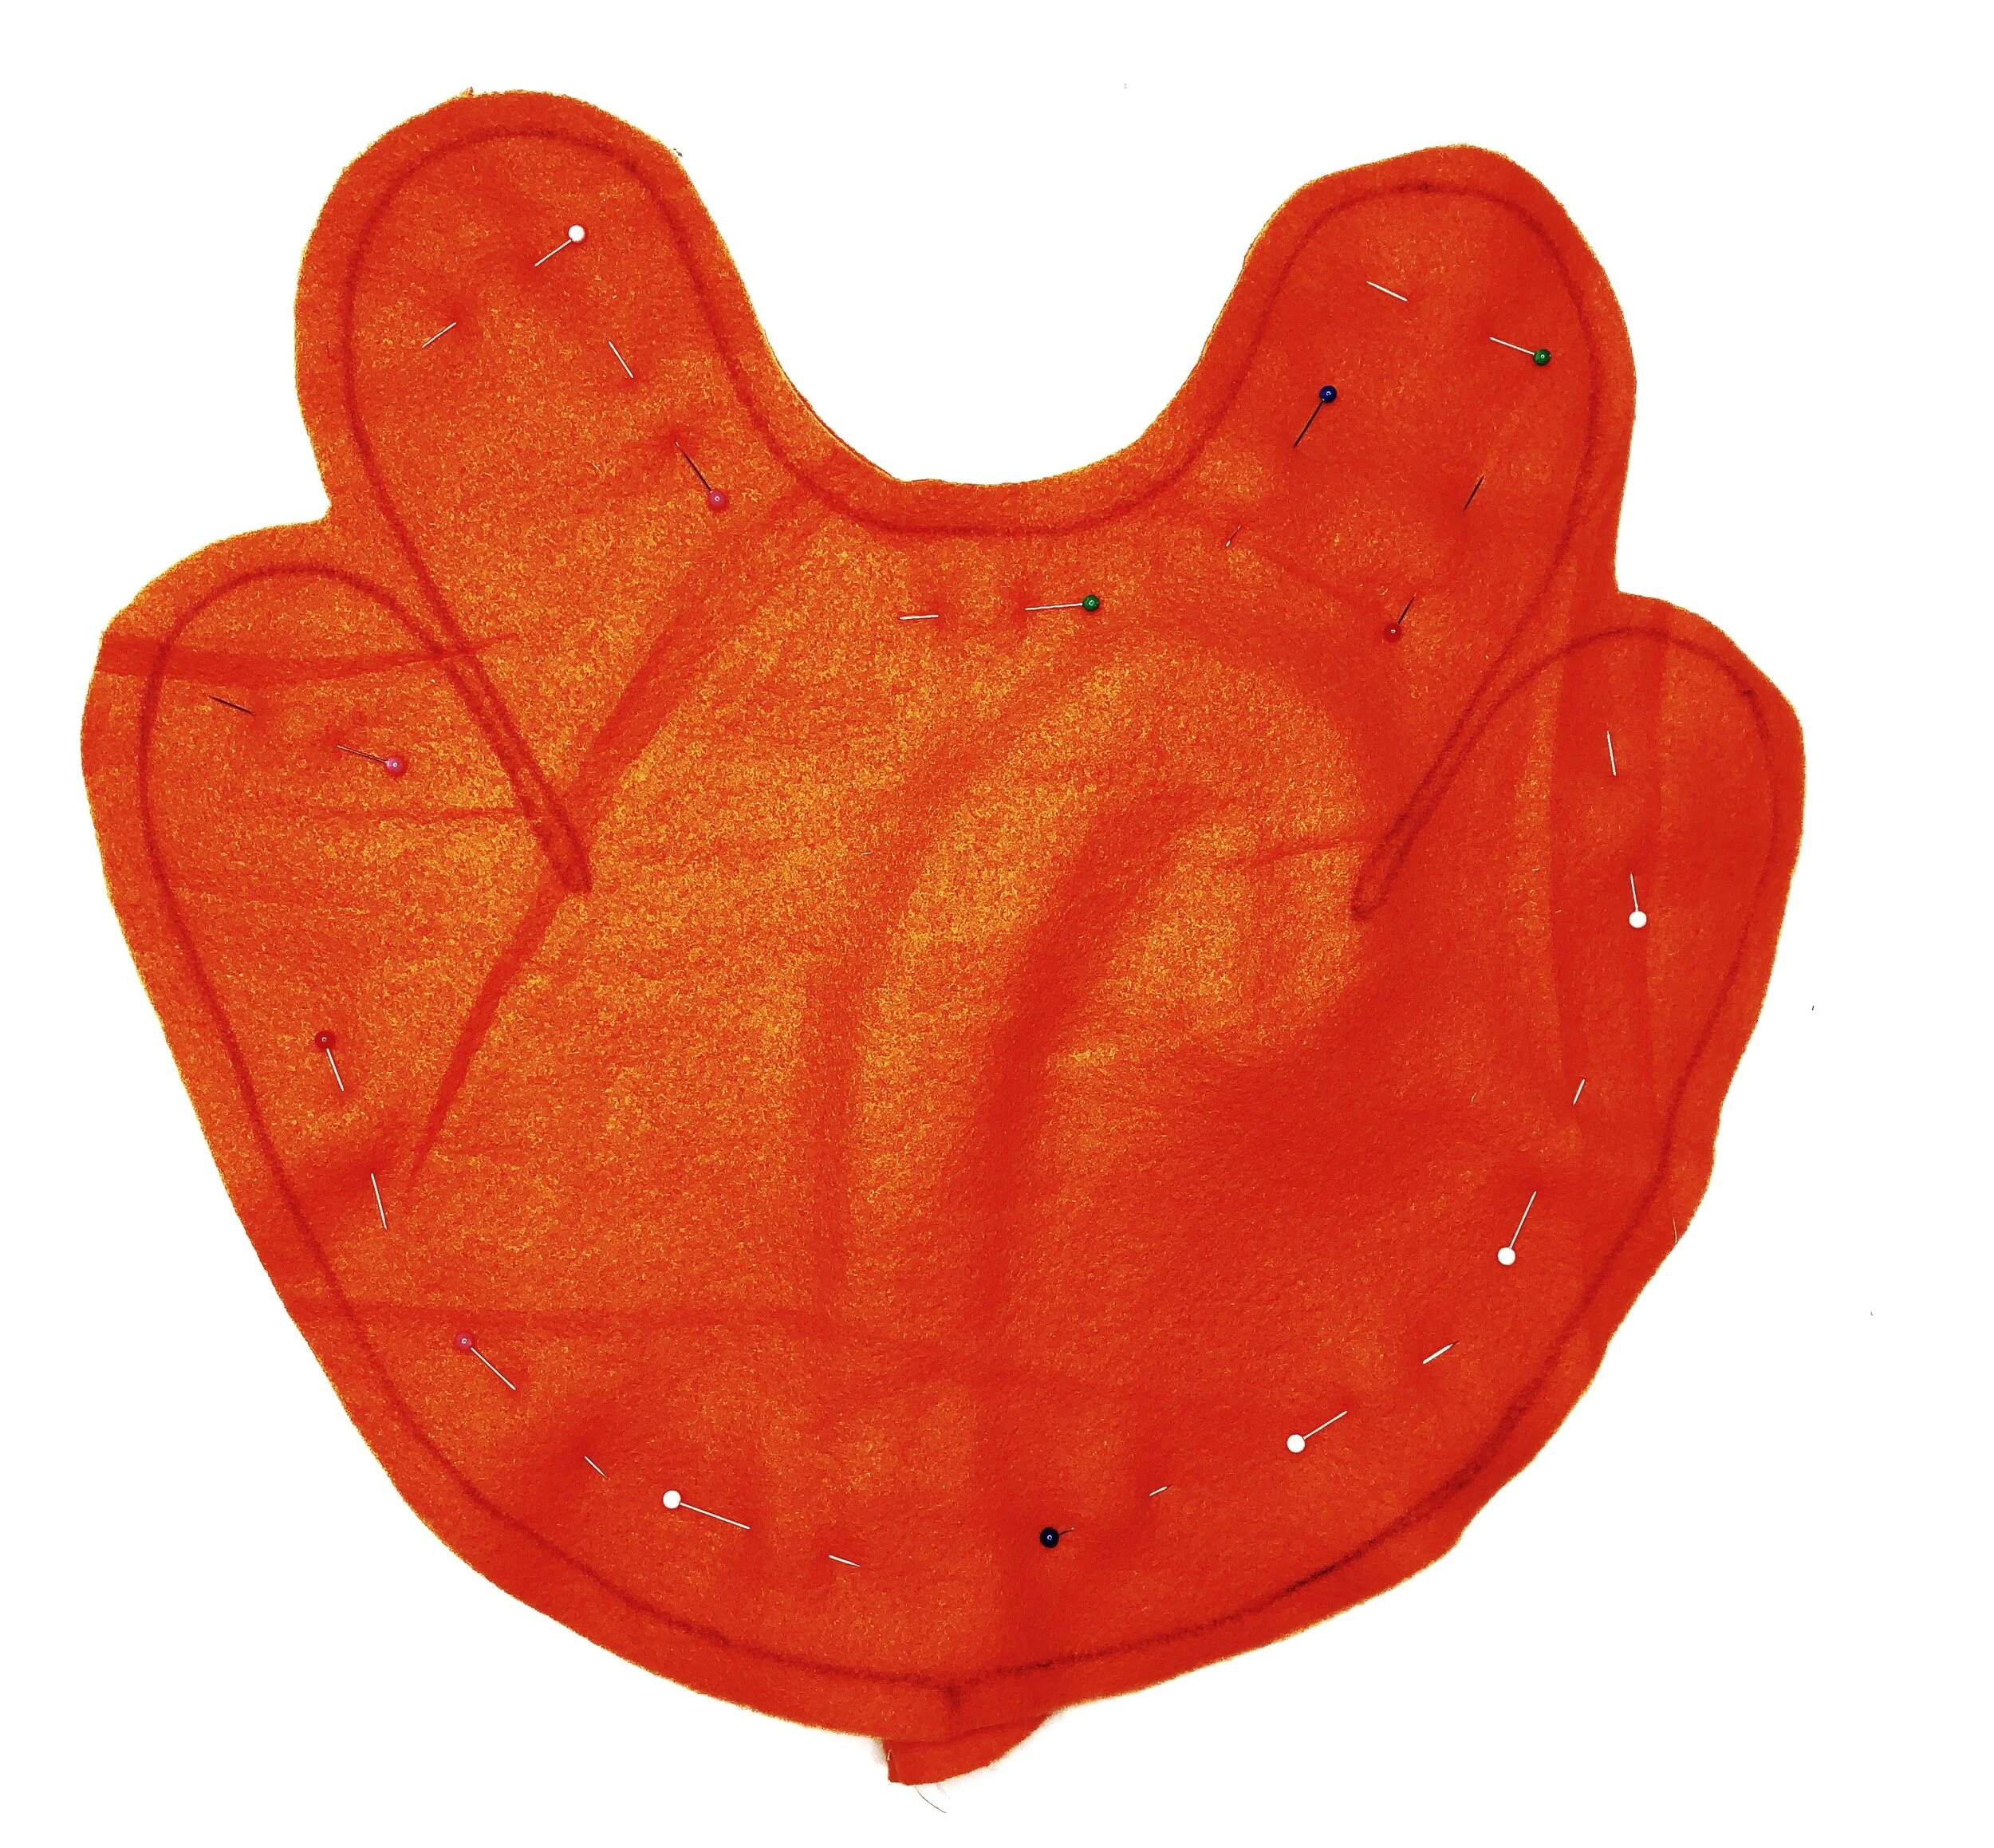
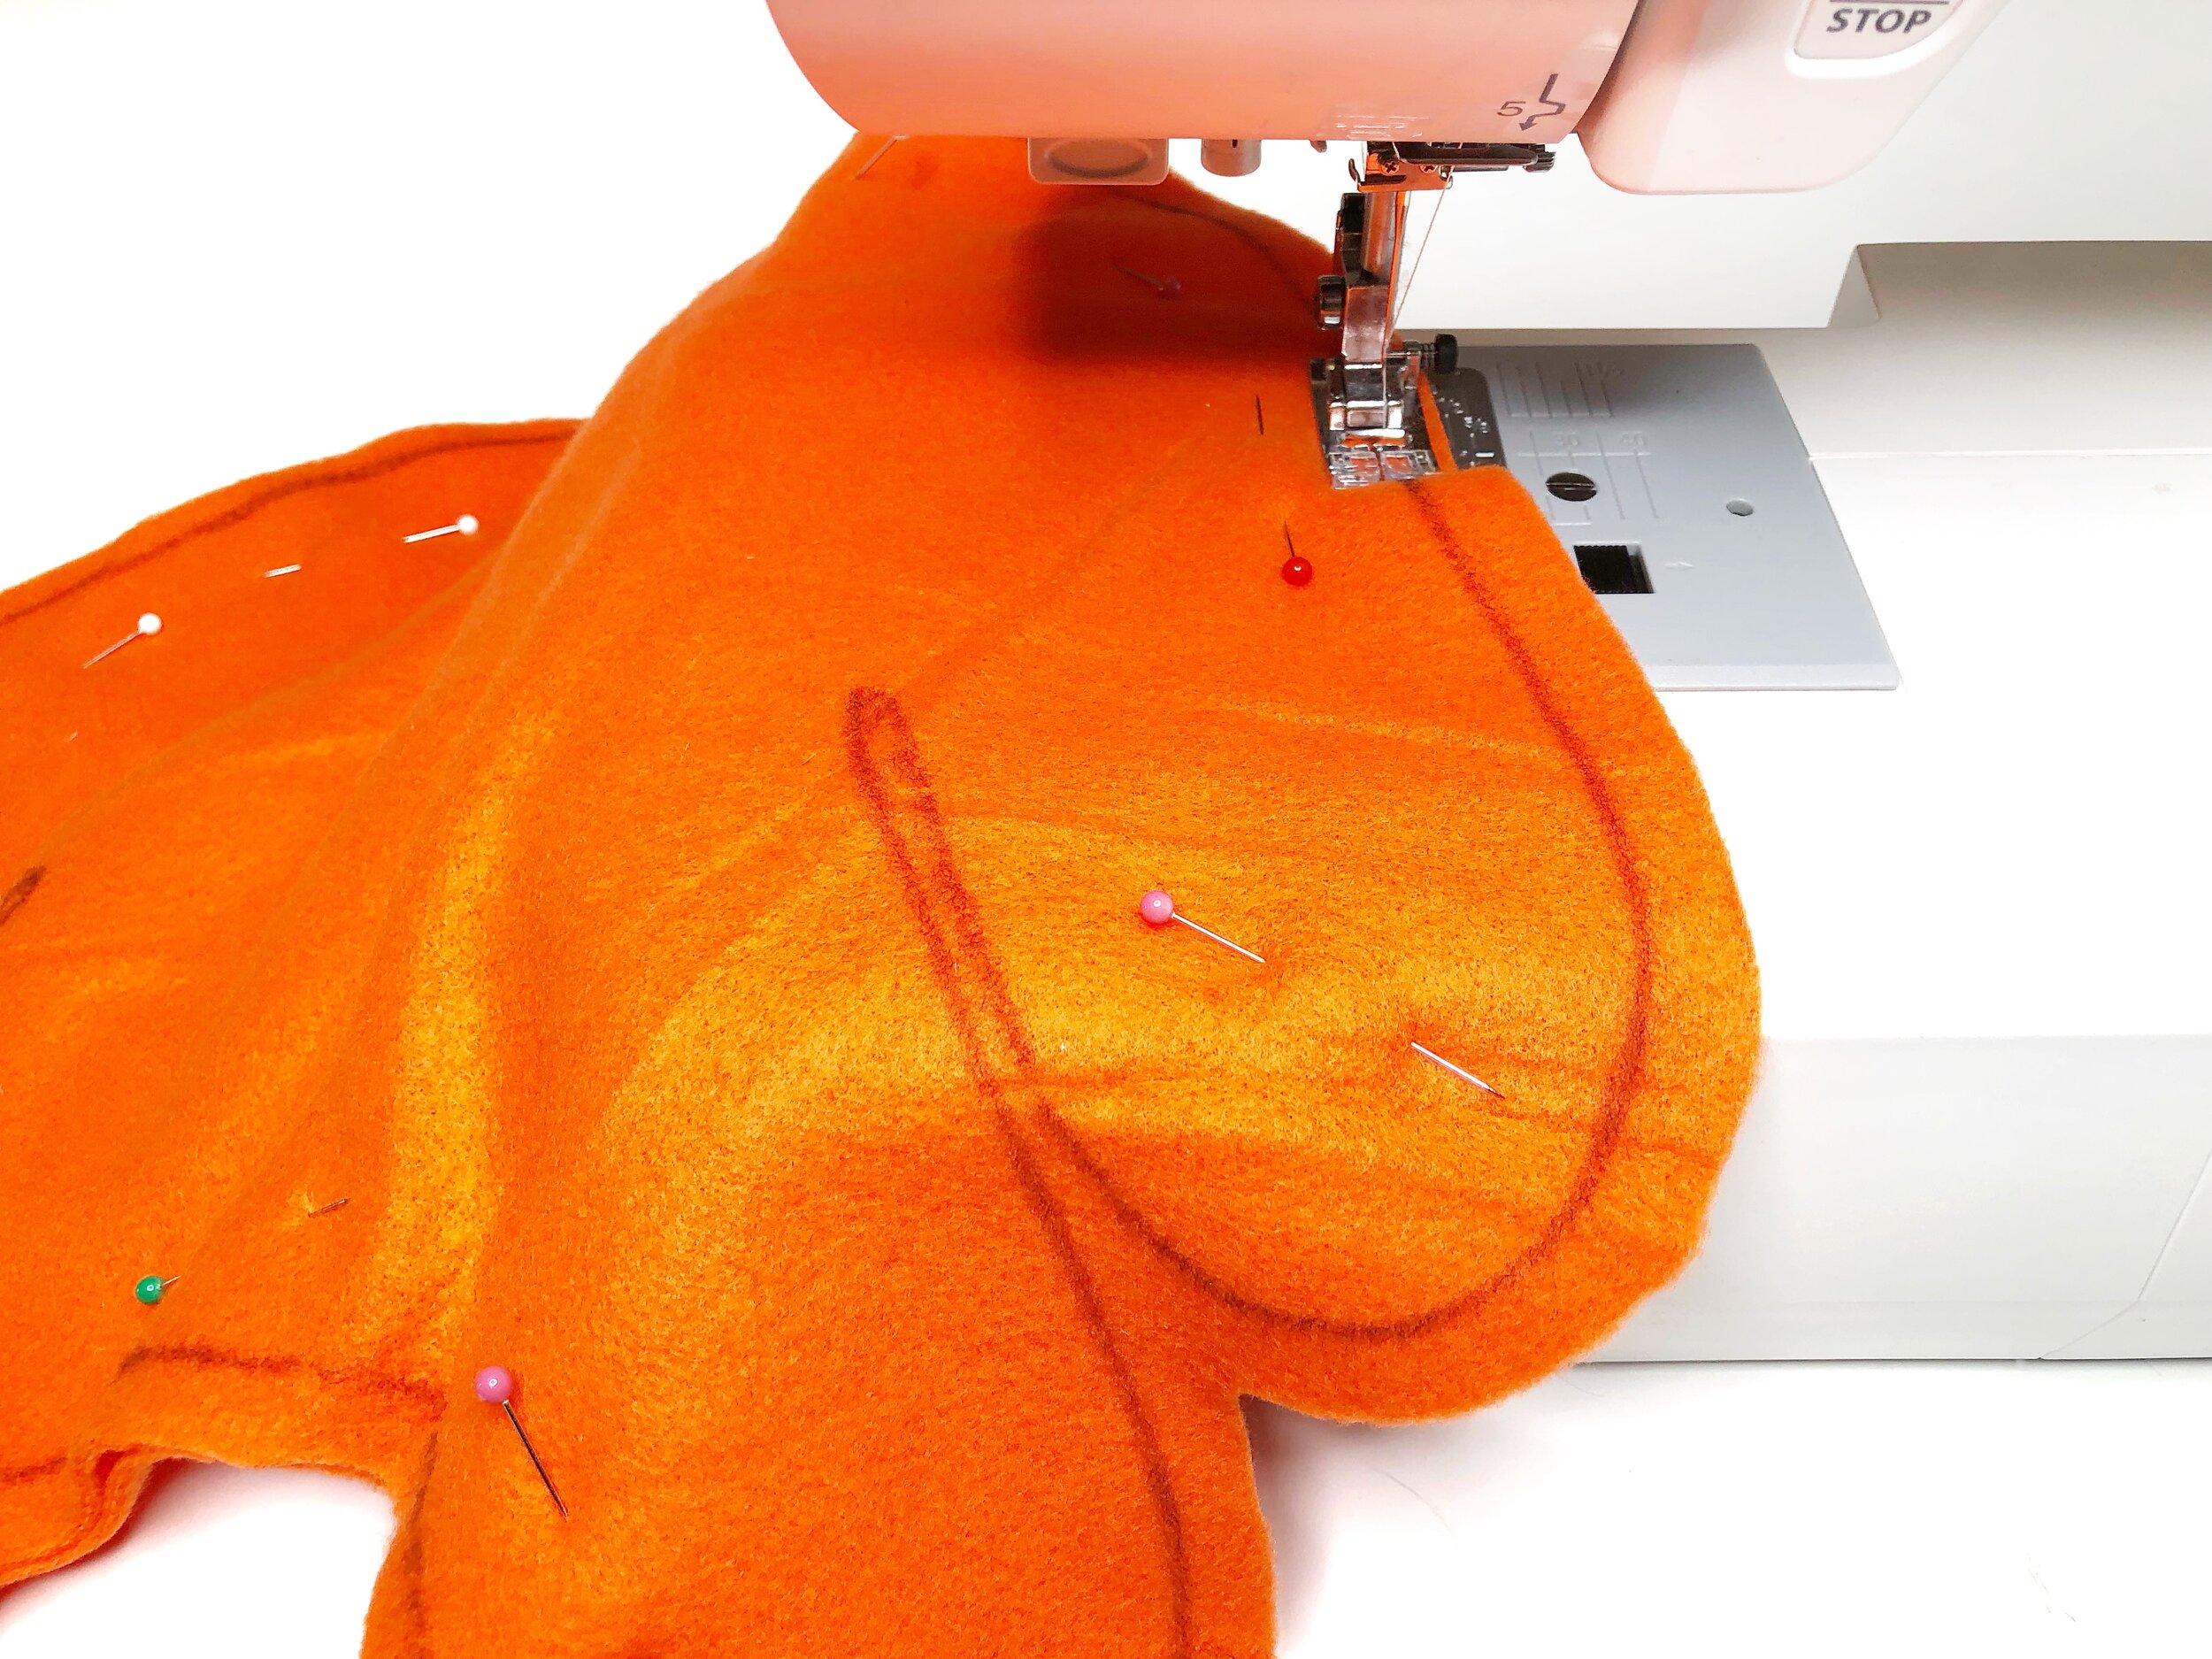
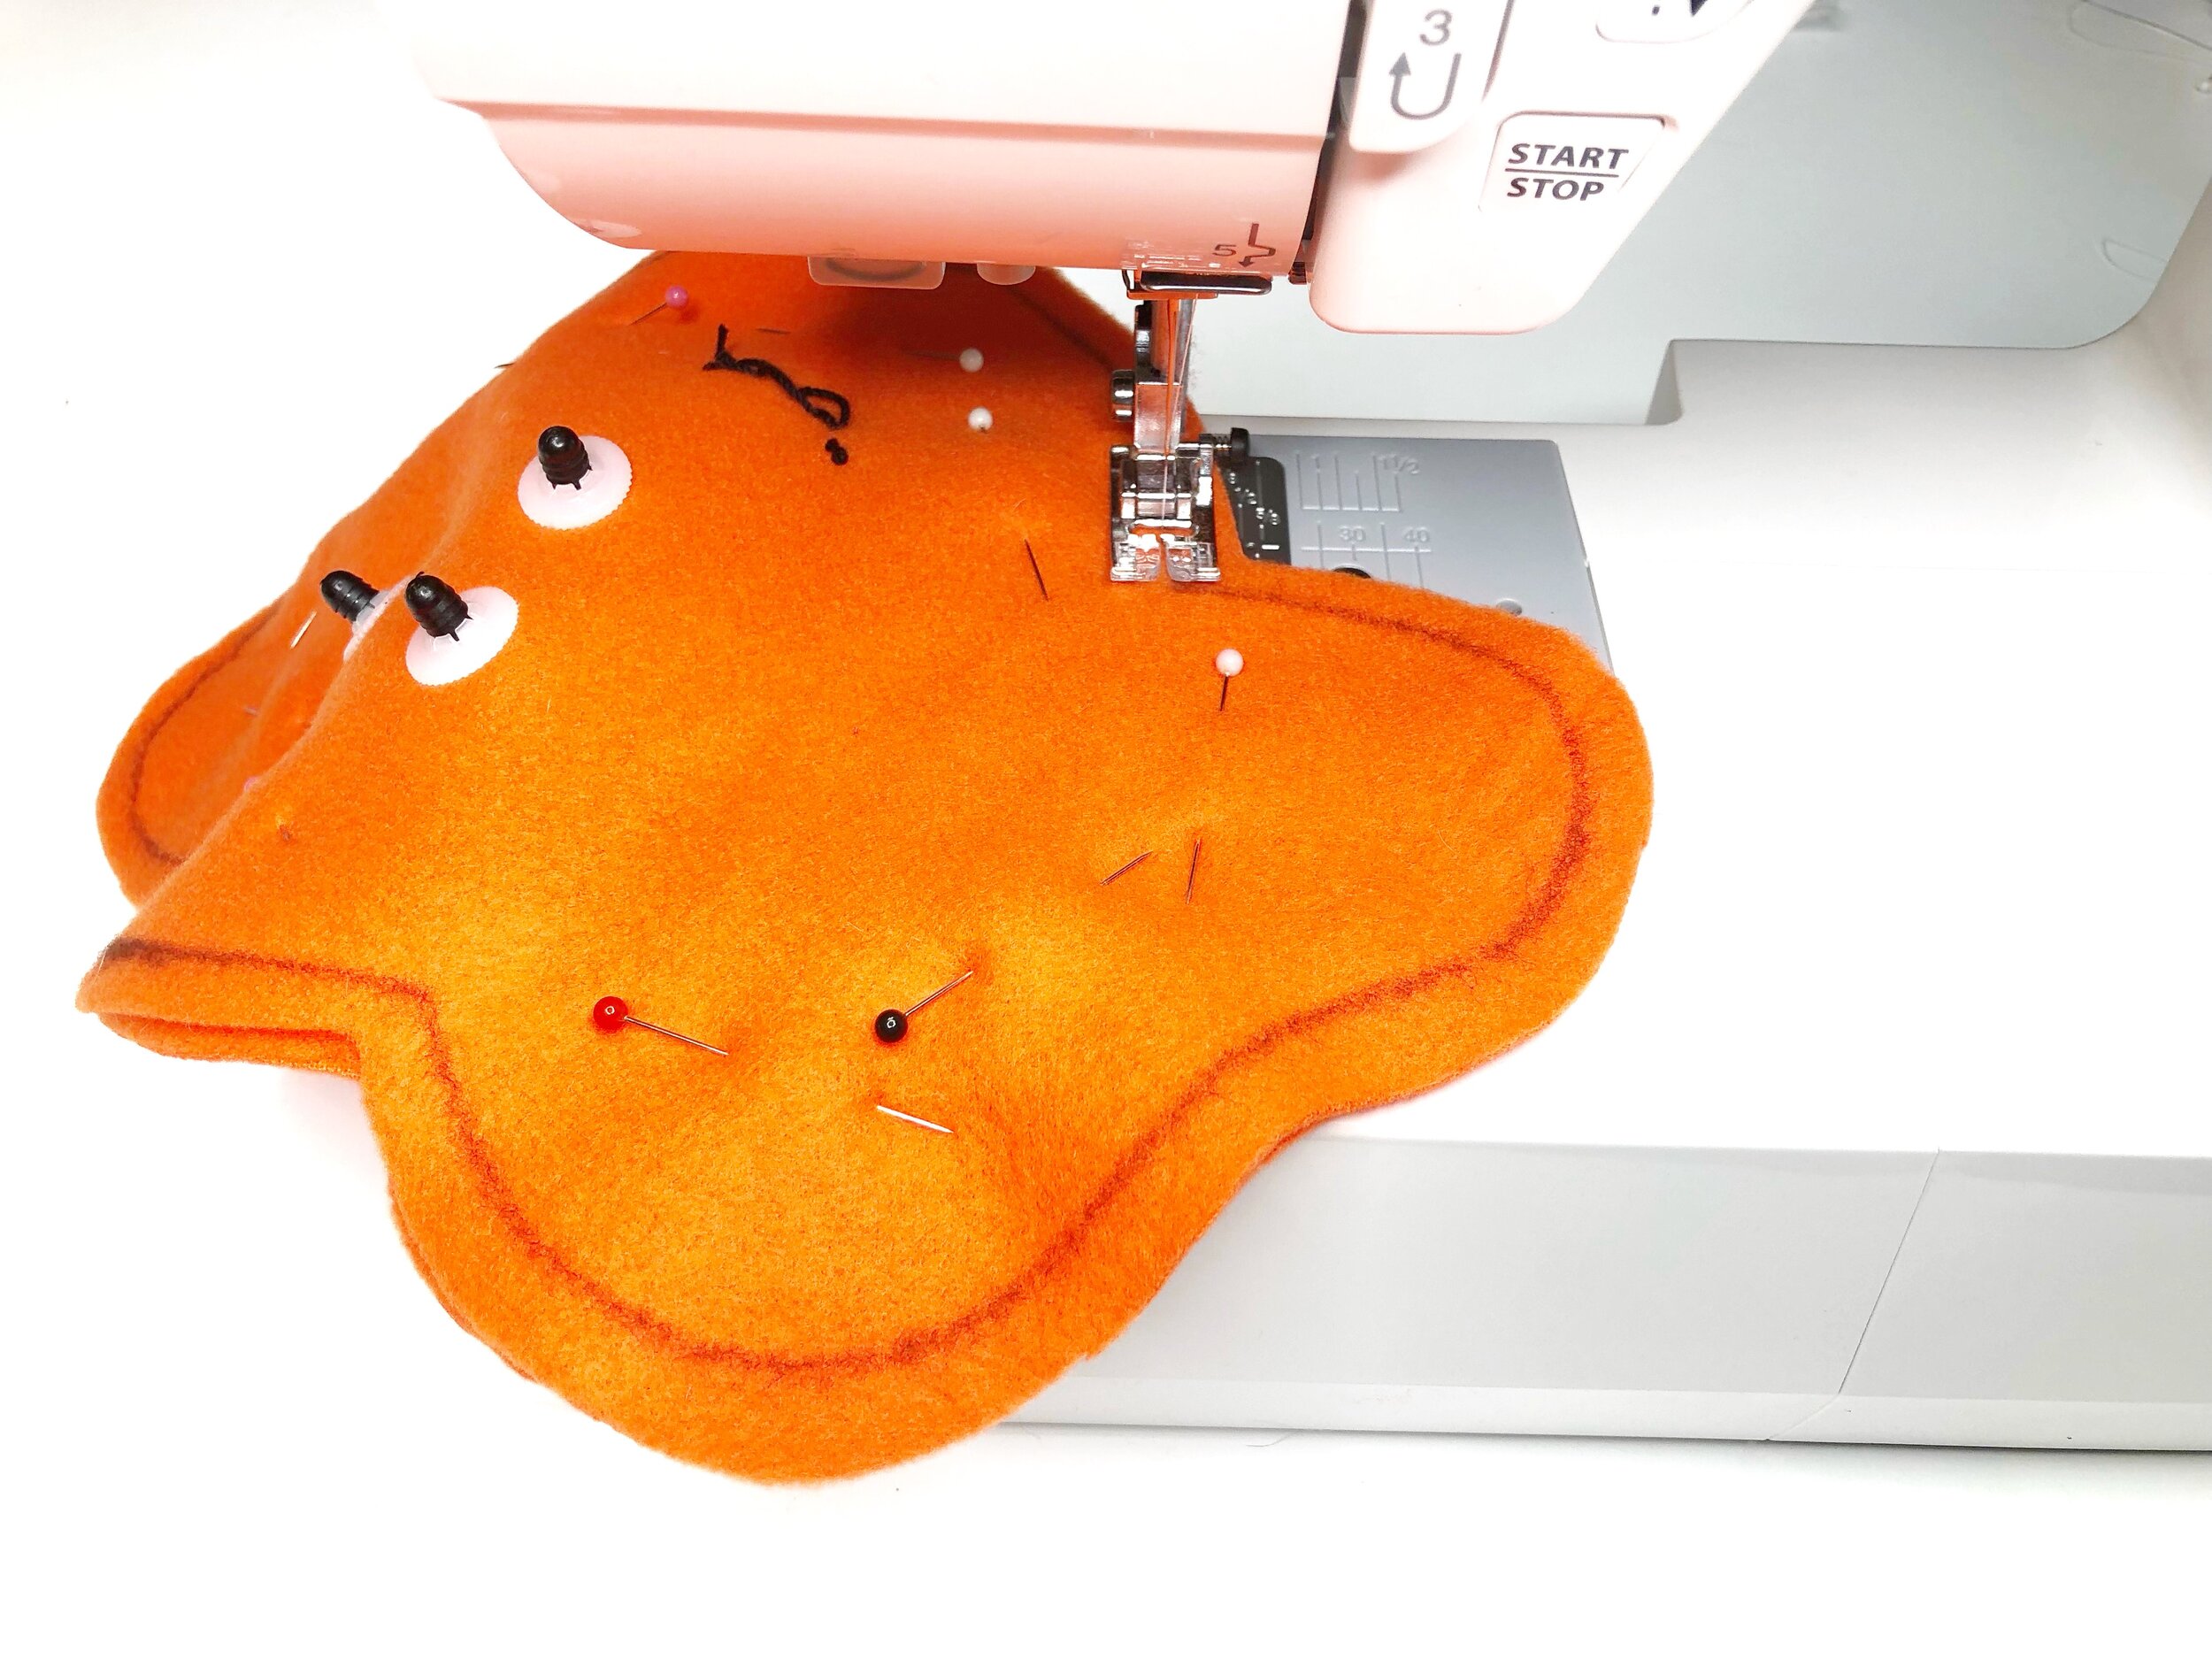
Body. Pin and transfer (trace) the body pattern to double layered fabric.
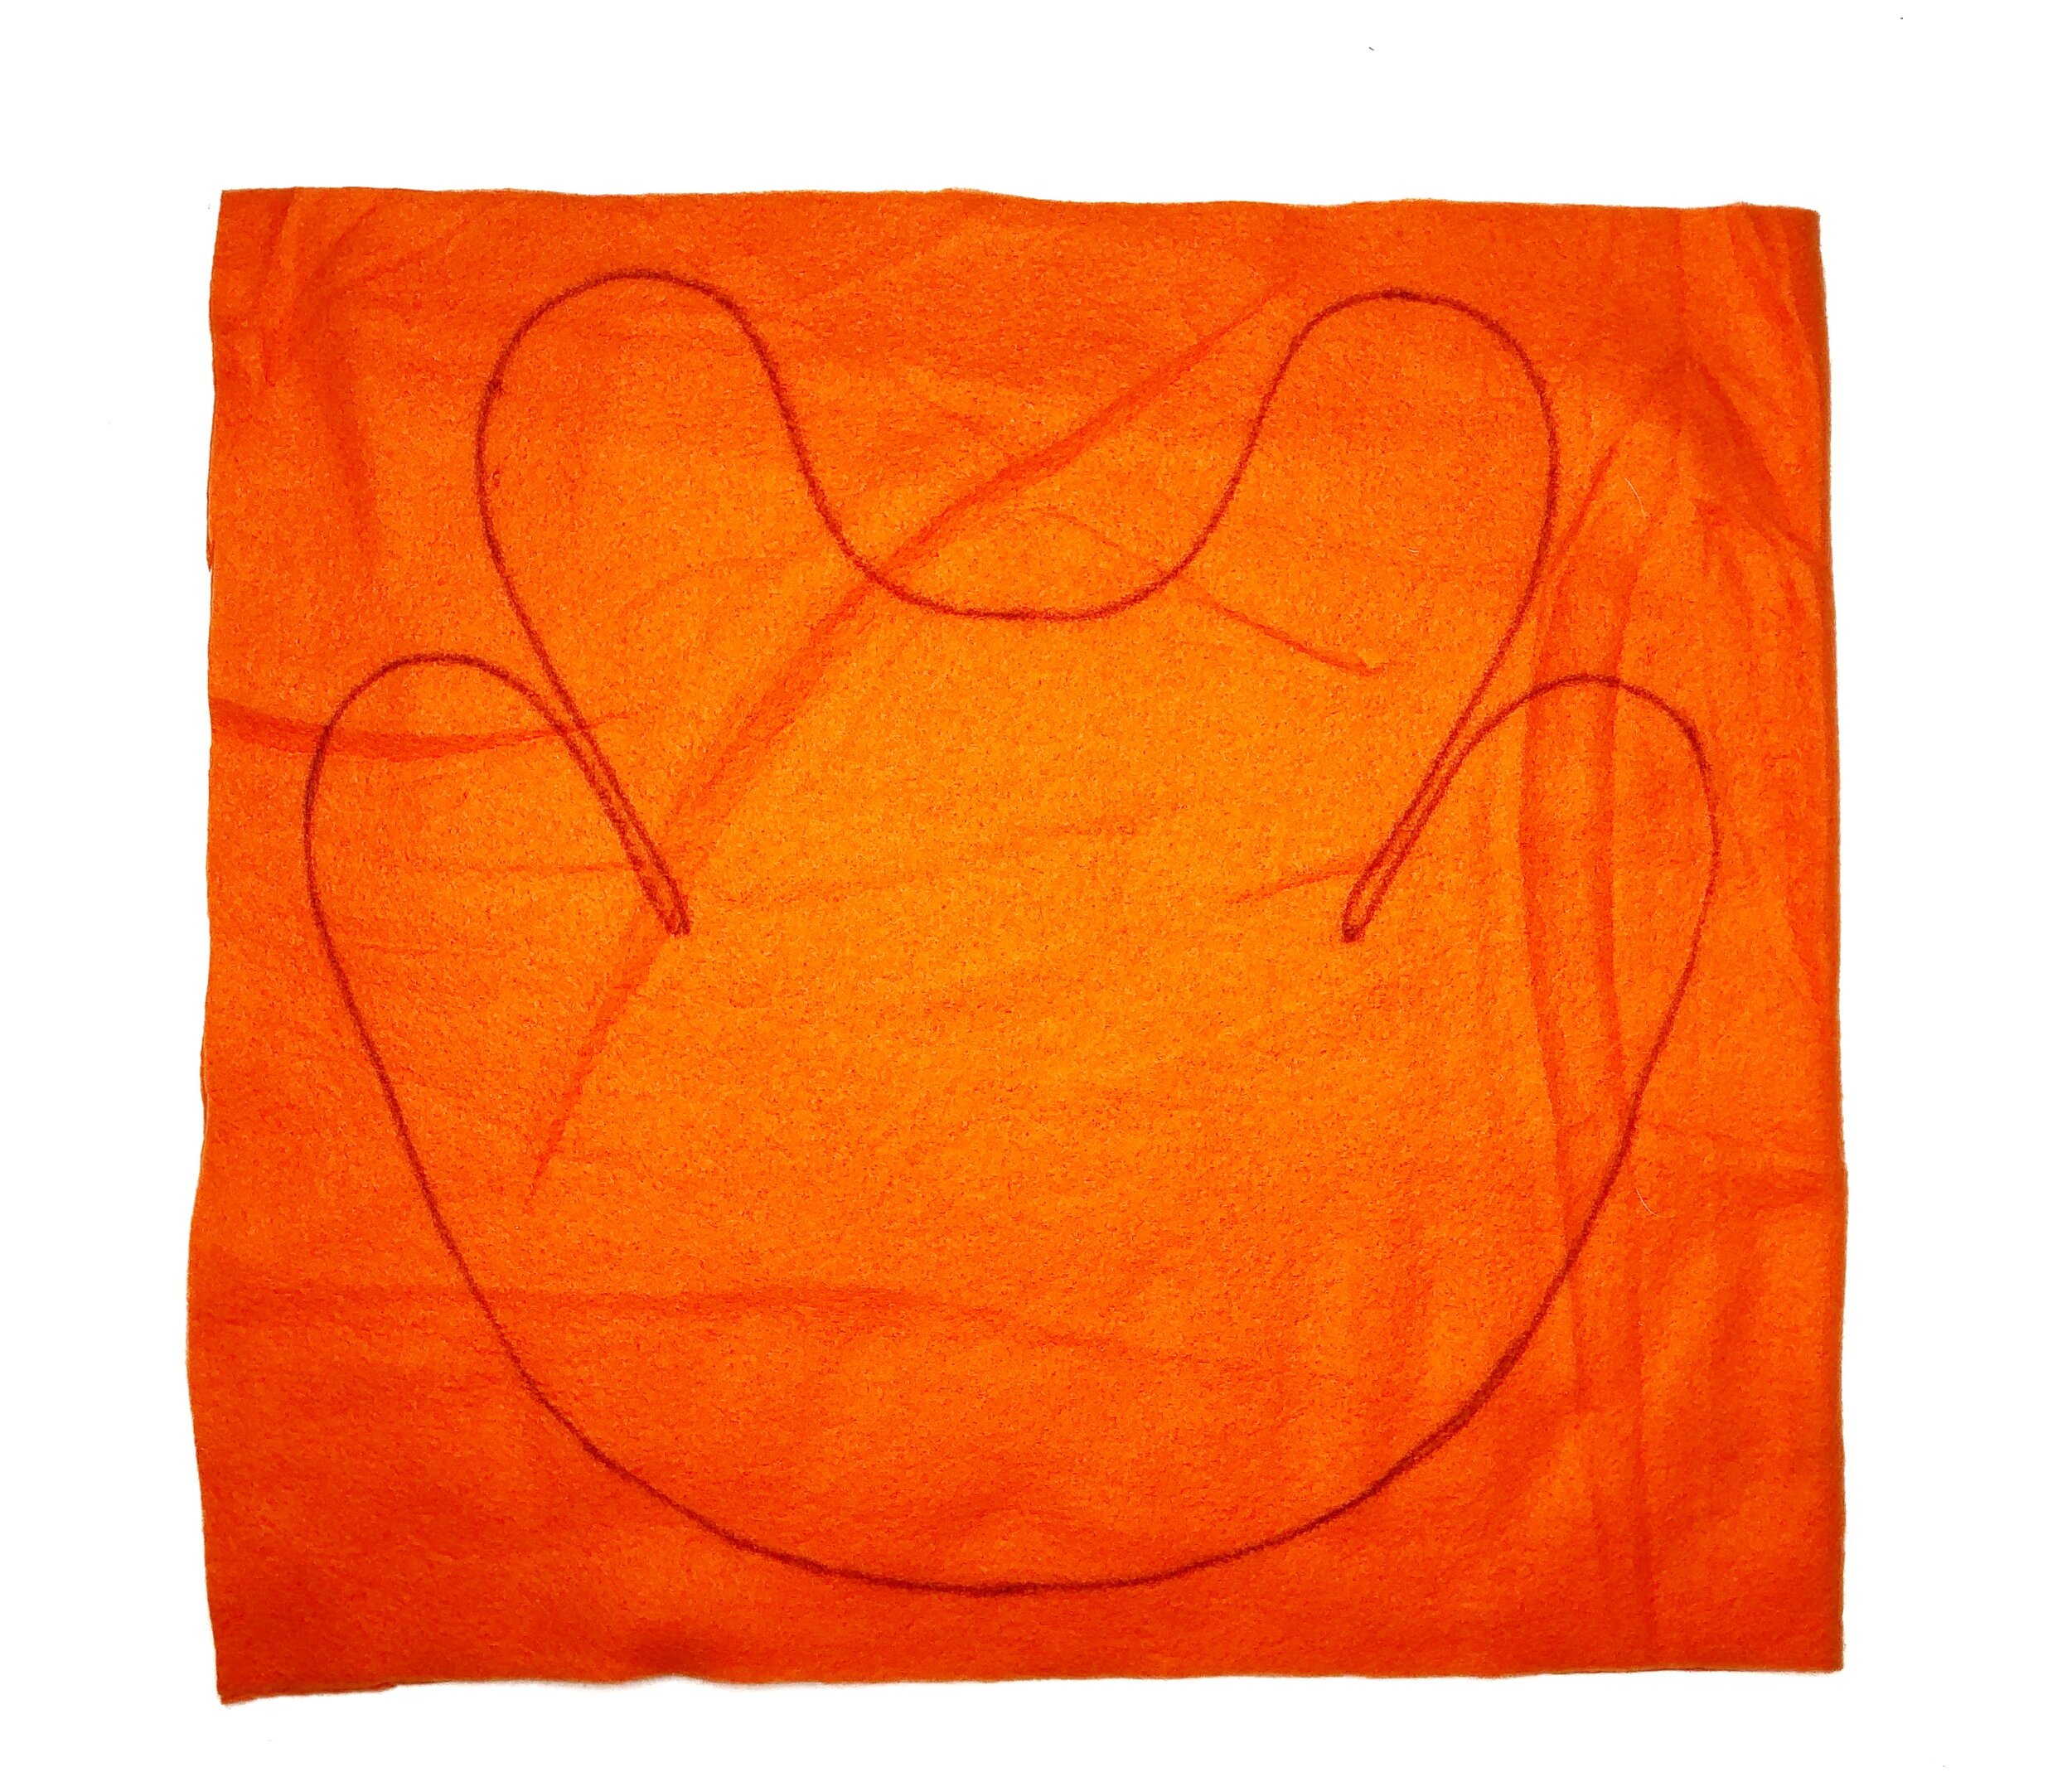
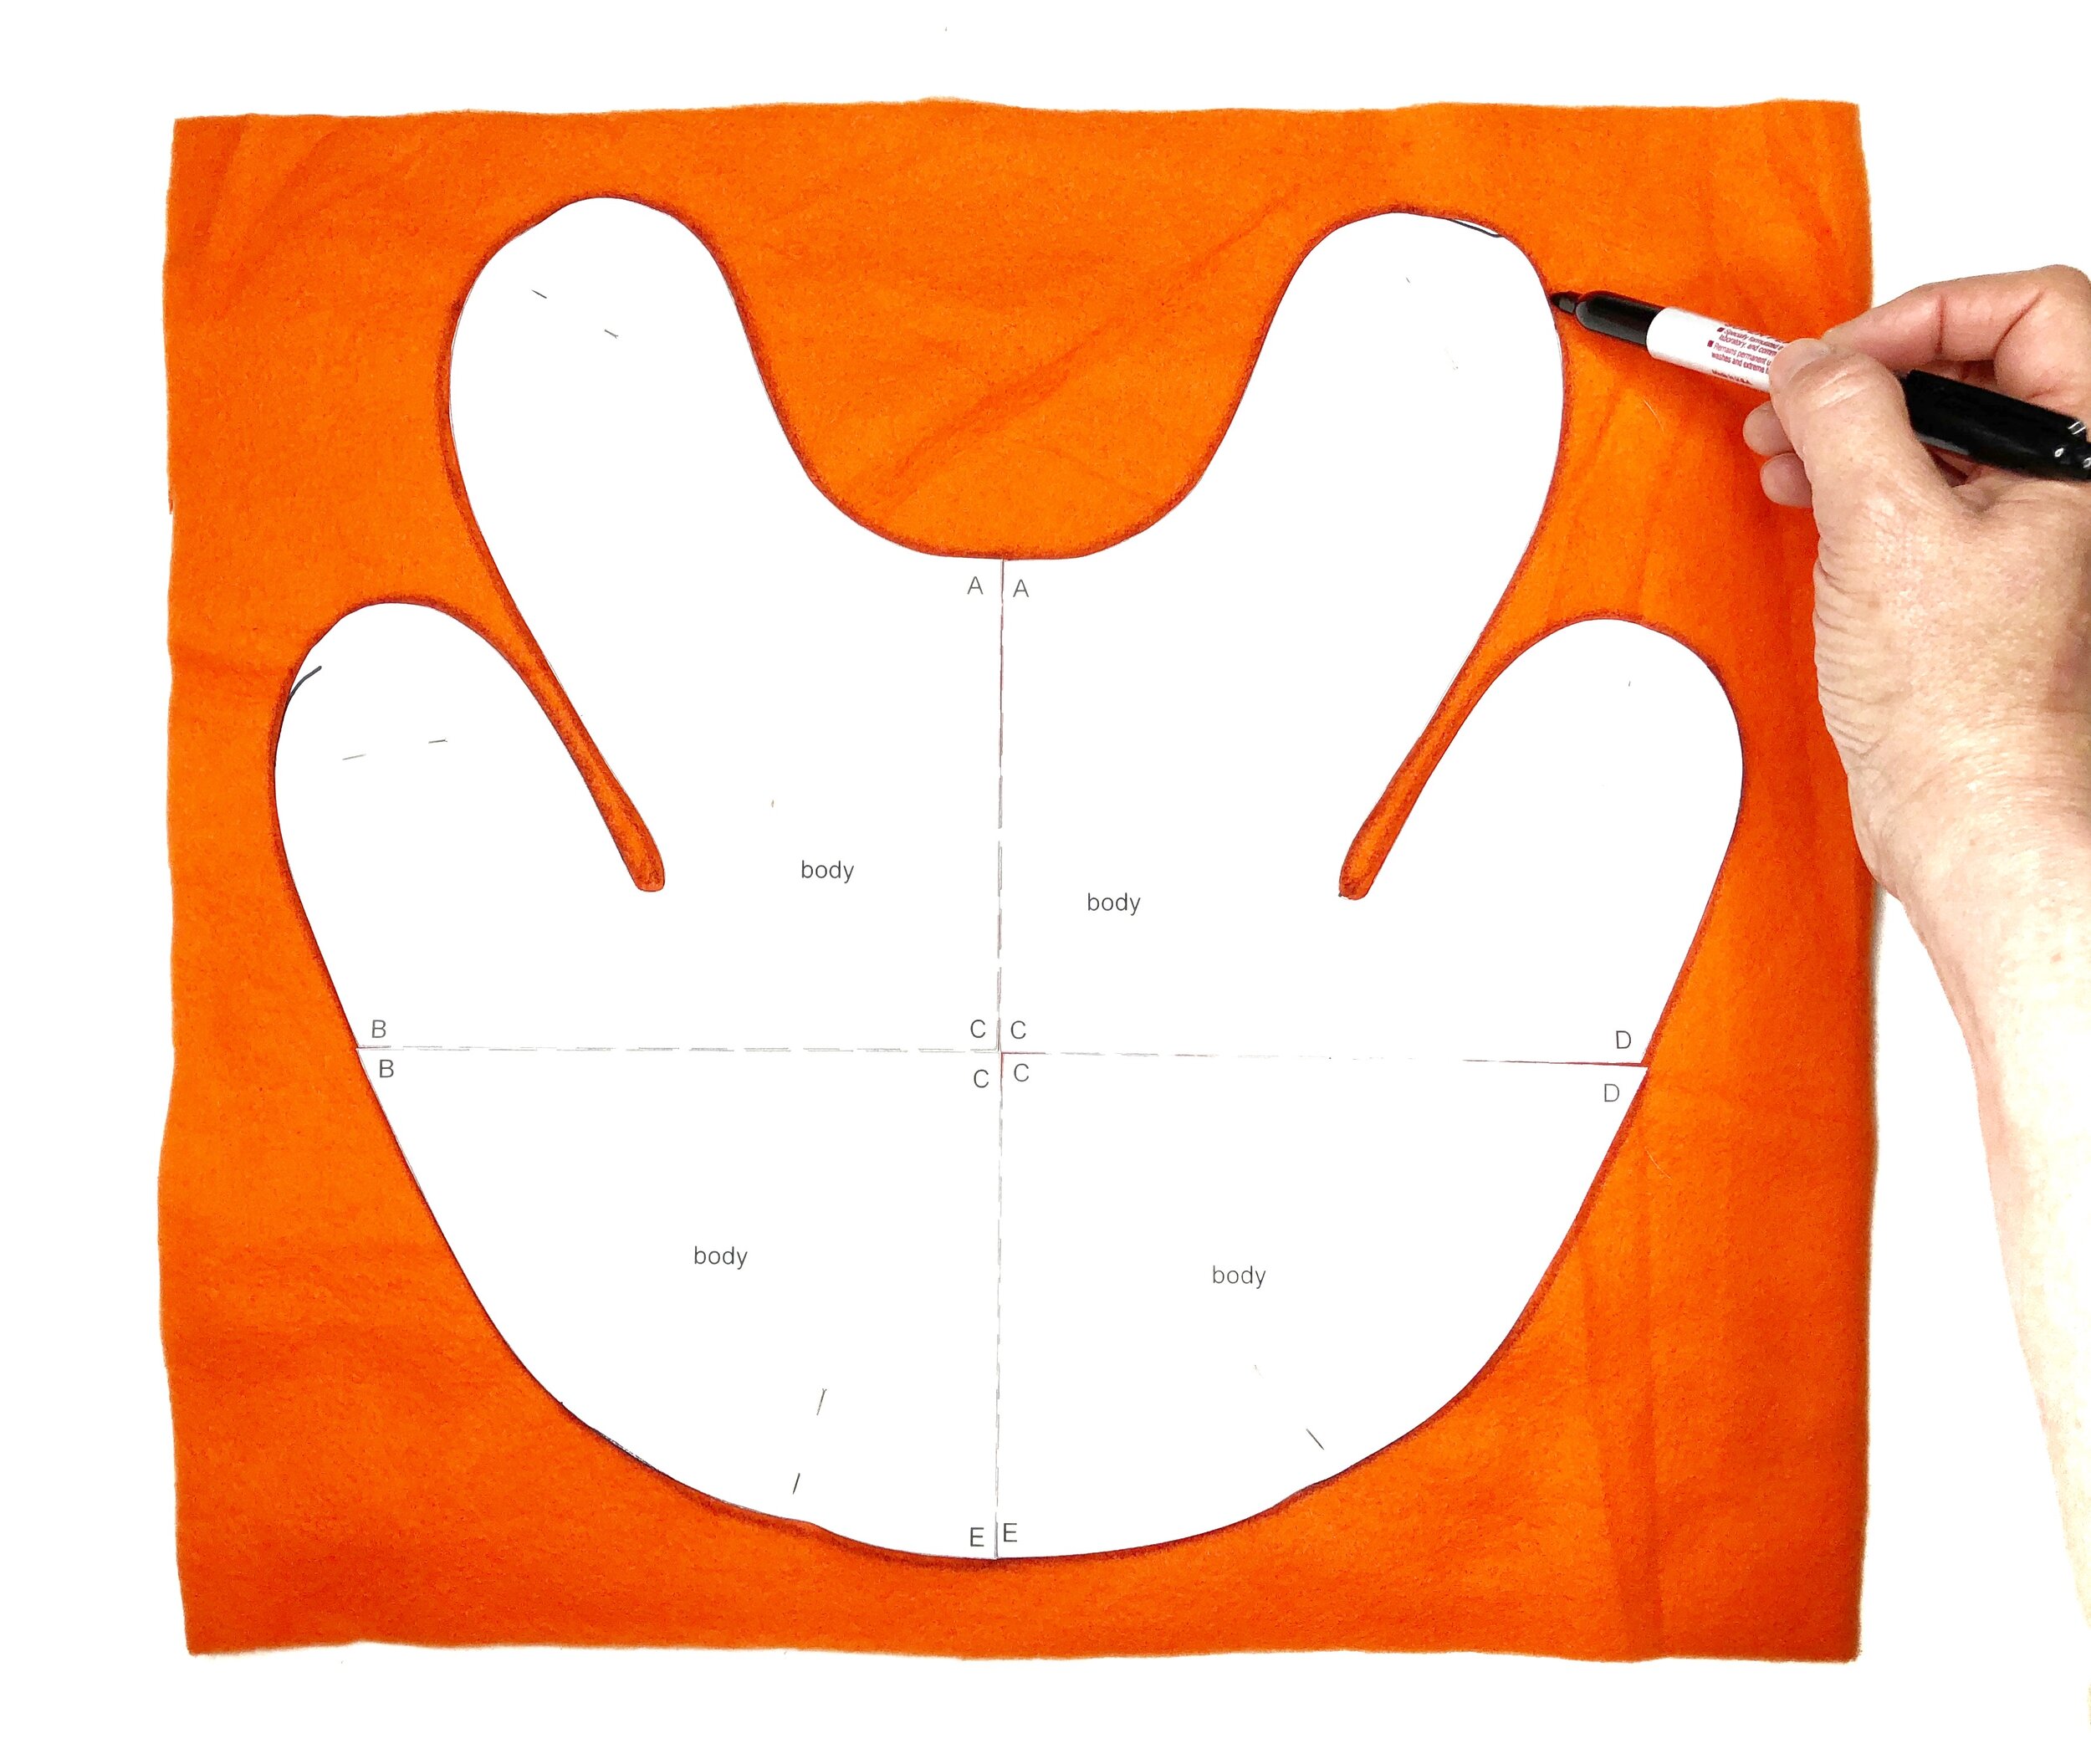
Cut around the transfer leaving a 1/4” seam. The pattern does not include the seam. The section between the body and the back legs does not allow for a wide seam so you will stitch this section first before cutting. For now, just cut around the legs.


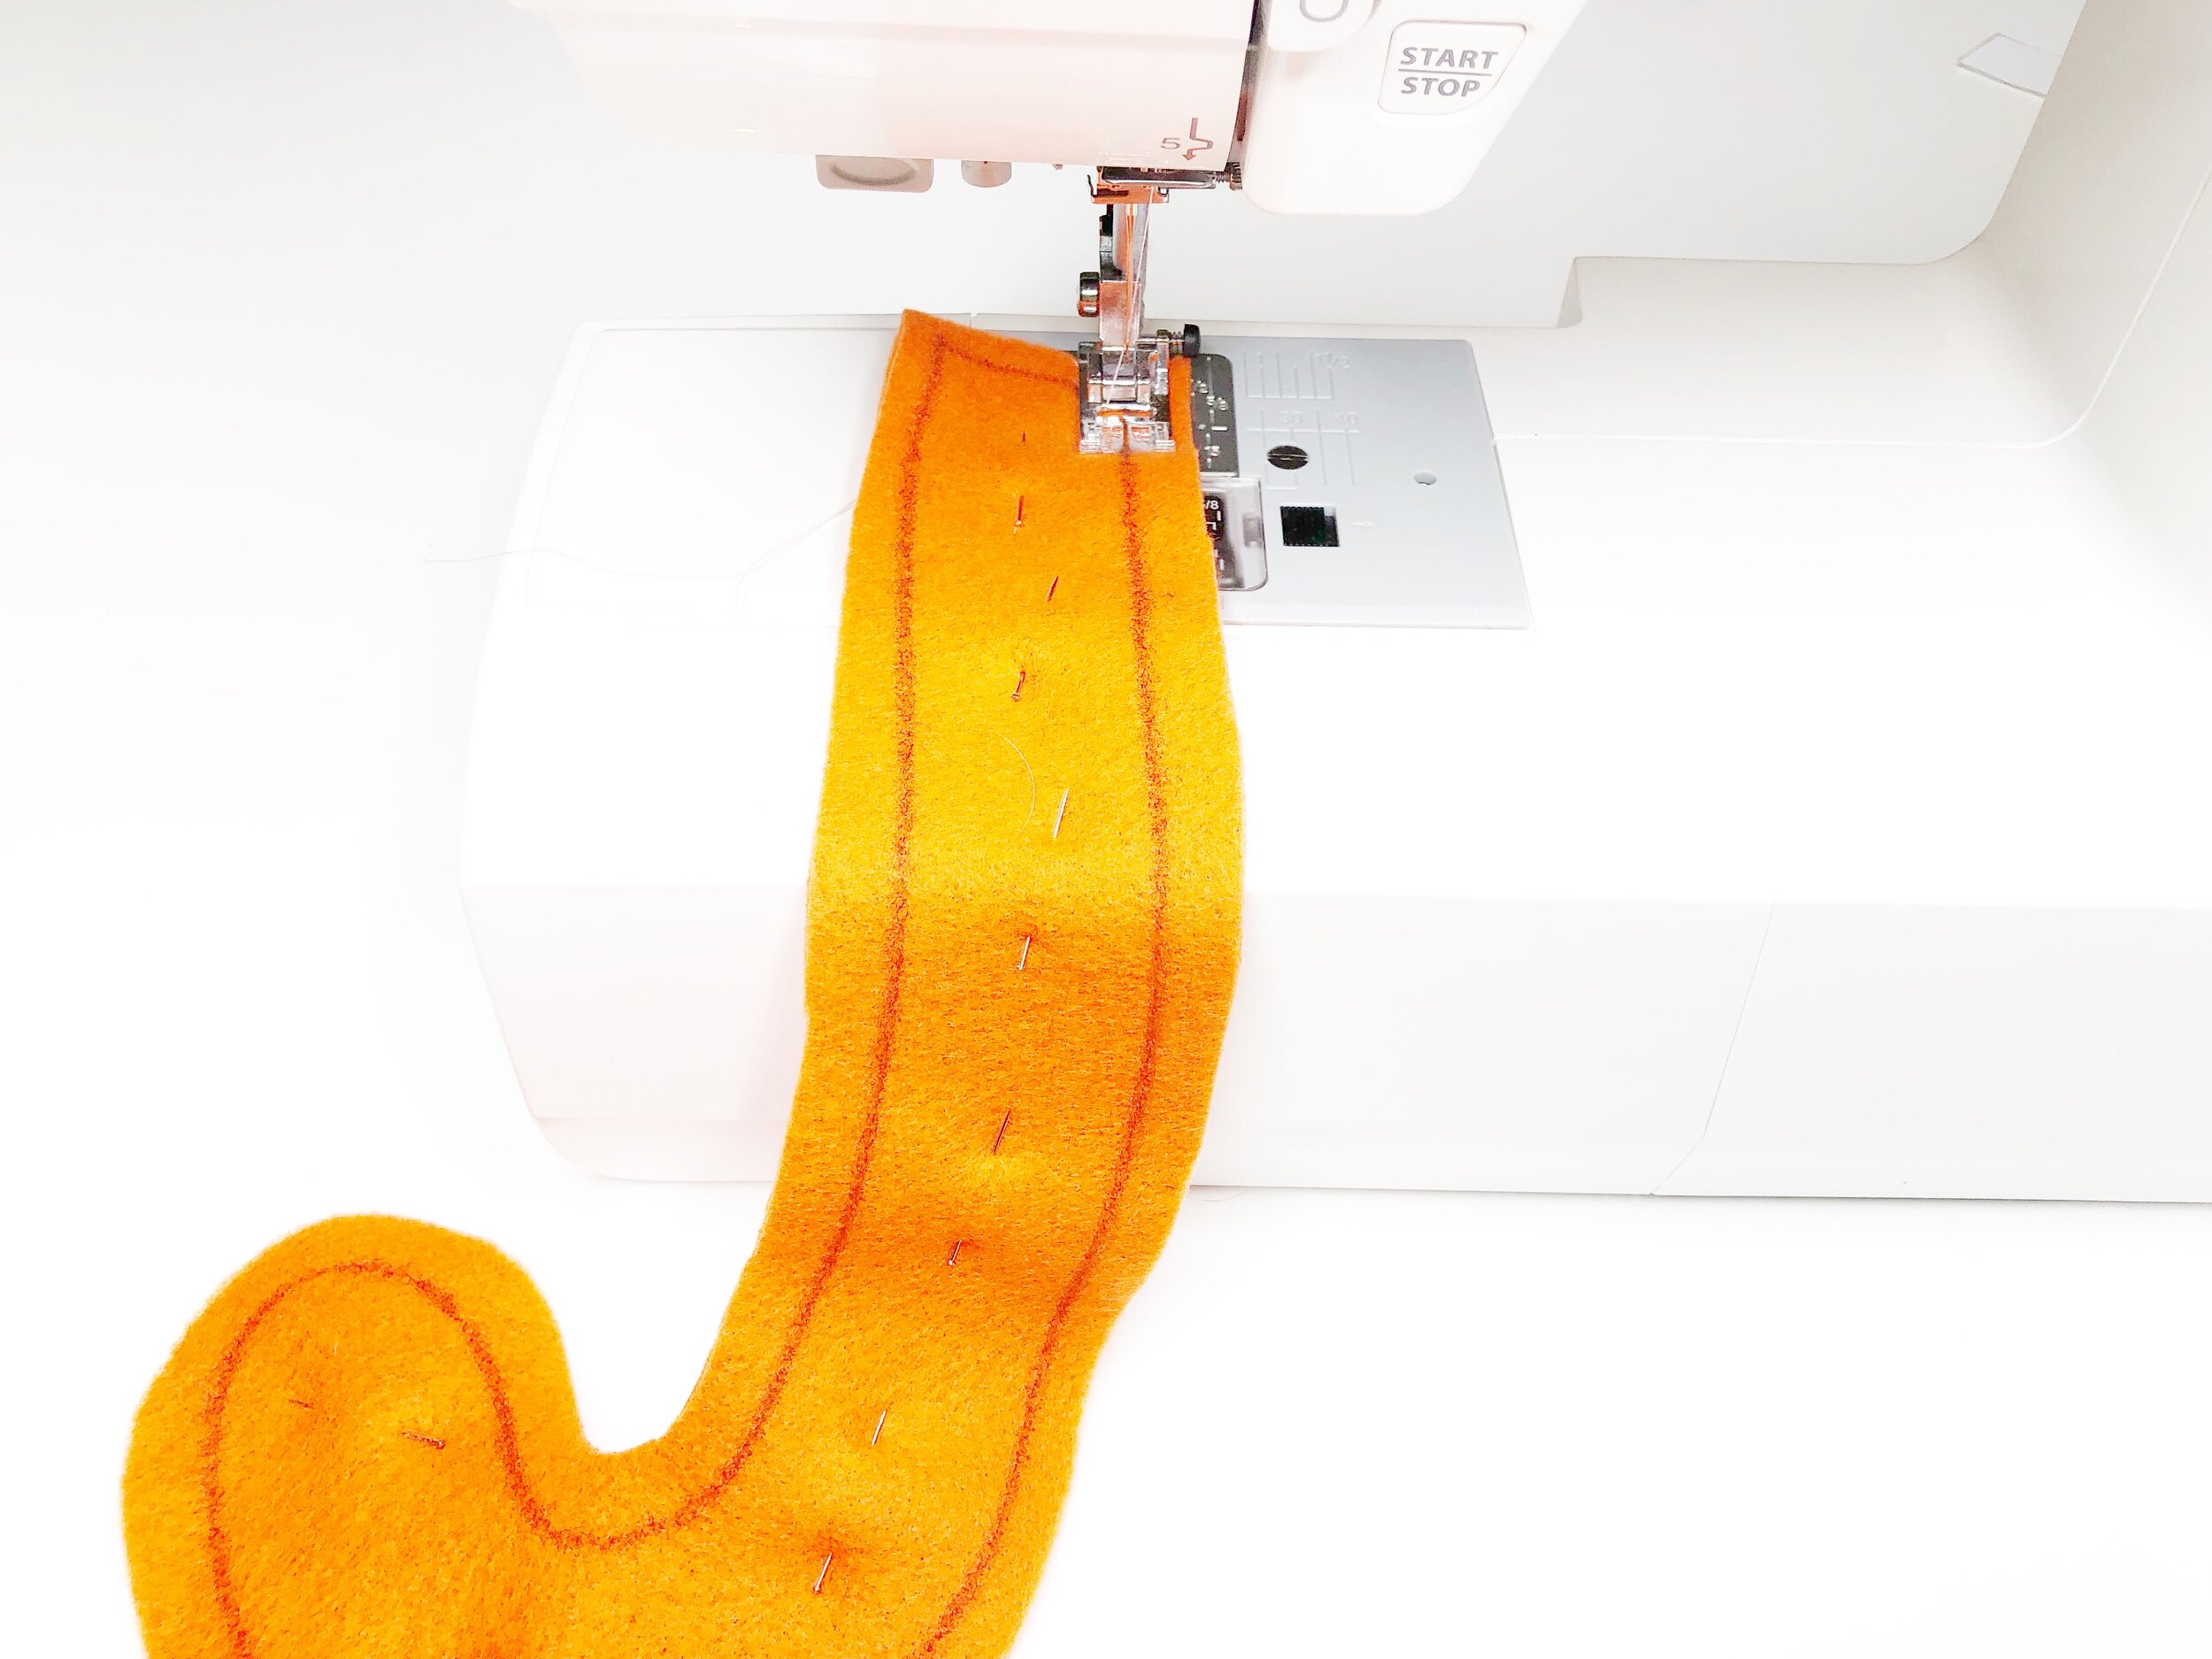
Tail. Pin and transfer (trace) the tail pattern to double layered fabric.
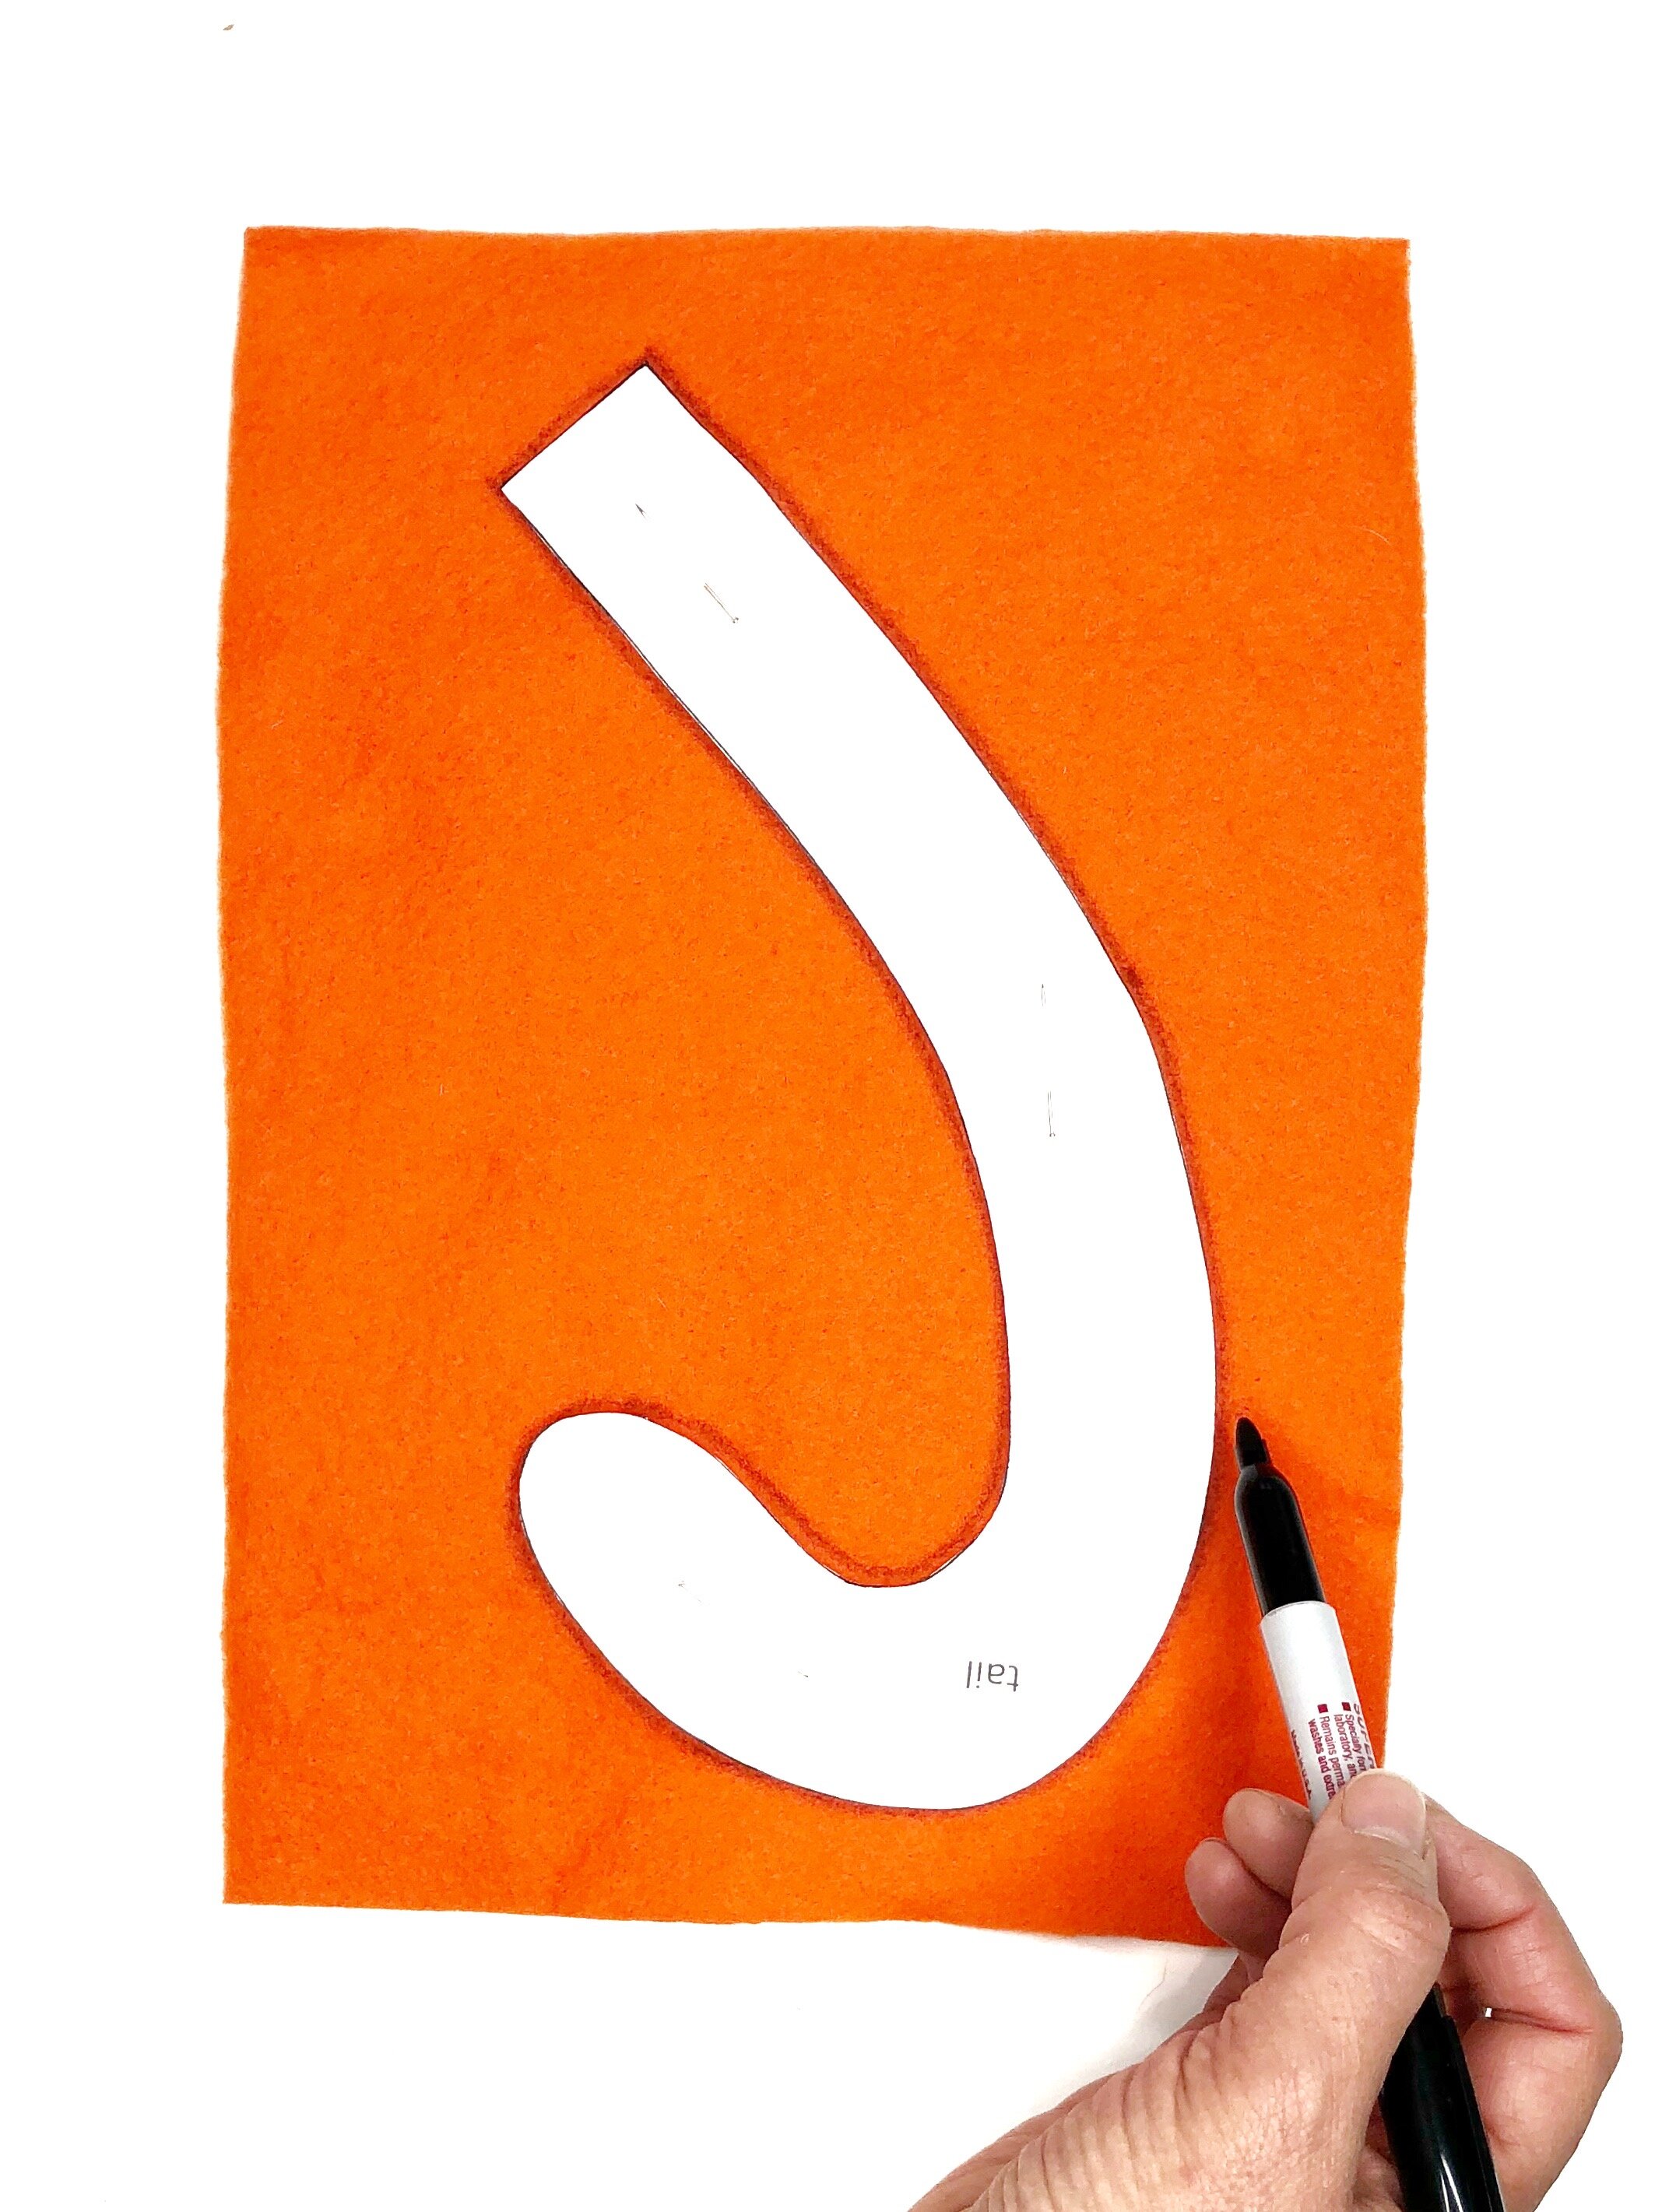
Cut leaving a 1/4” seam. Pattern does not include the seam.
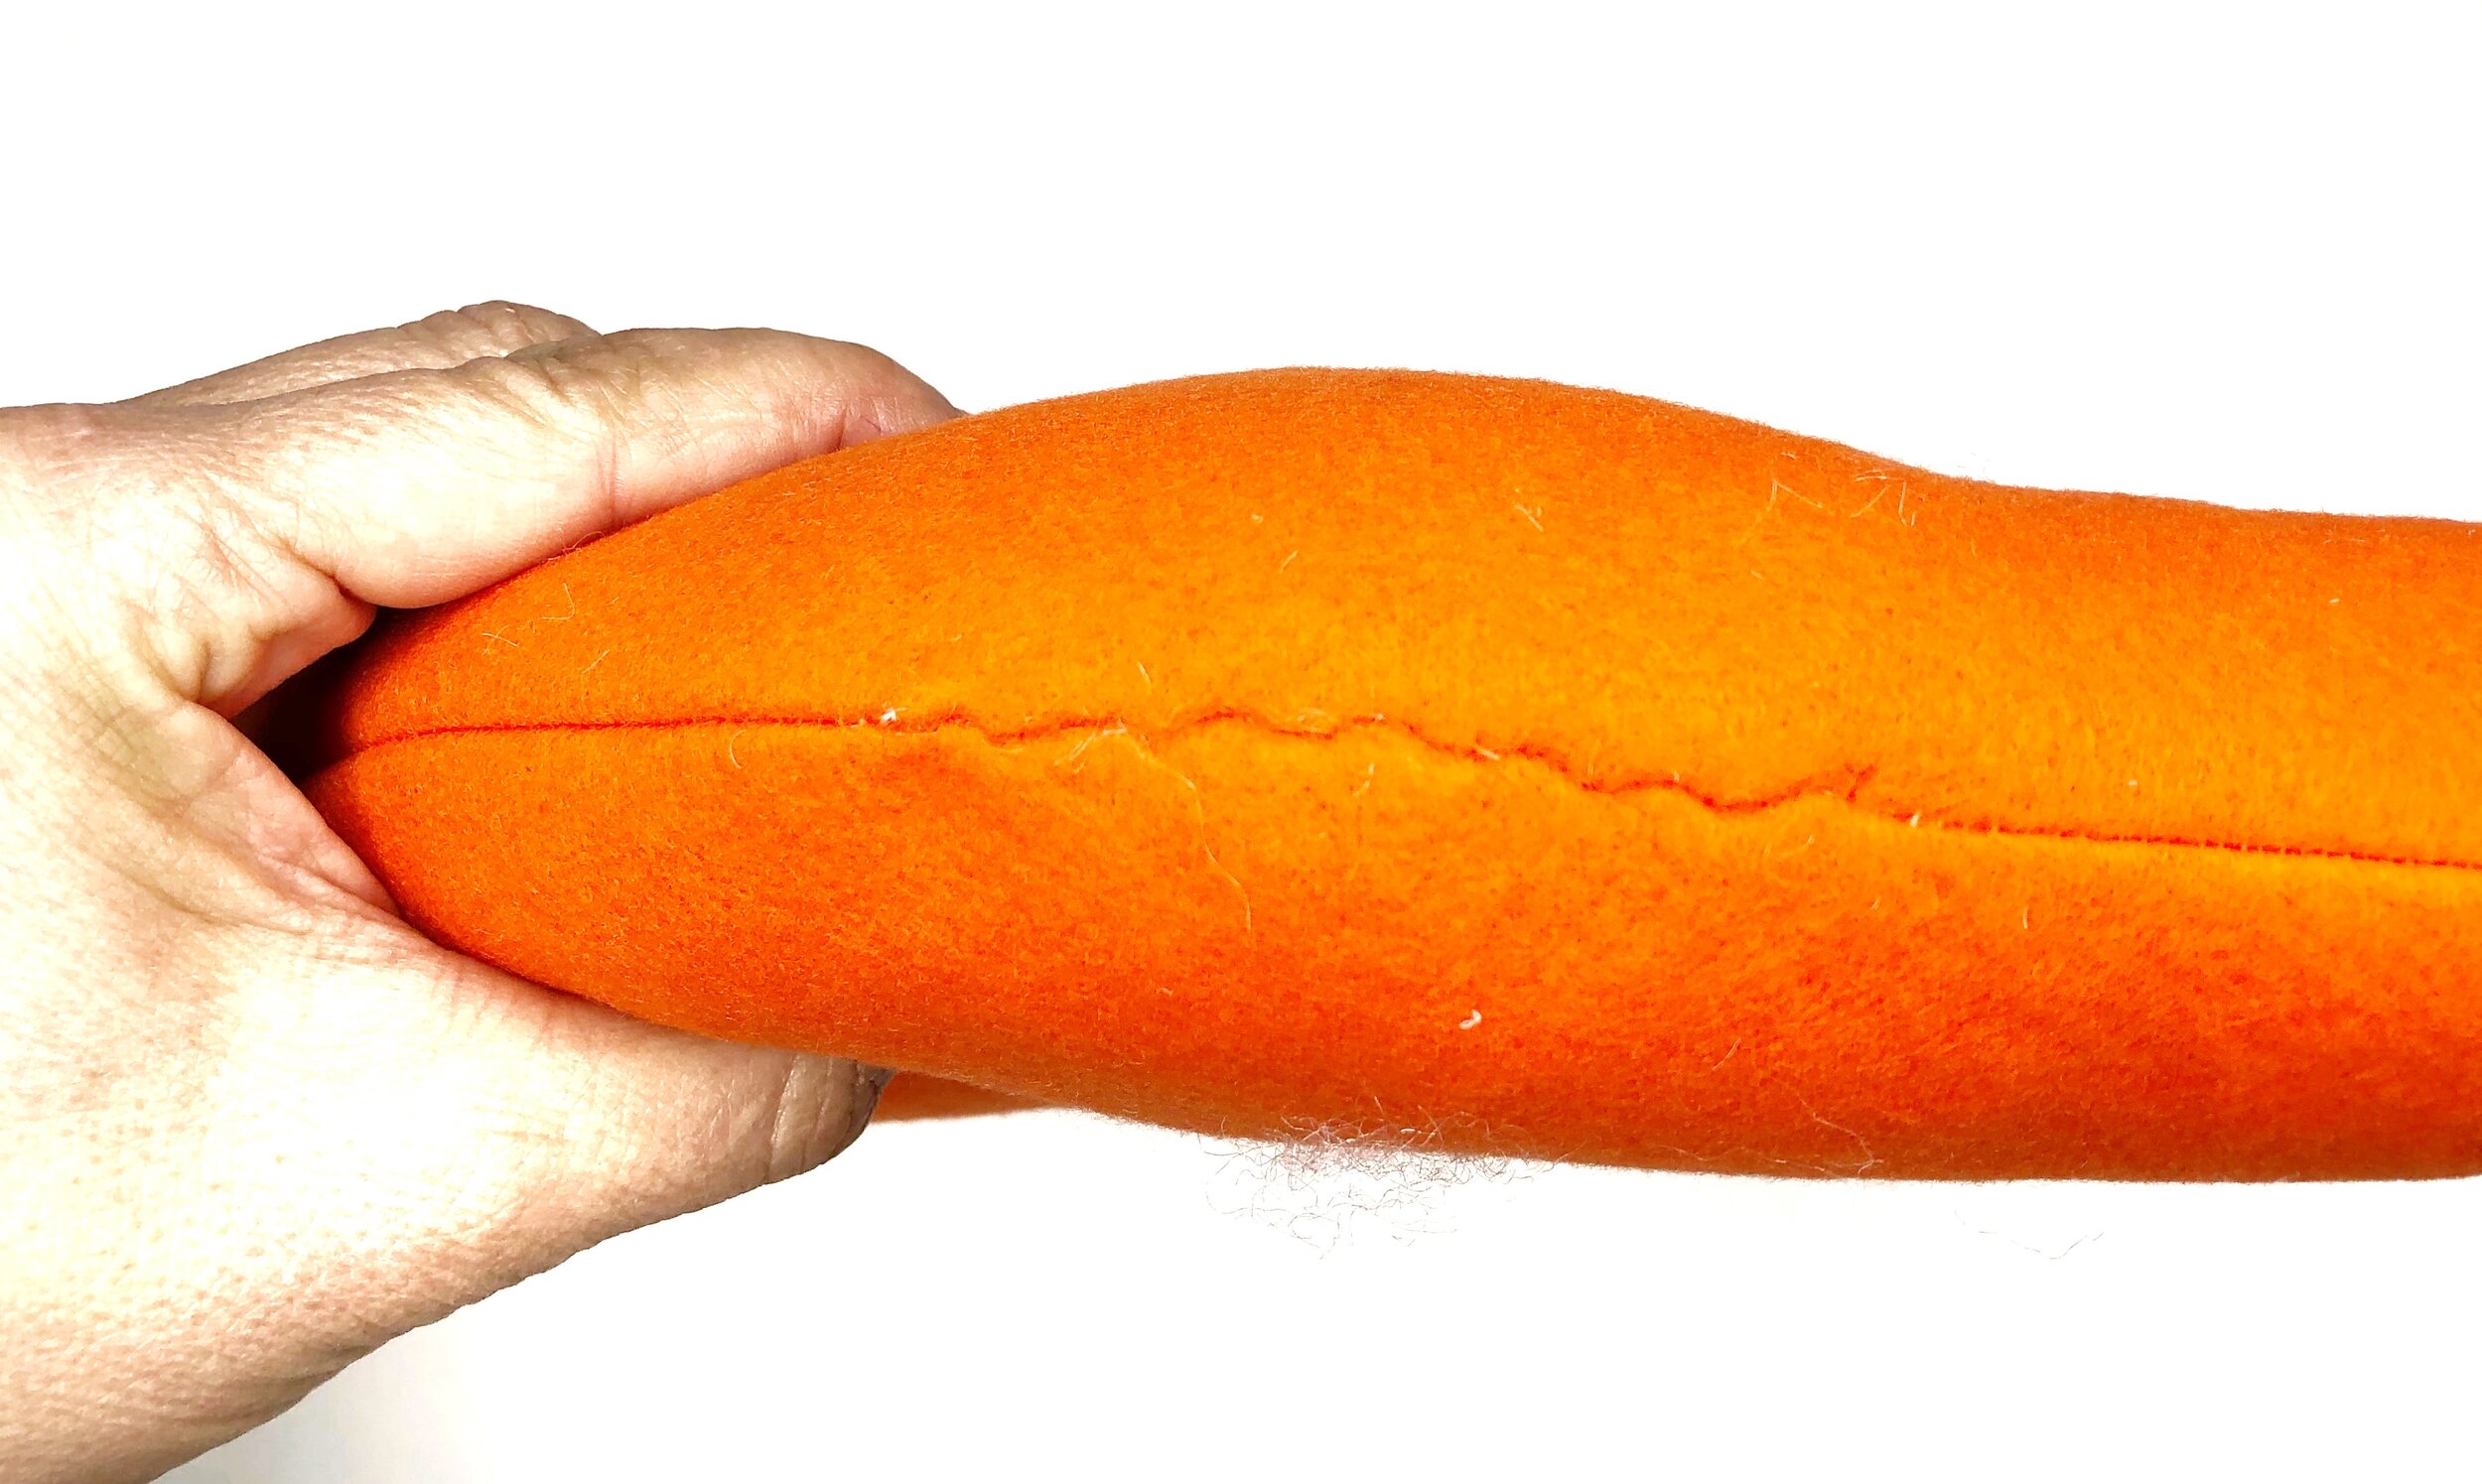
With right sides together, stitch the tail pieces leaving the top of the tail open.
Clip inward seams at the bend of the tail.
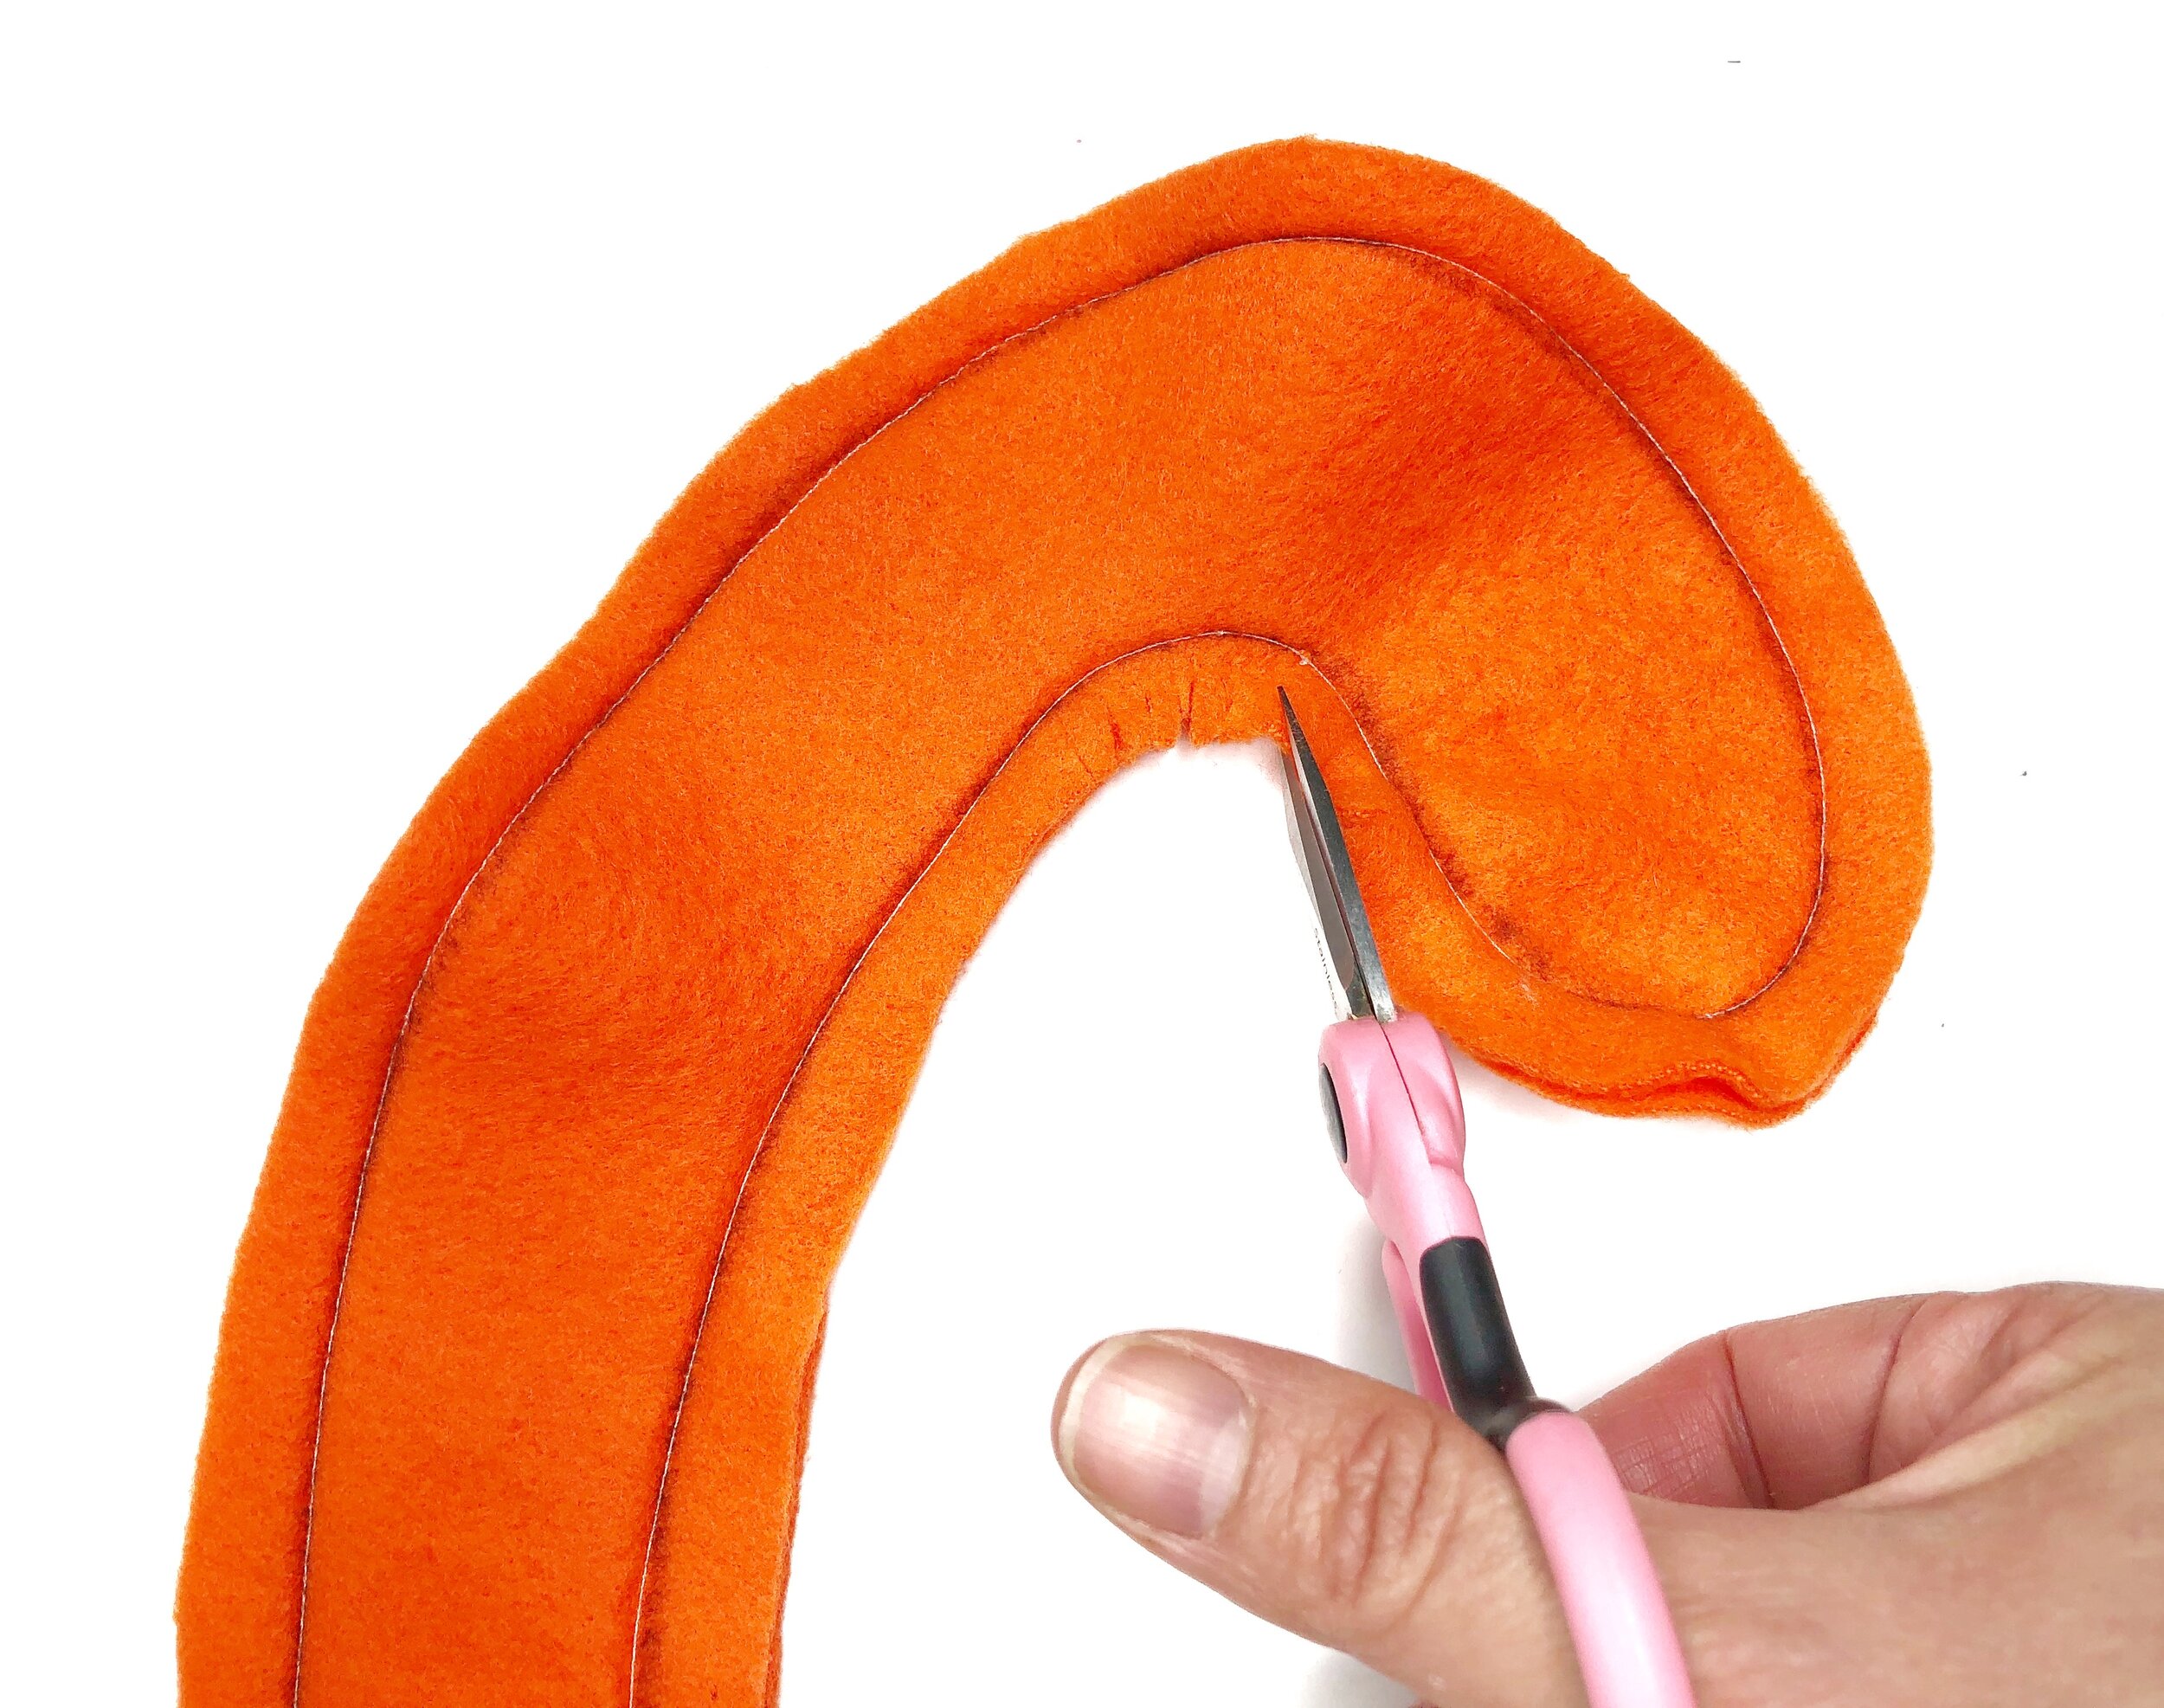
Reverse right side out.
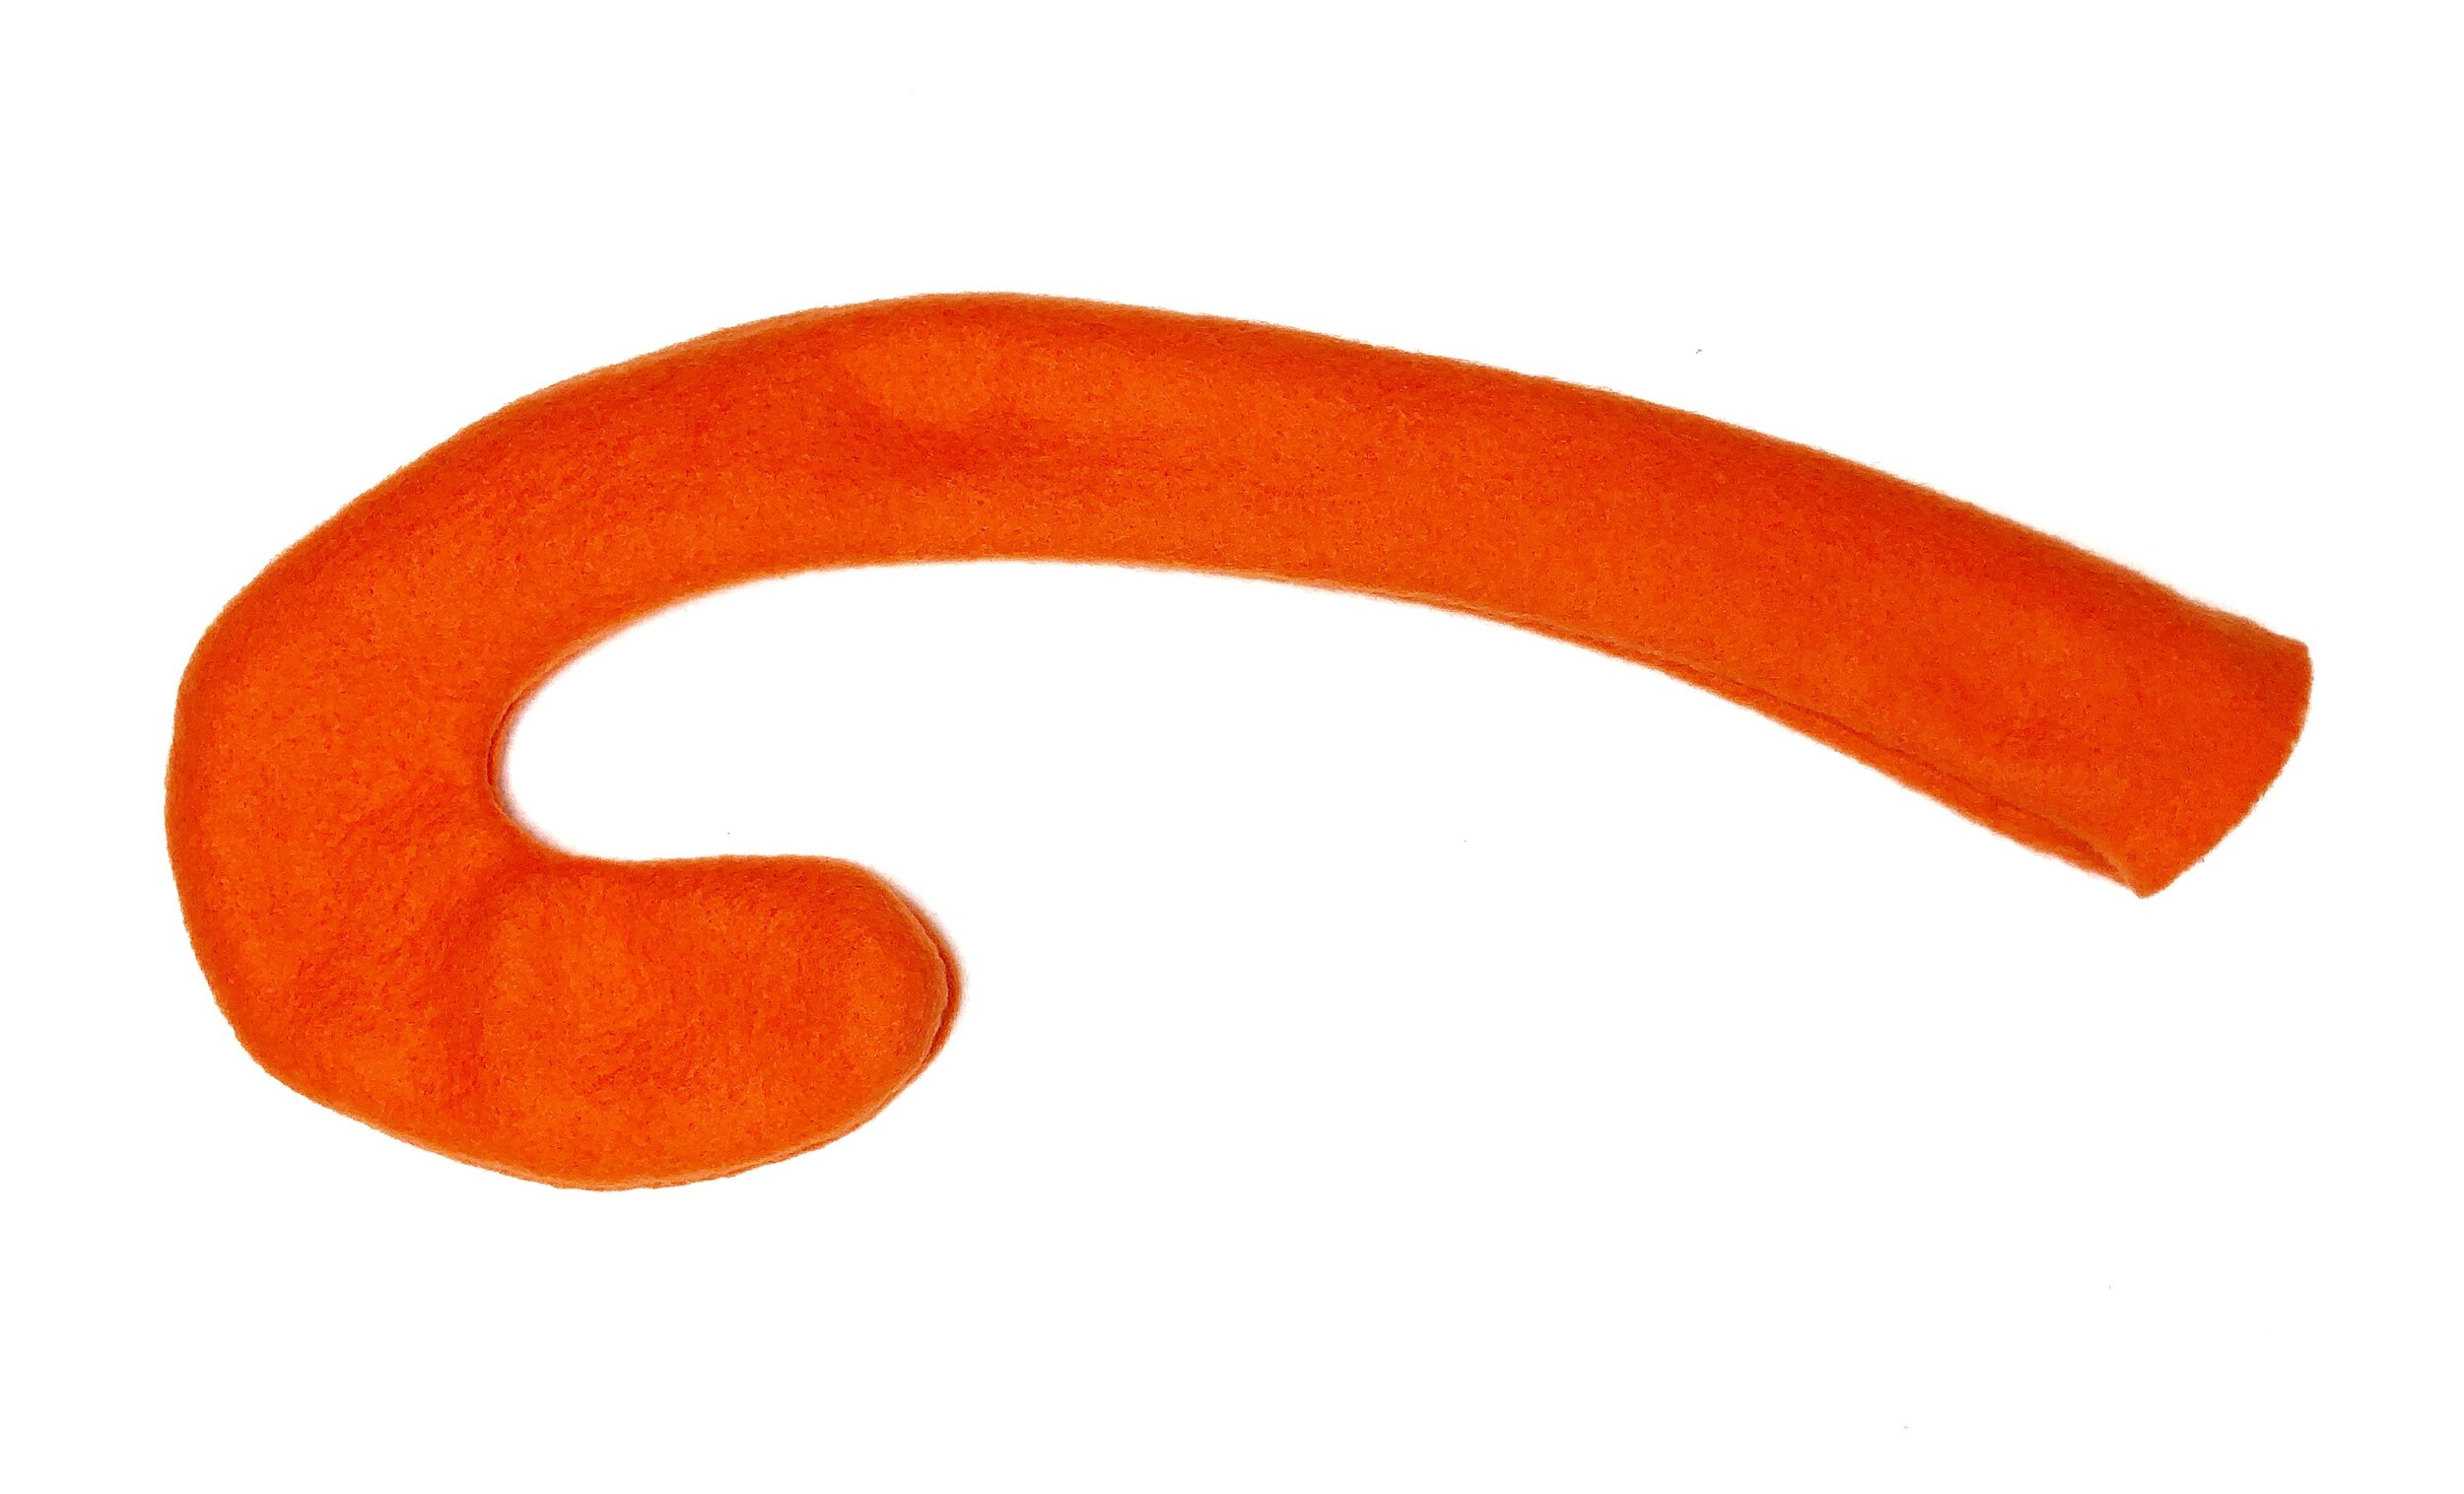
You can stuffed the tail with stuffing or leave unstuffed if you would like a more floppy tail. If opting to stuff, leave the top two inches of the tail at the opening unstuffed.
Place the tail between the body pieces at the back of the puppy with the tail facing inward. Body pieces are right sides together.

With fabric right sides together, pin and stitch the body pieces leaving an opening to reverse and stuff.
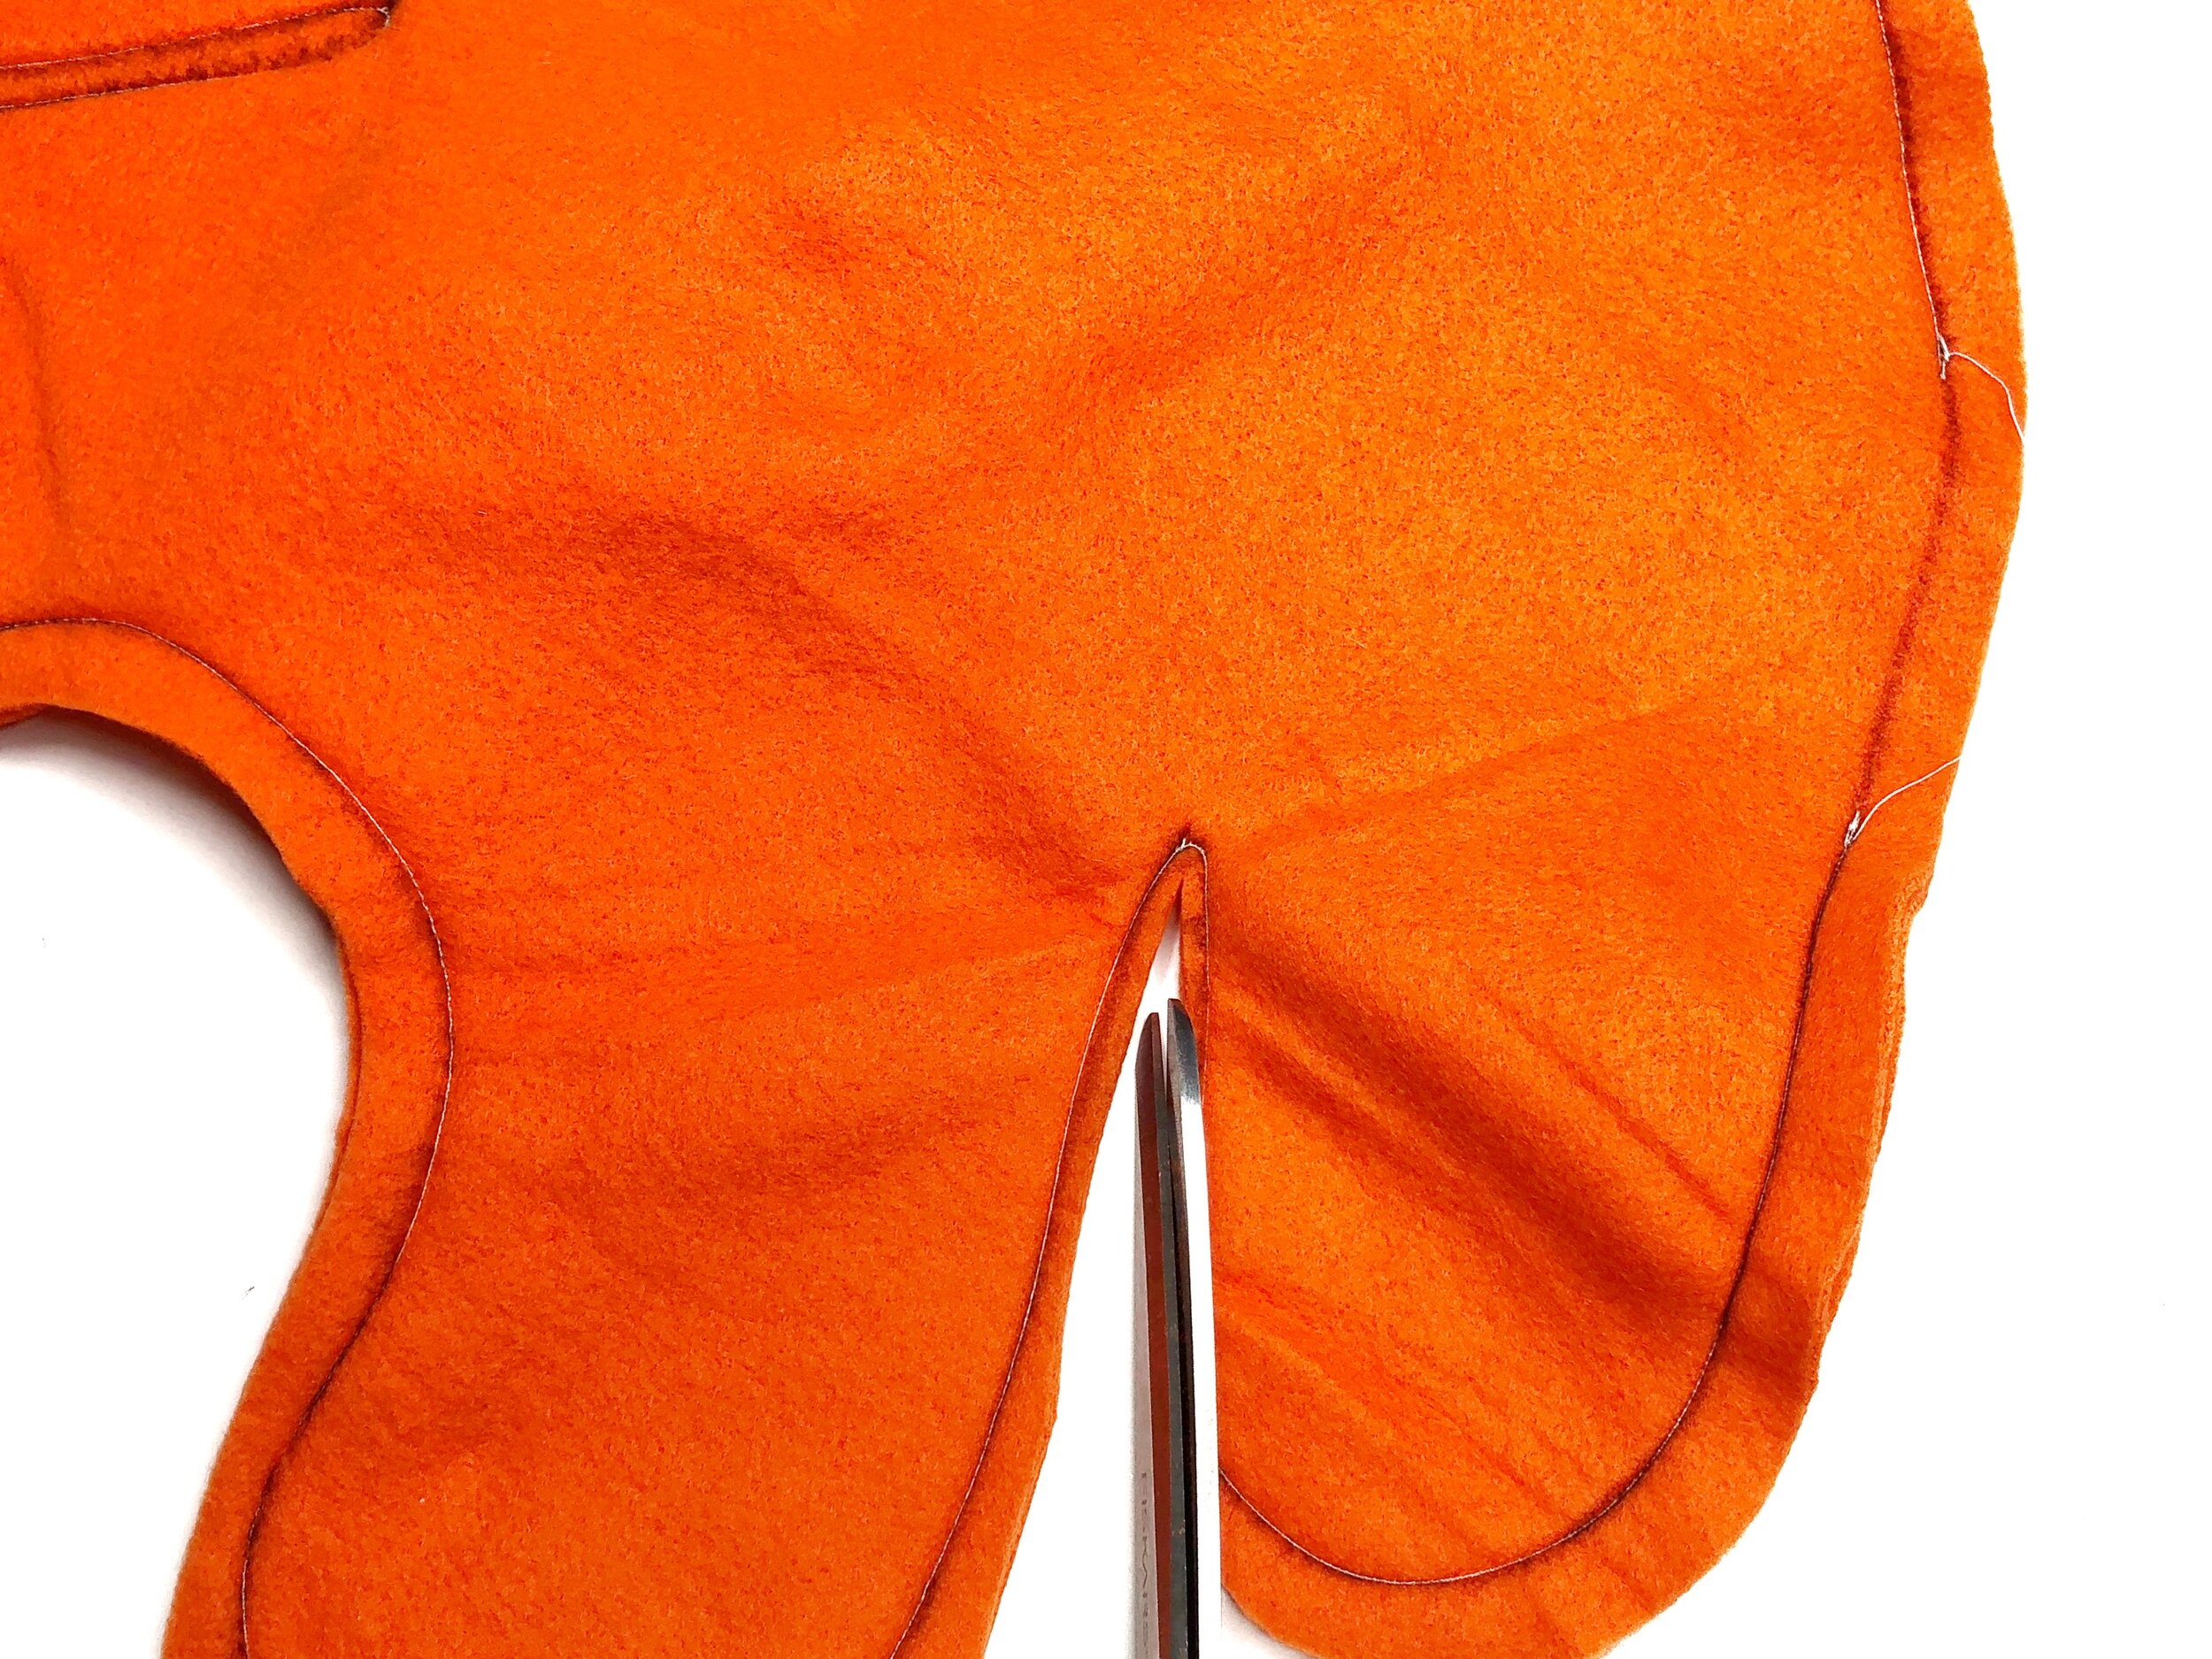
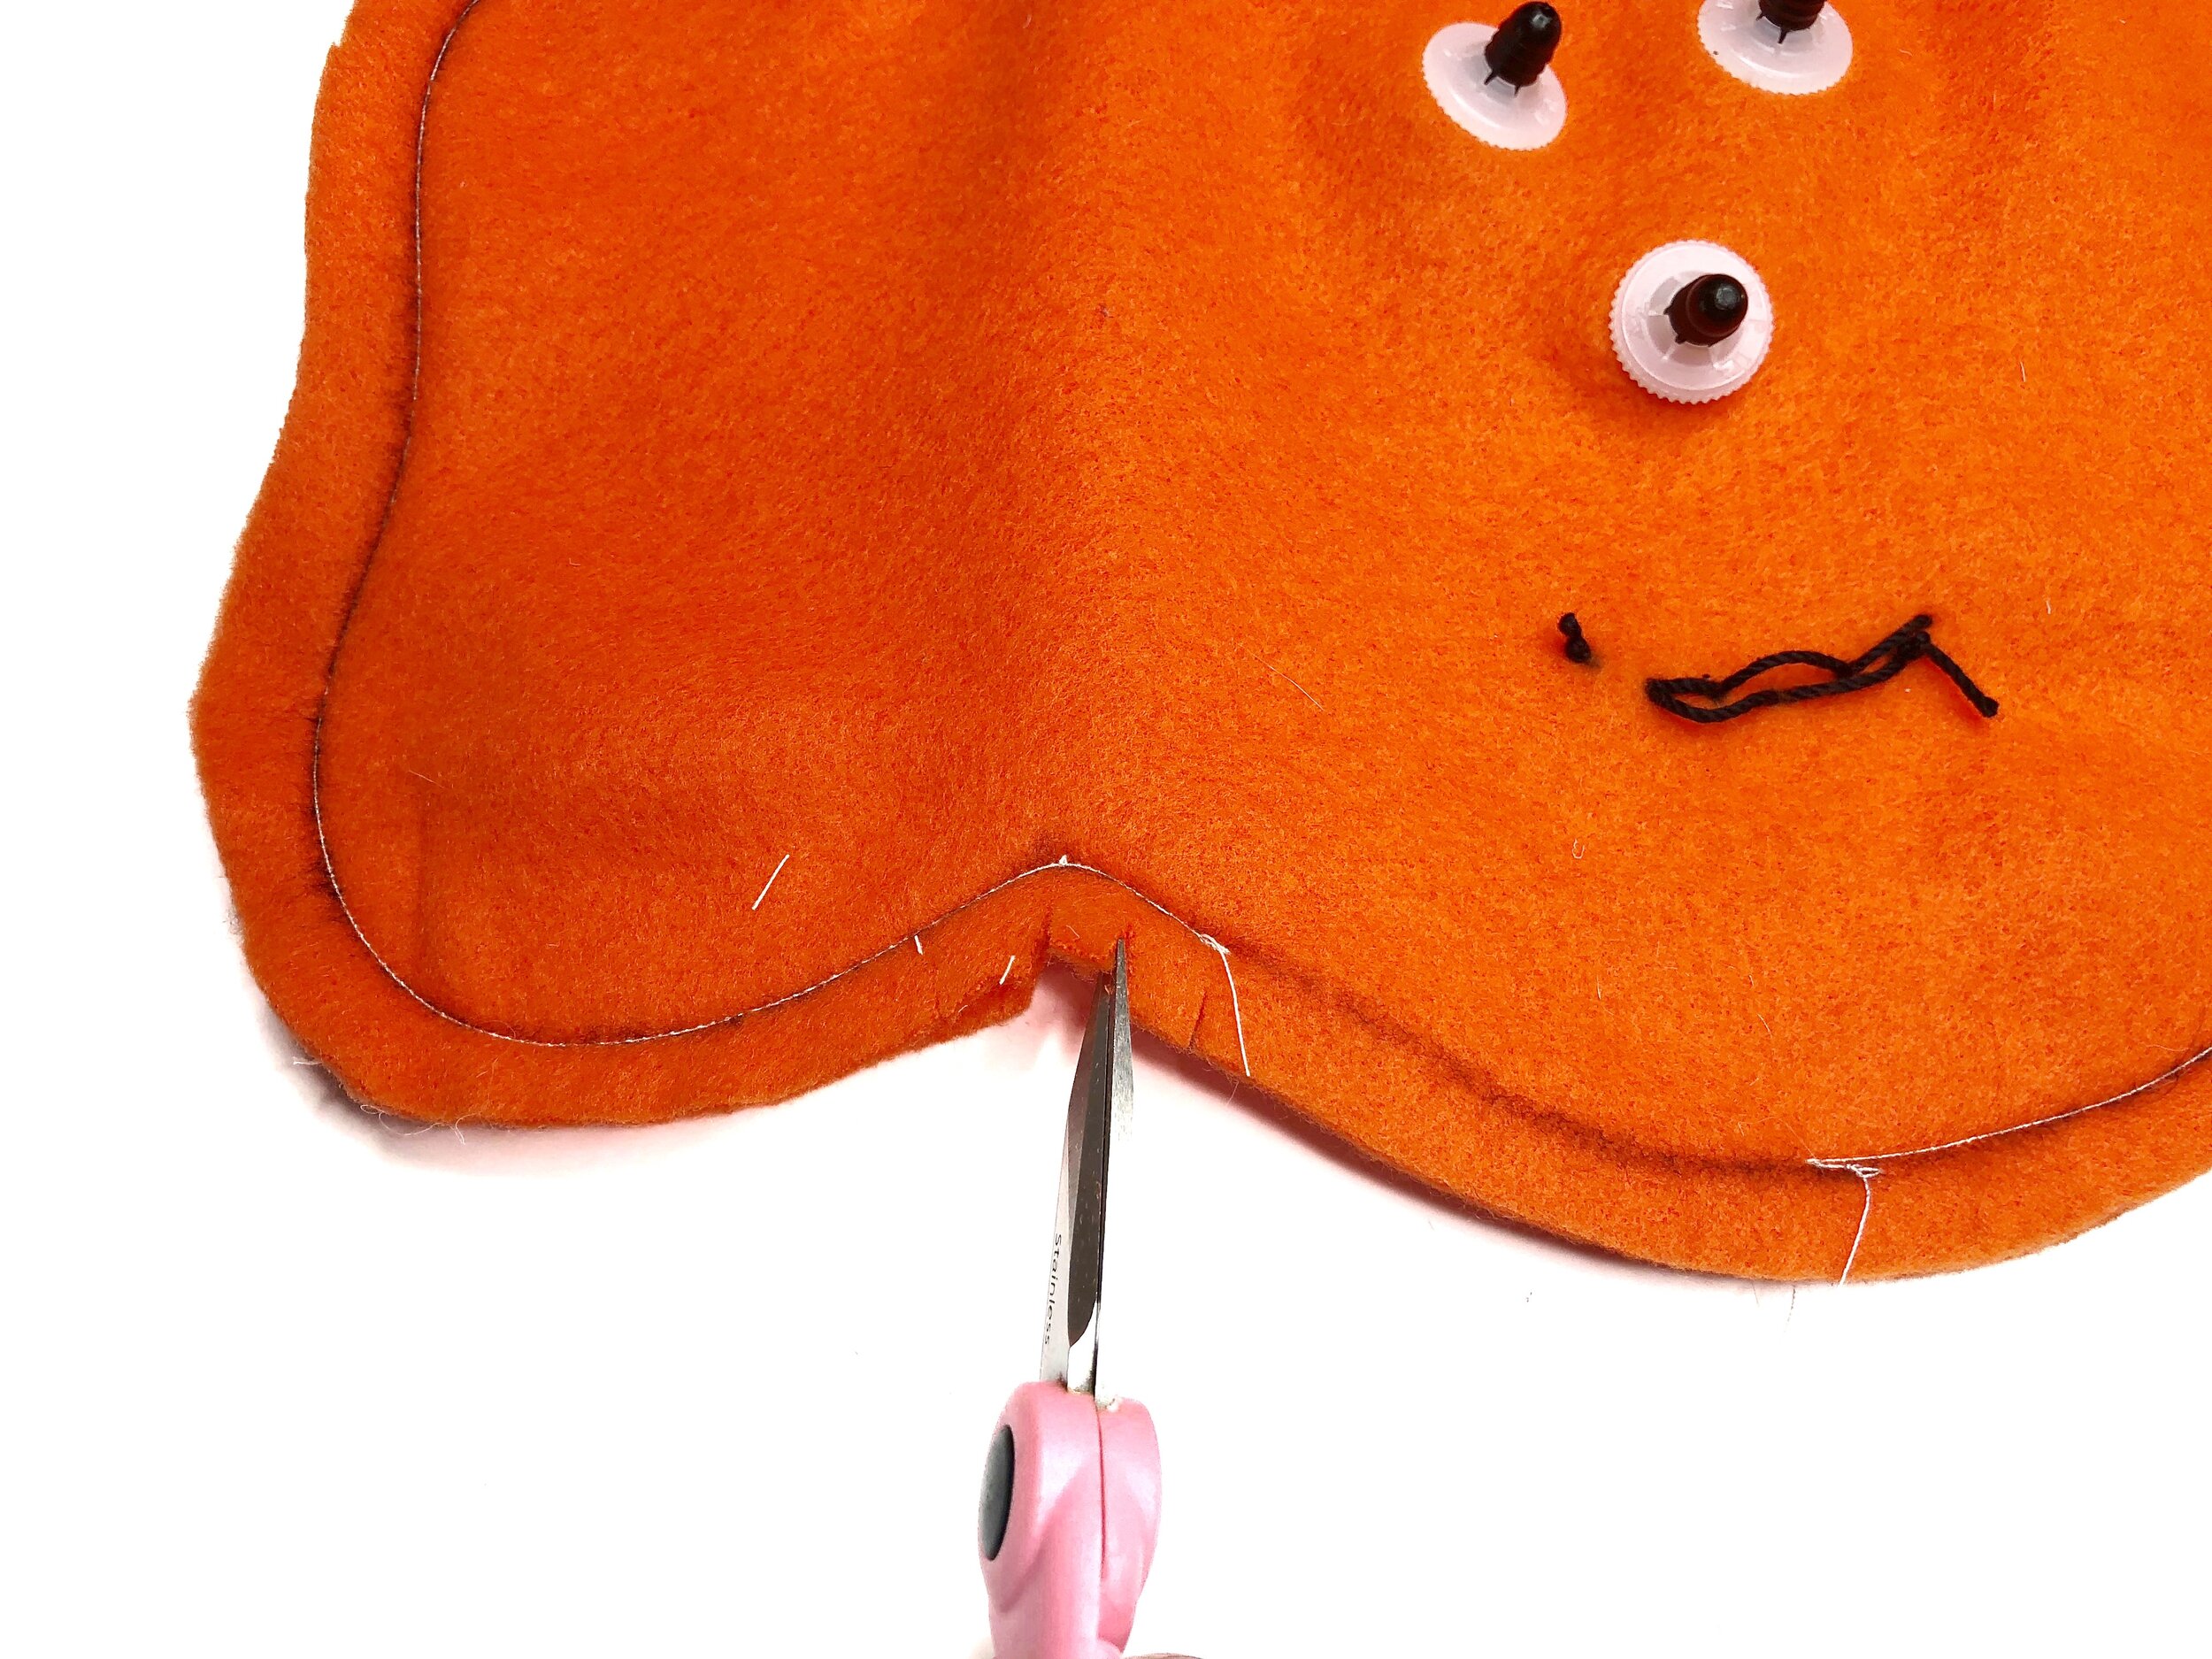
Carefully cut a slit between the back legs and the body to separate, being careful not to cut the stitching.

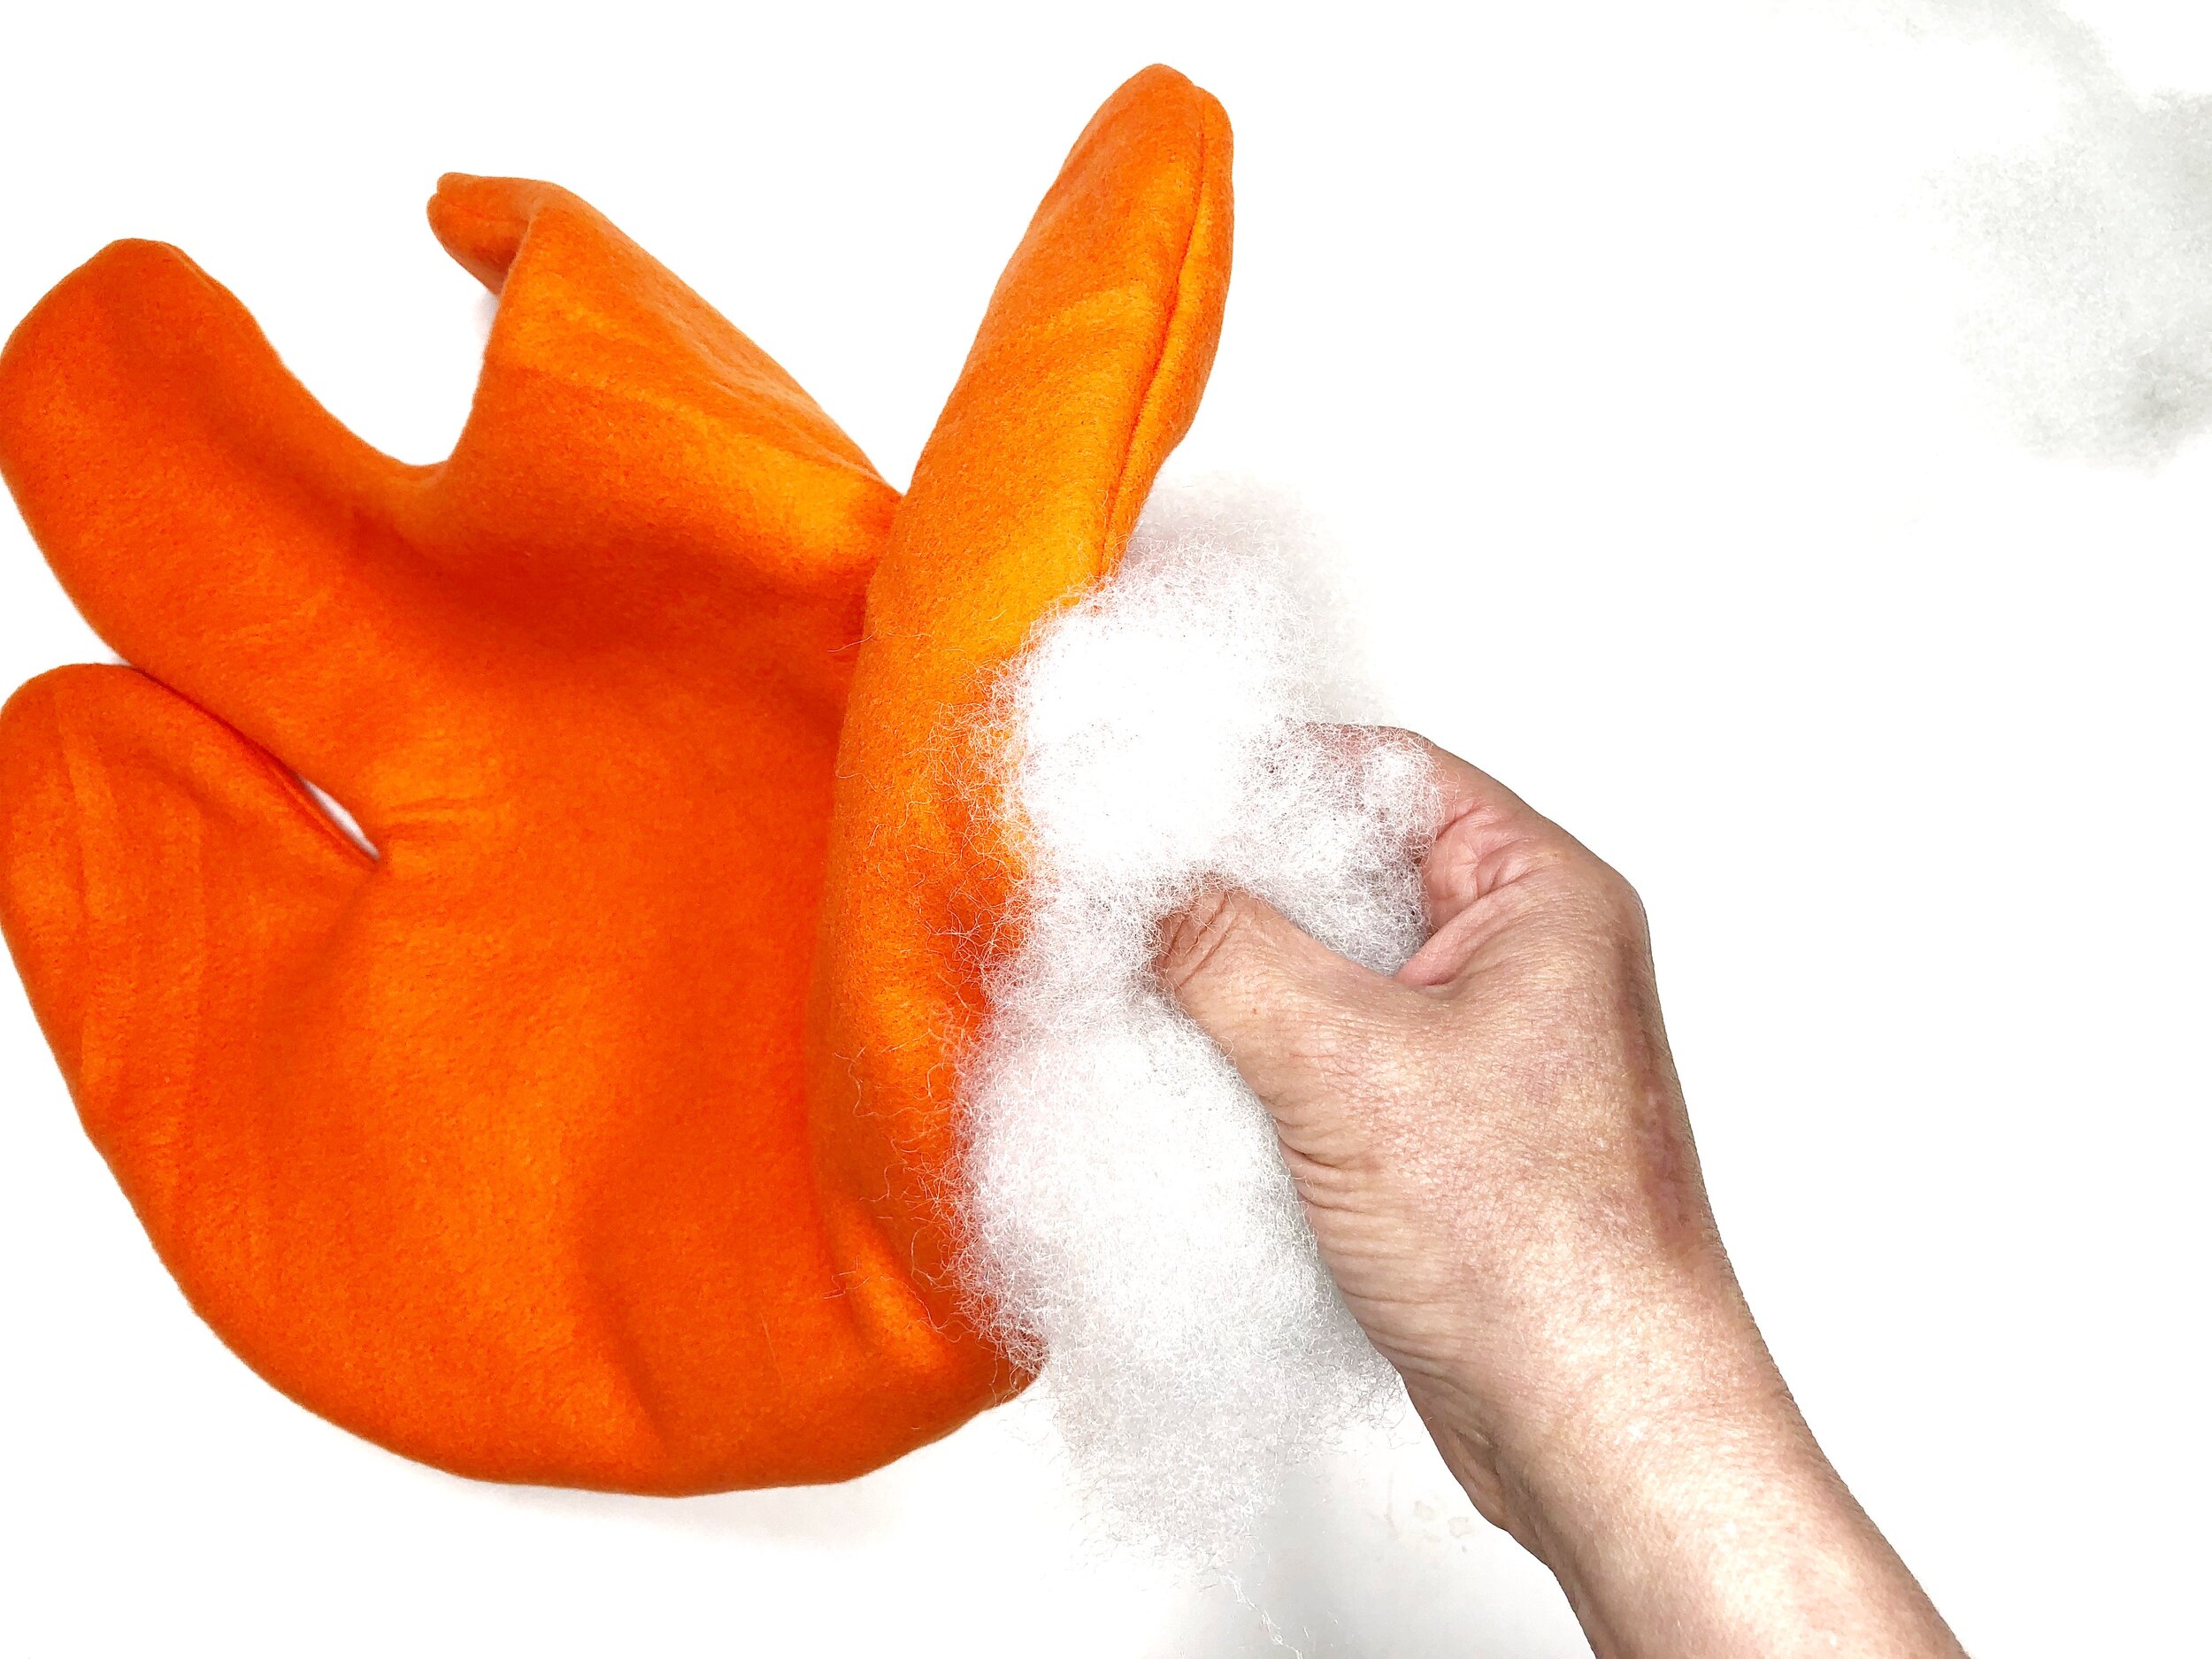
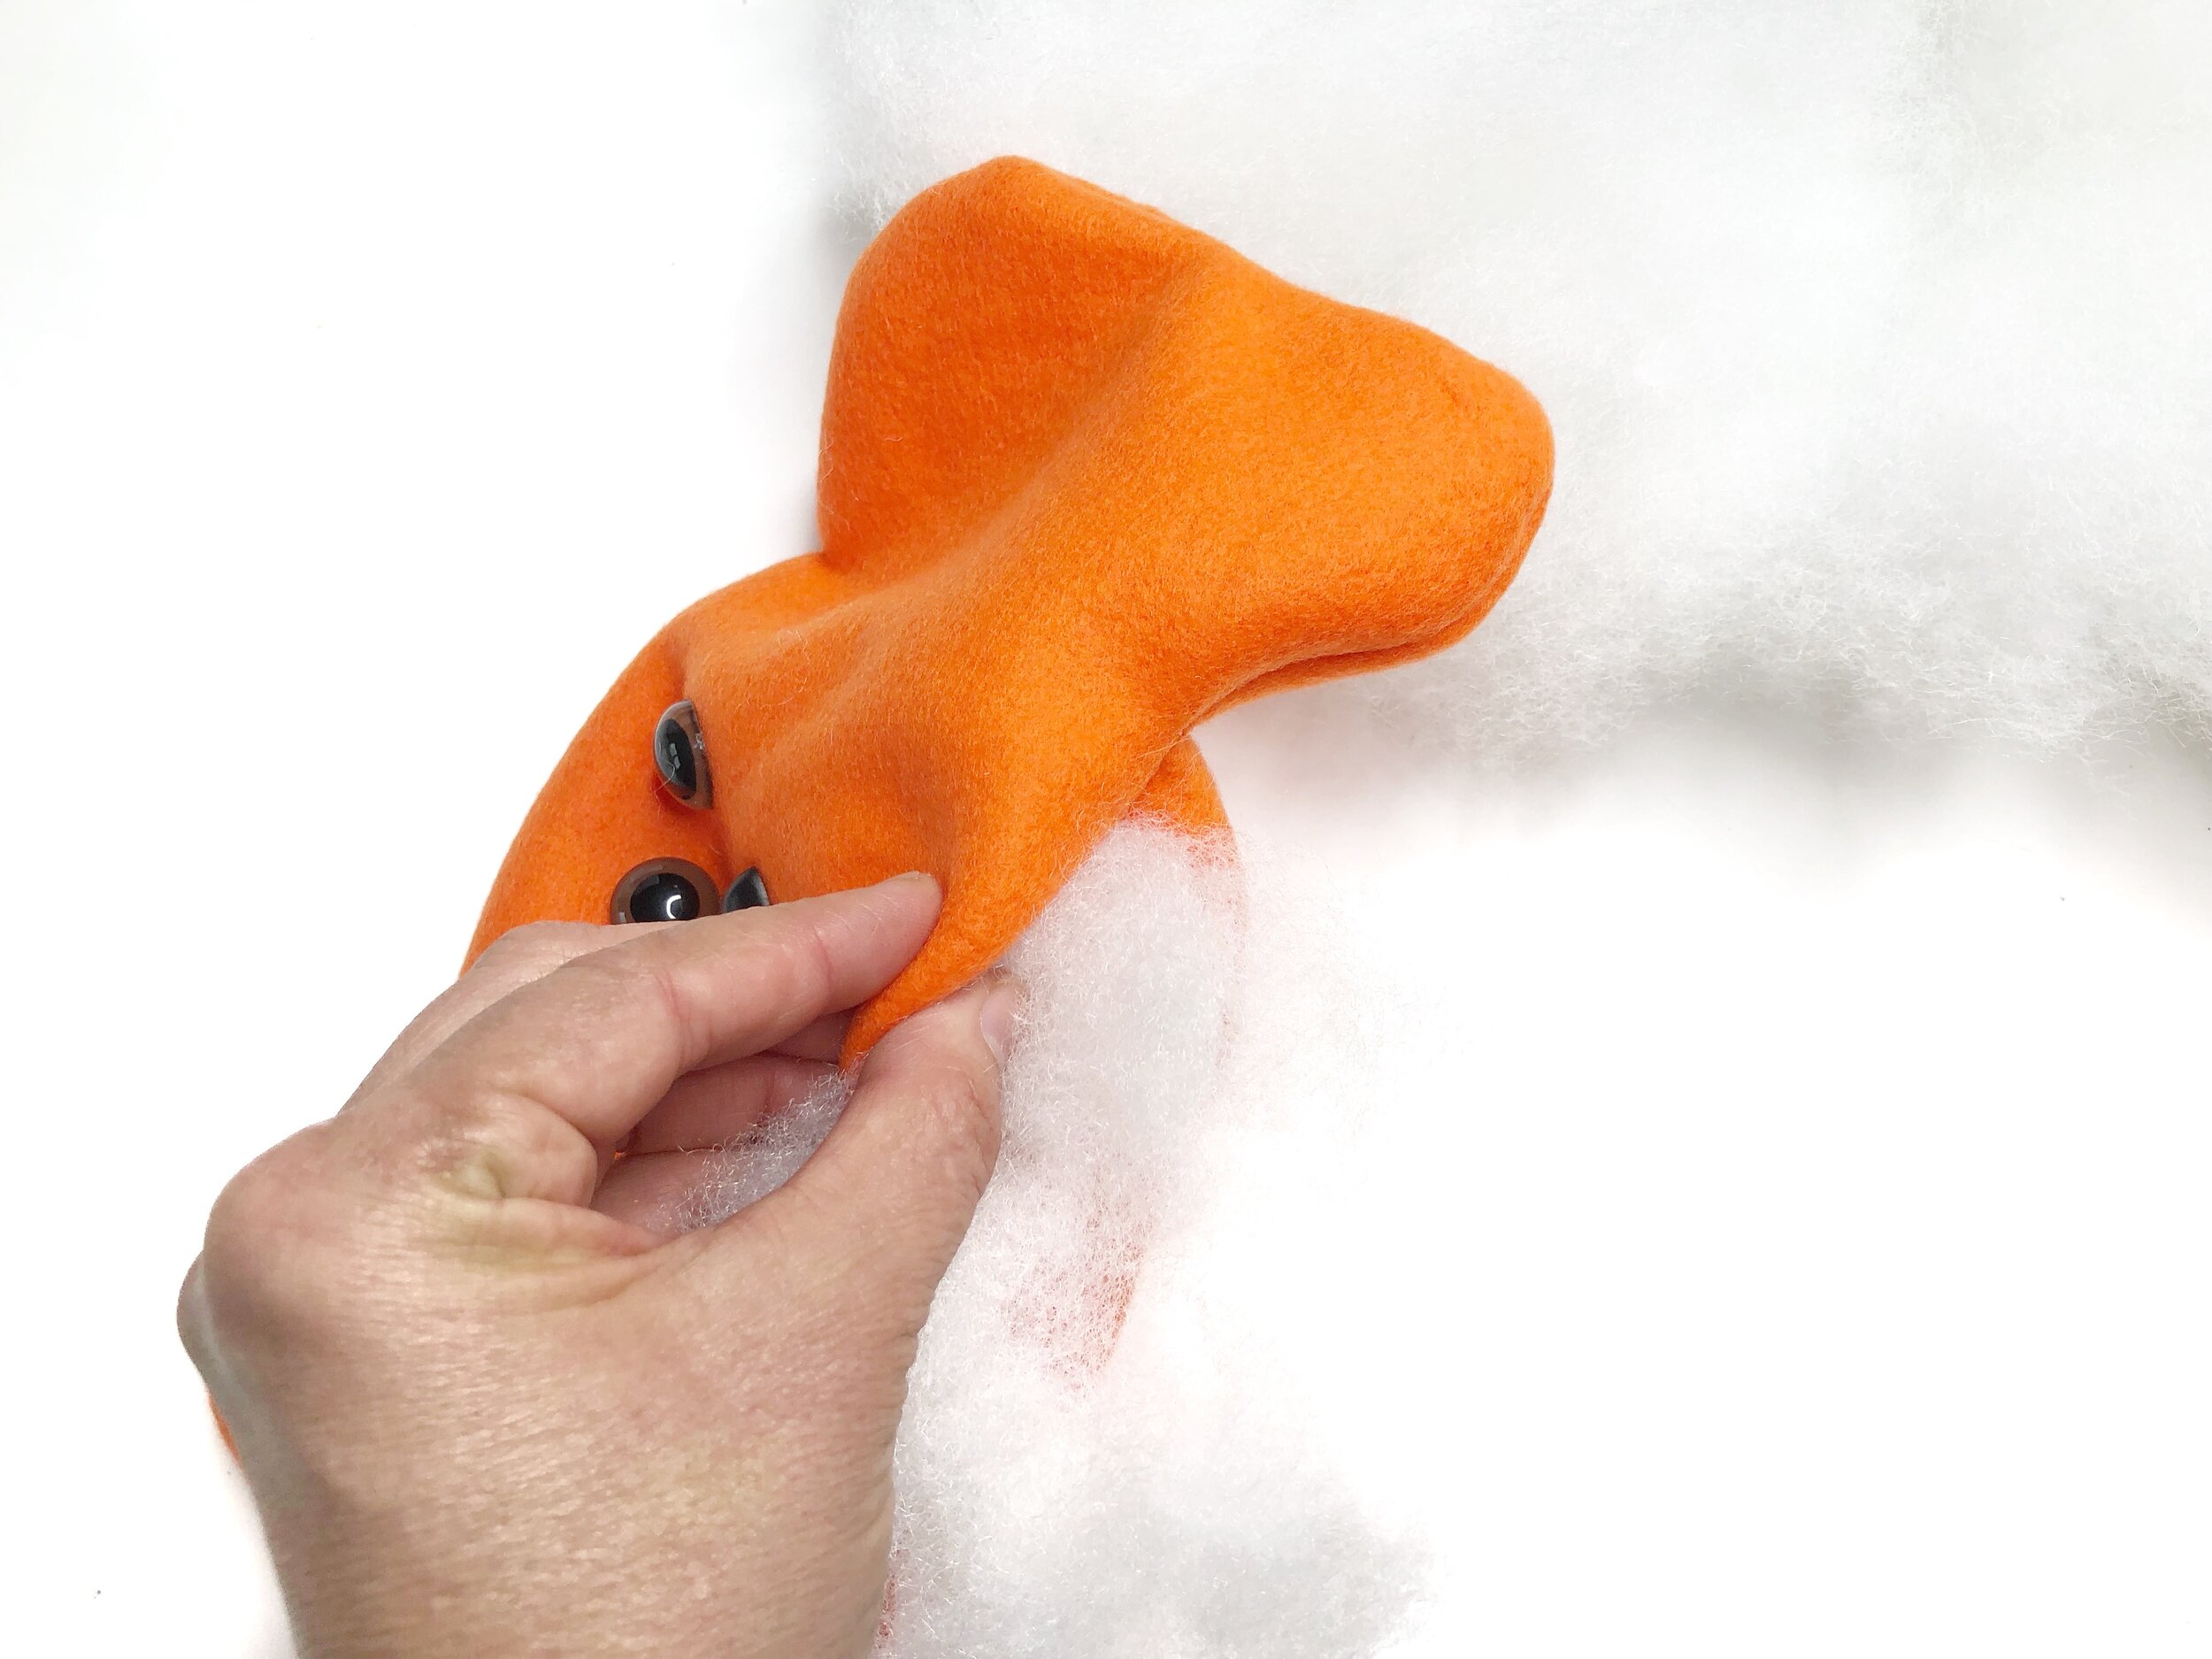
Reverse right side out and stuff with polyester stuffing.


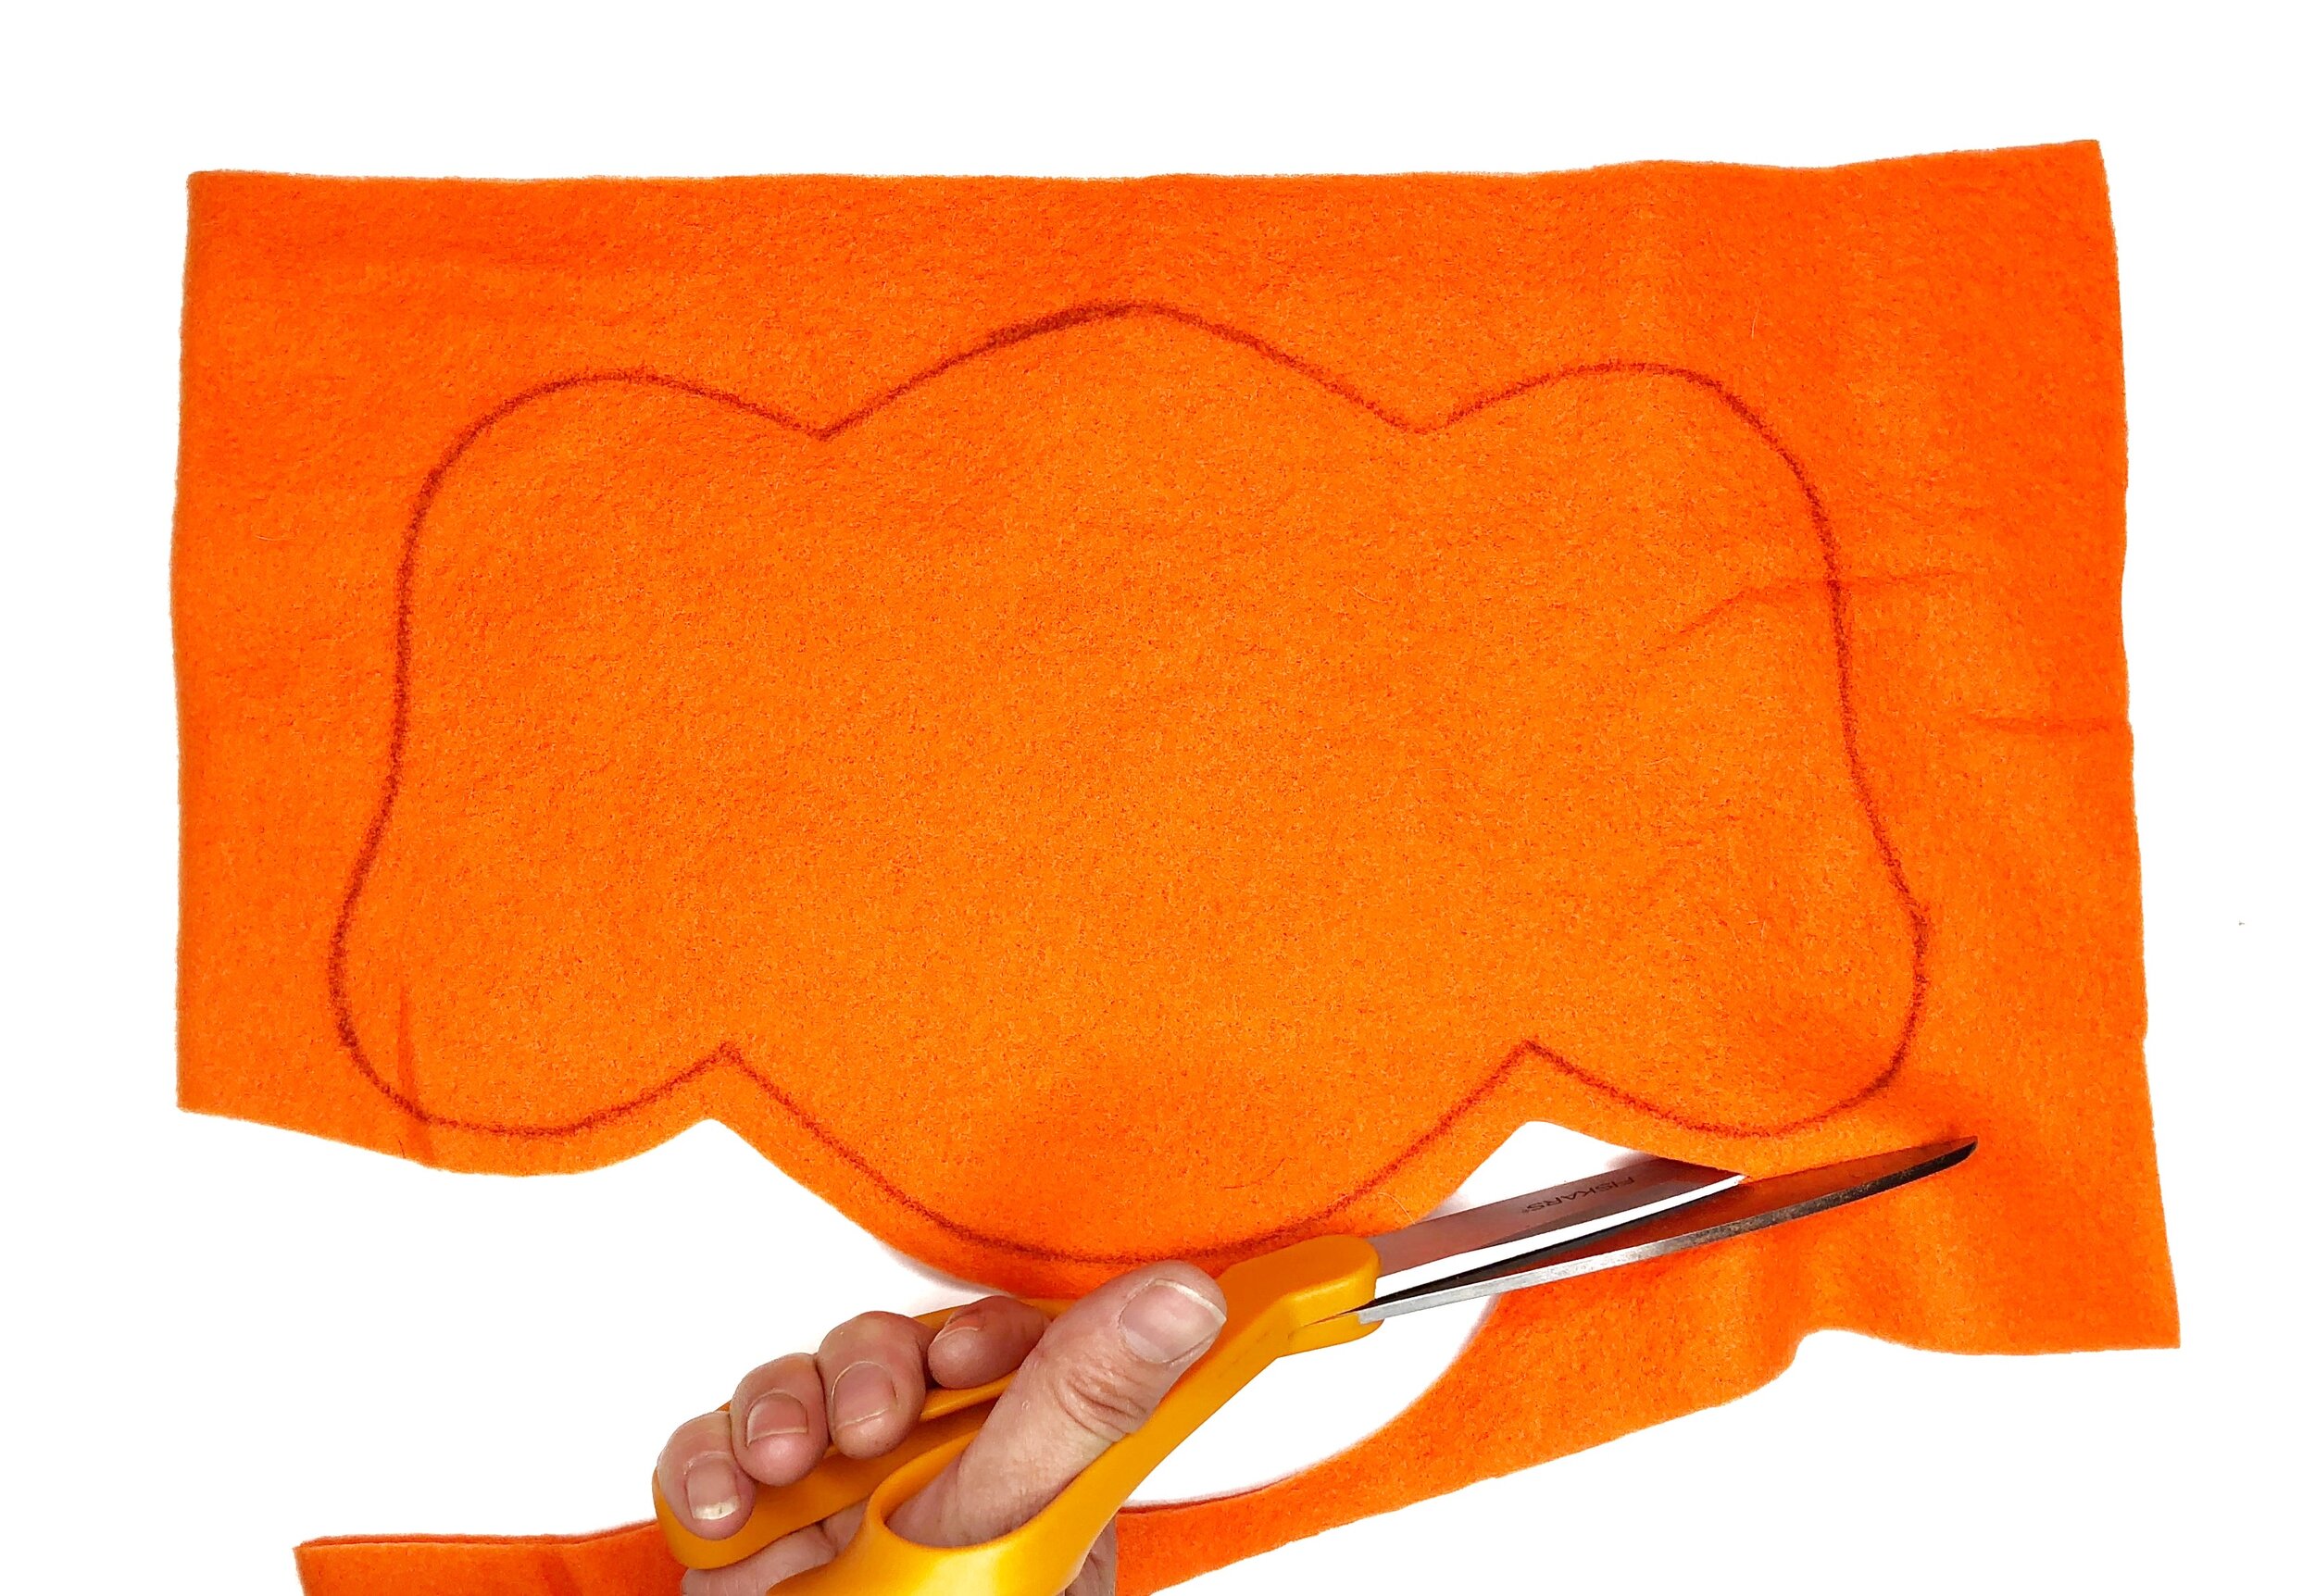
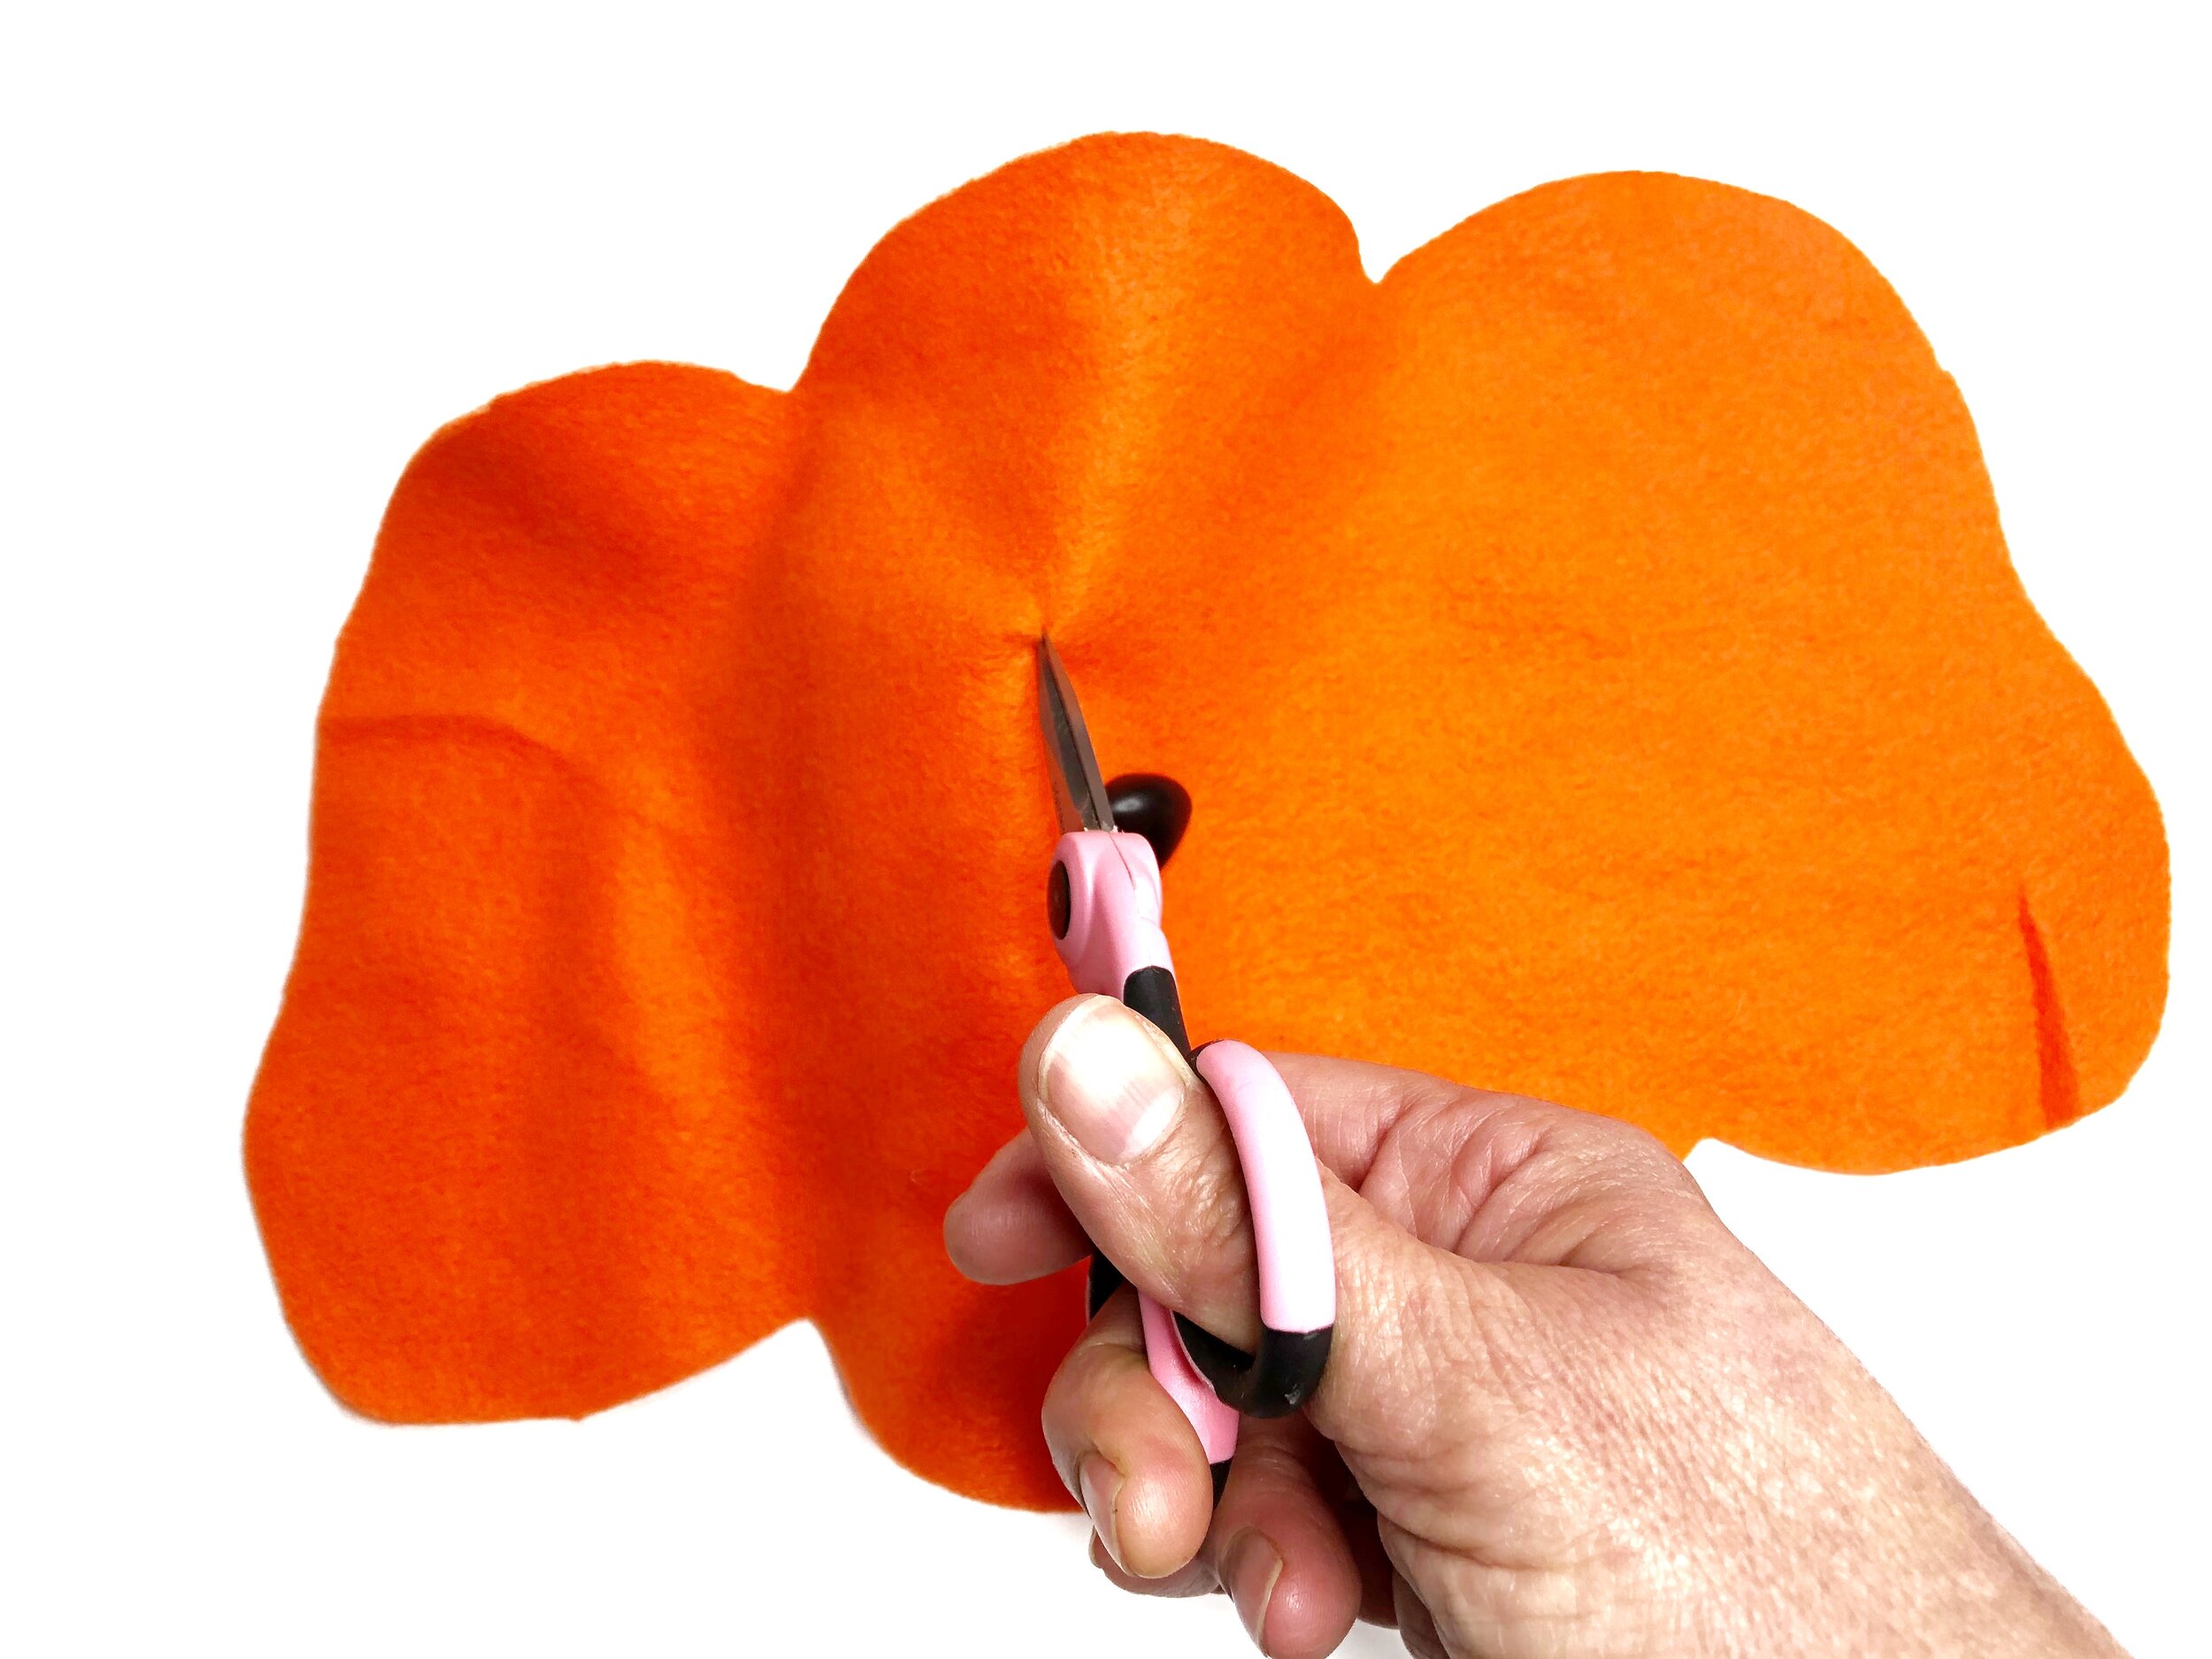
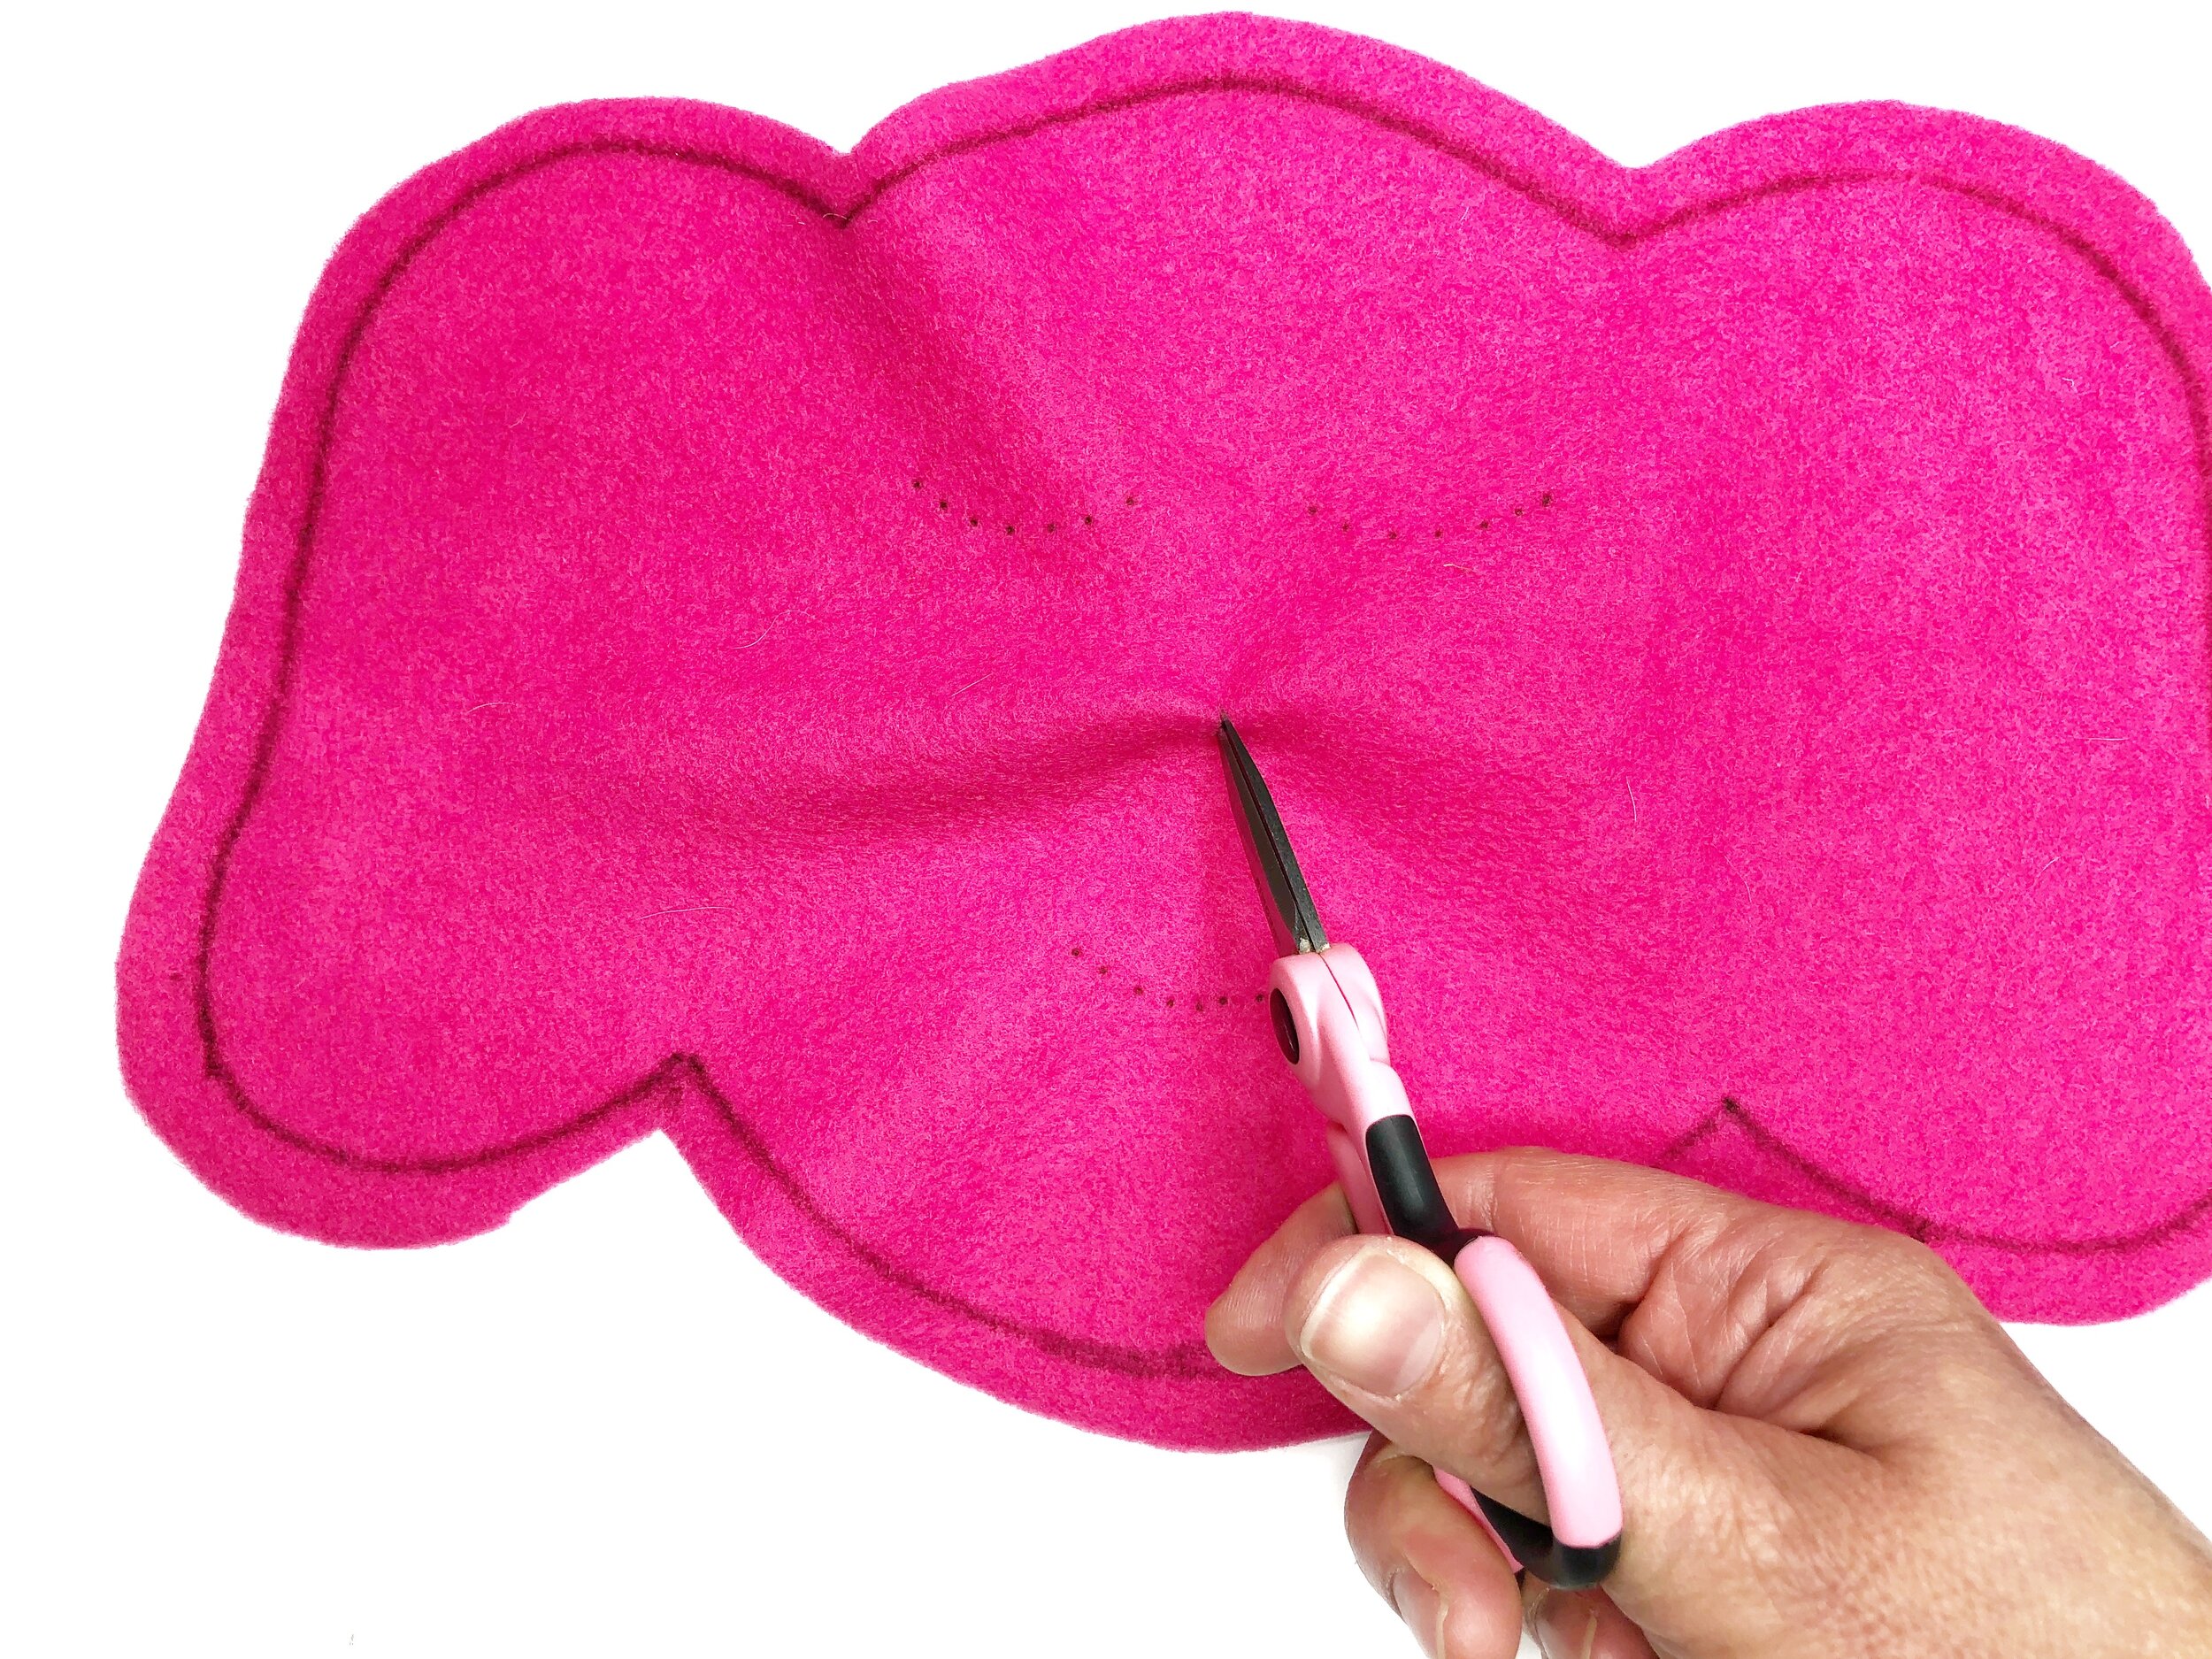
Head. Pin and transfer (trace) the head pattern to double layered fabric.
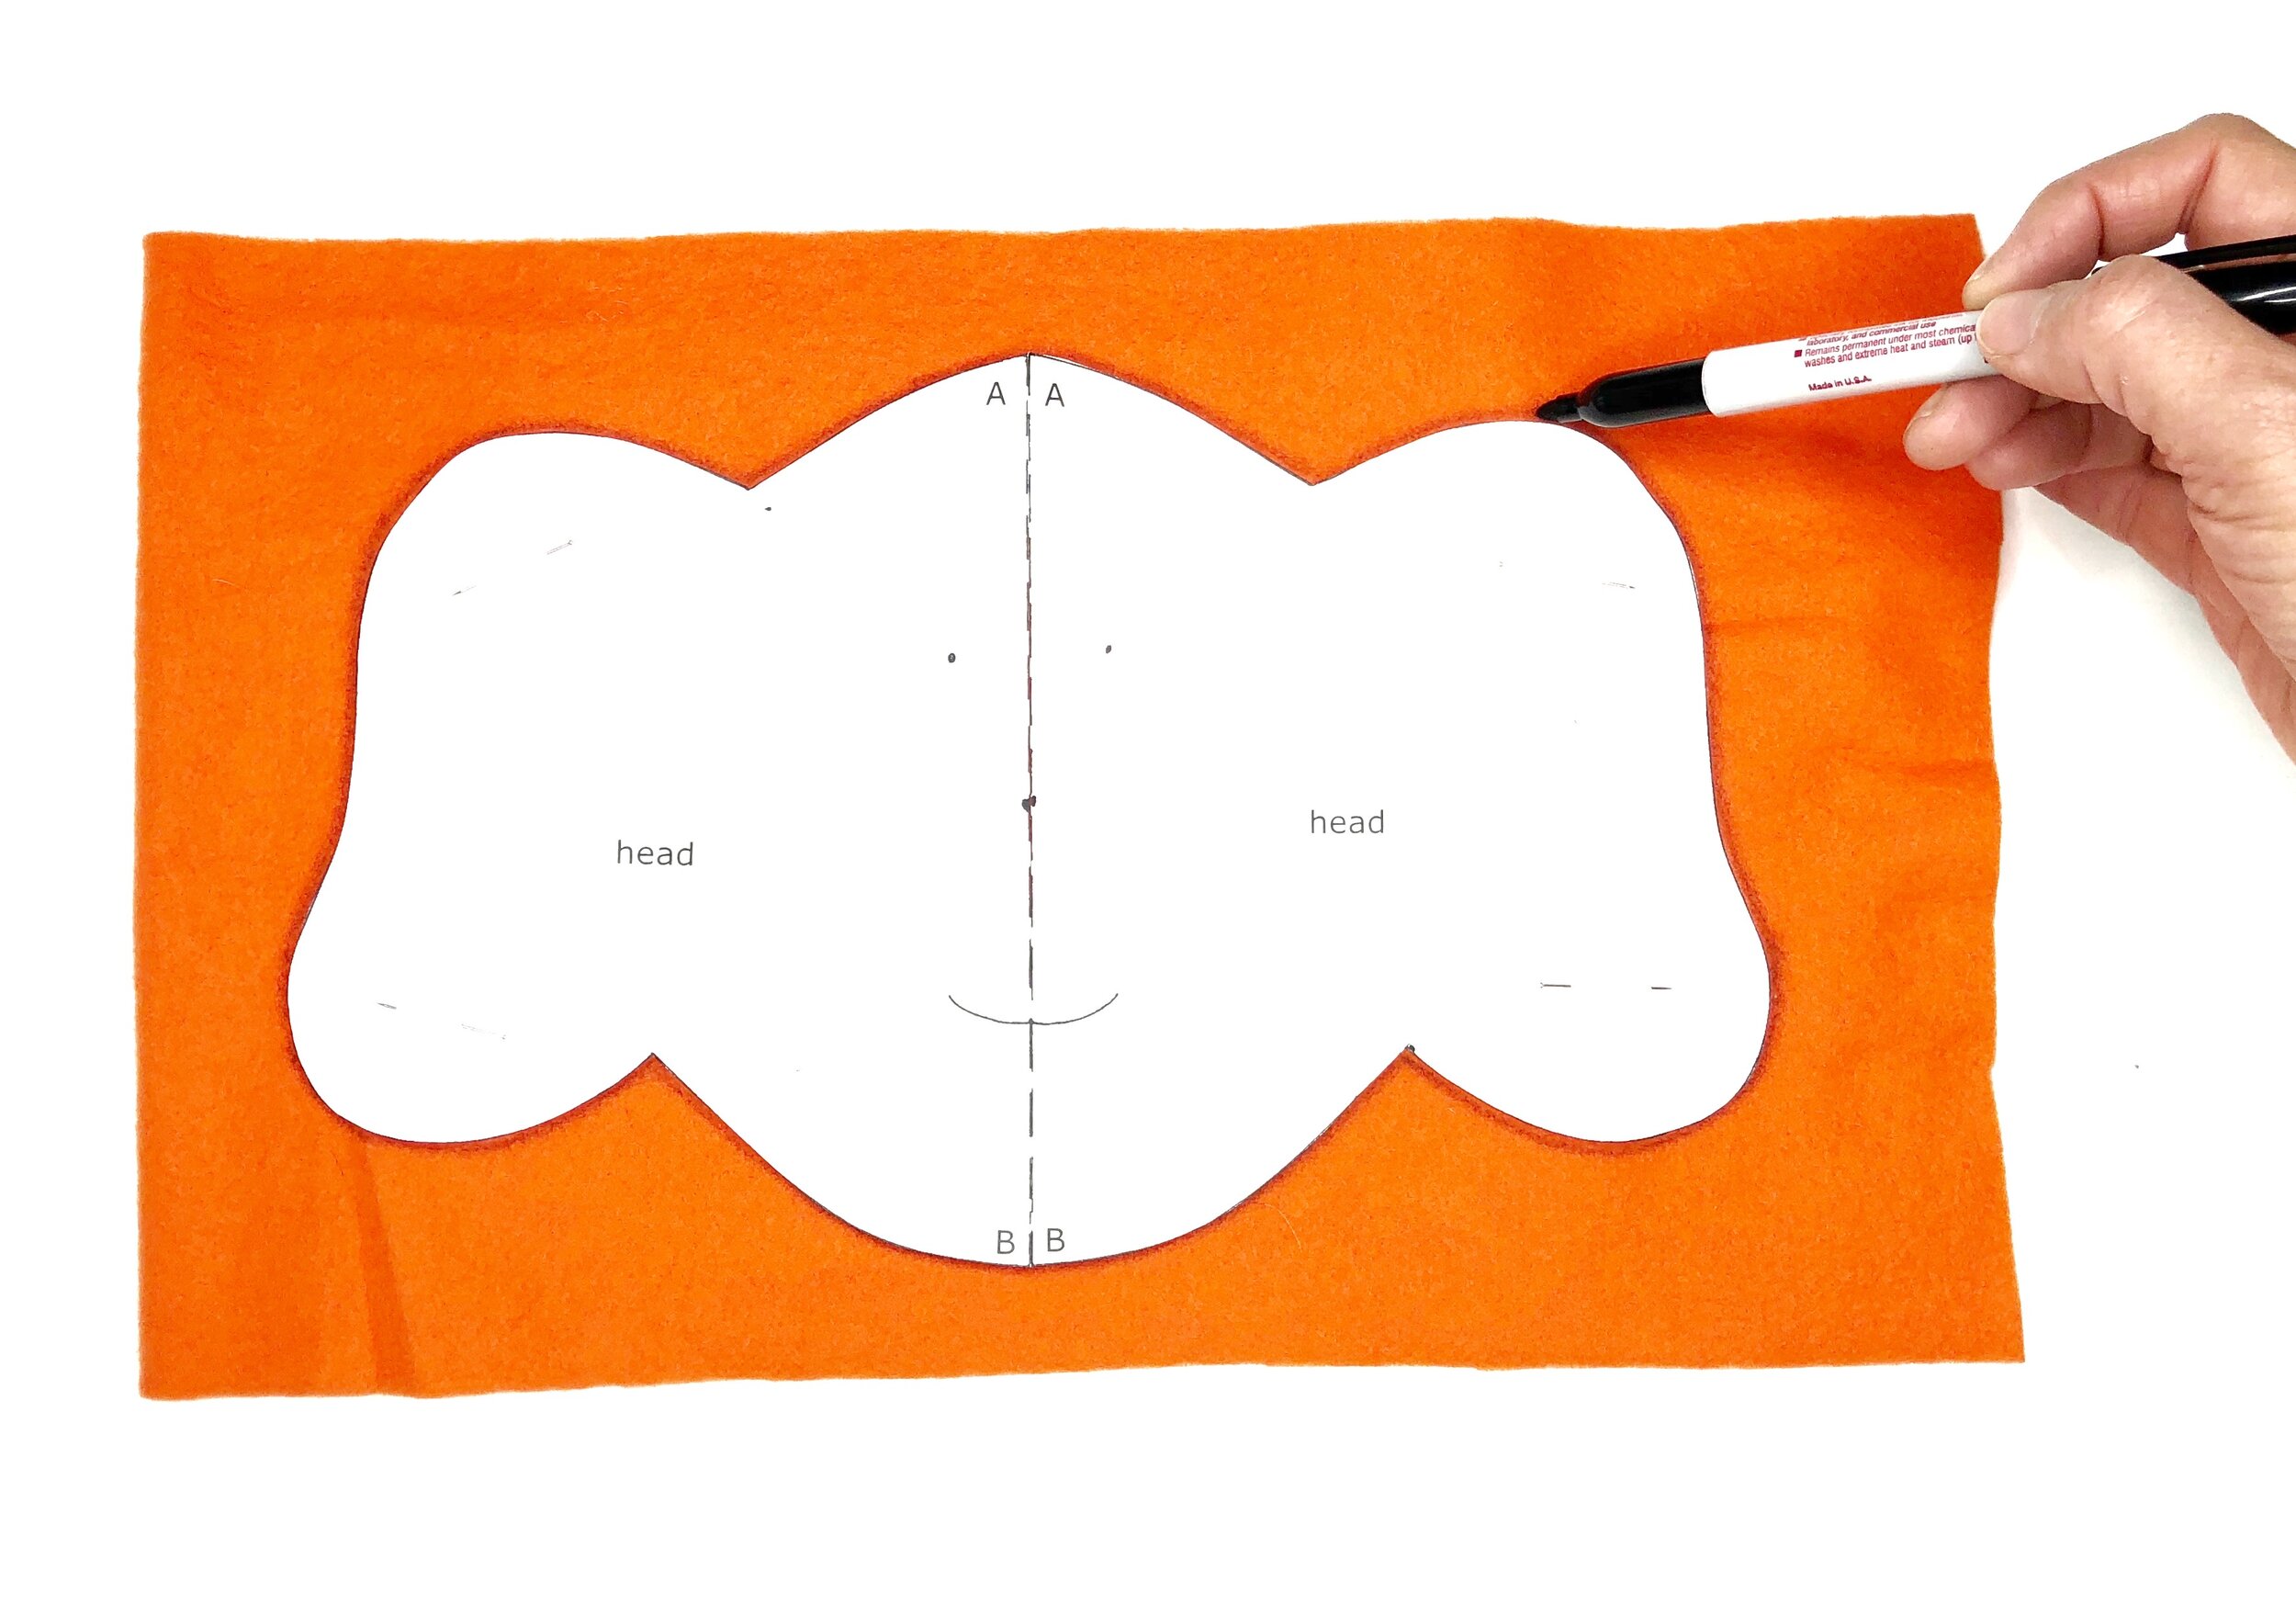
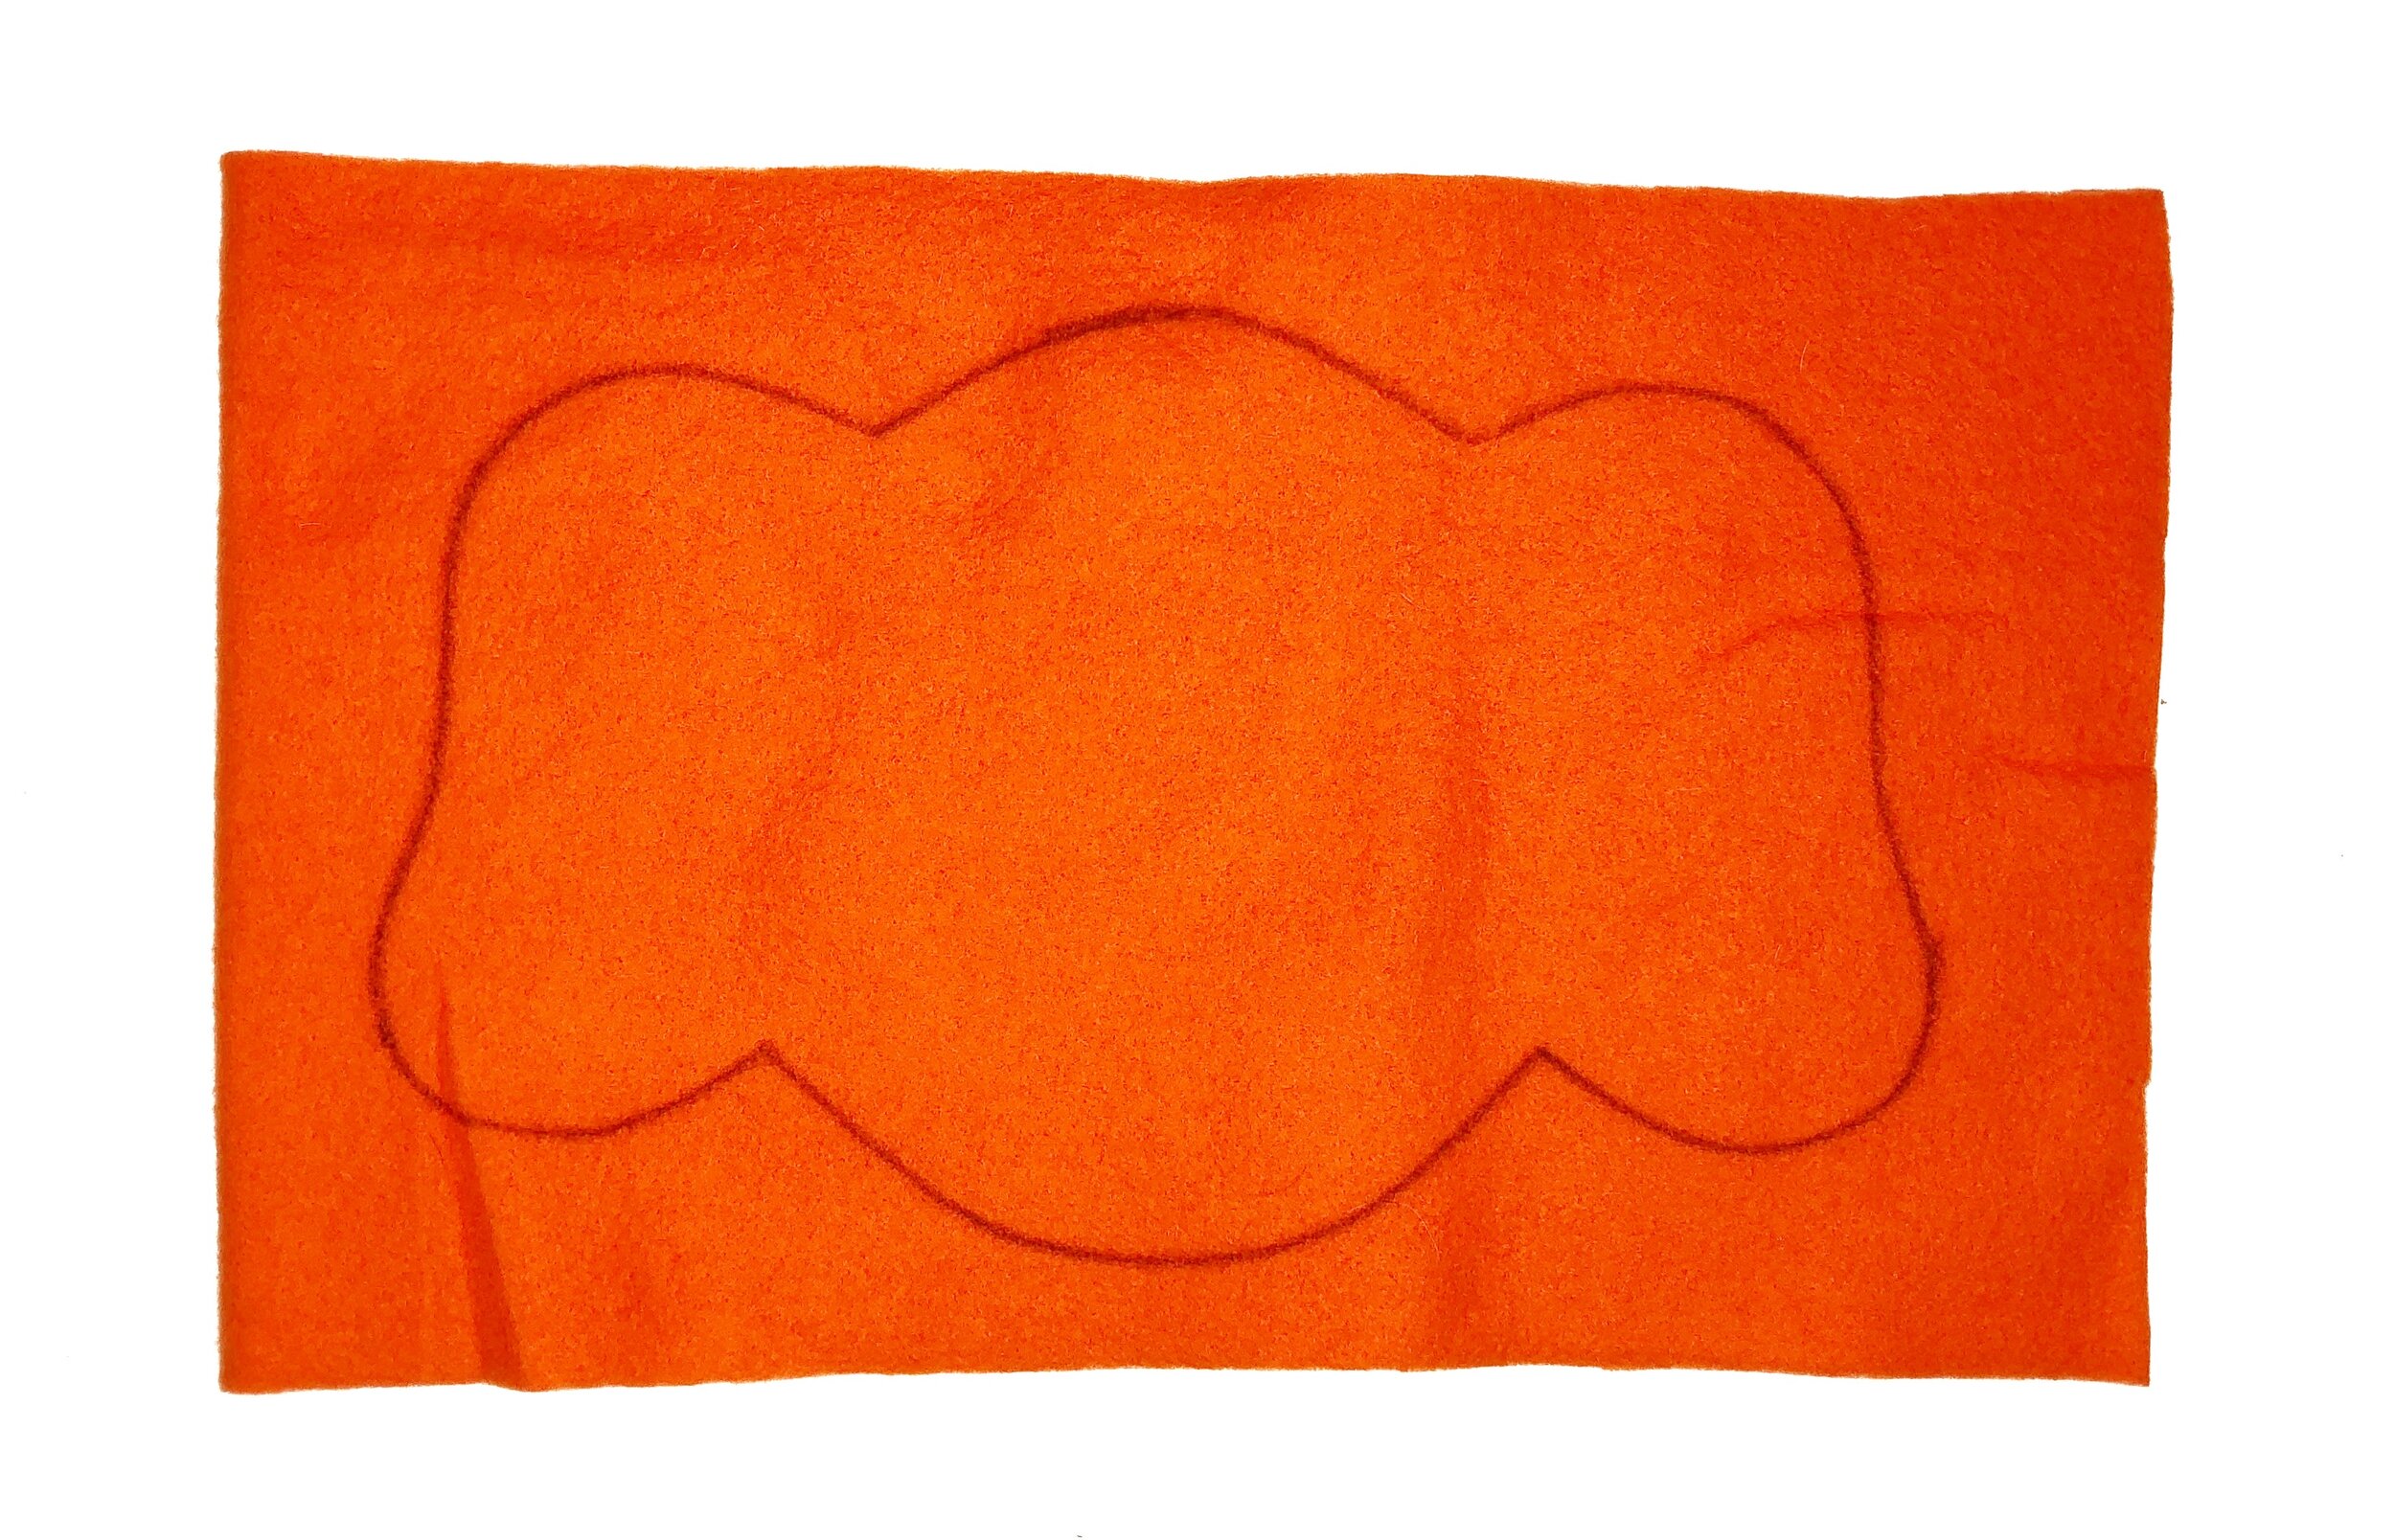
Cut leaving 1/4” seam. Pattern does not include the seam.
Chose from the awake or sleeping face and follow the instructions for the one you choose.
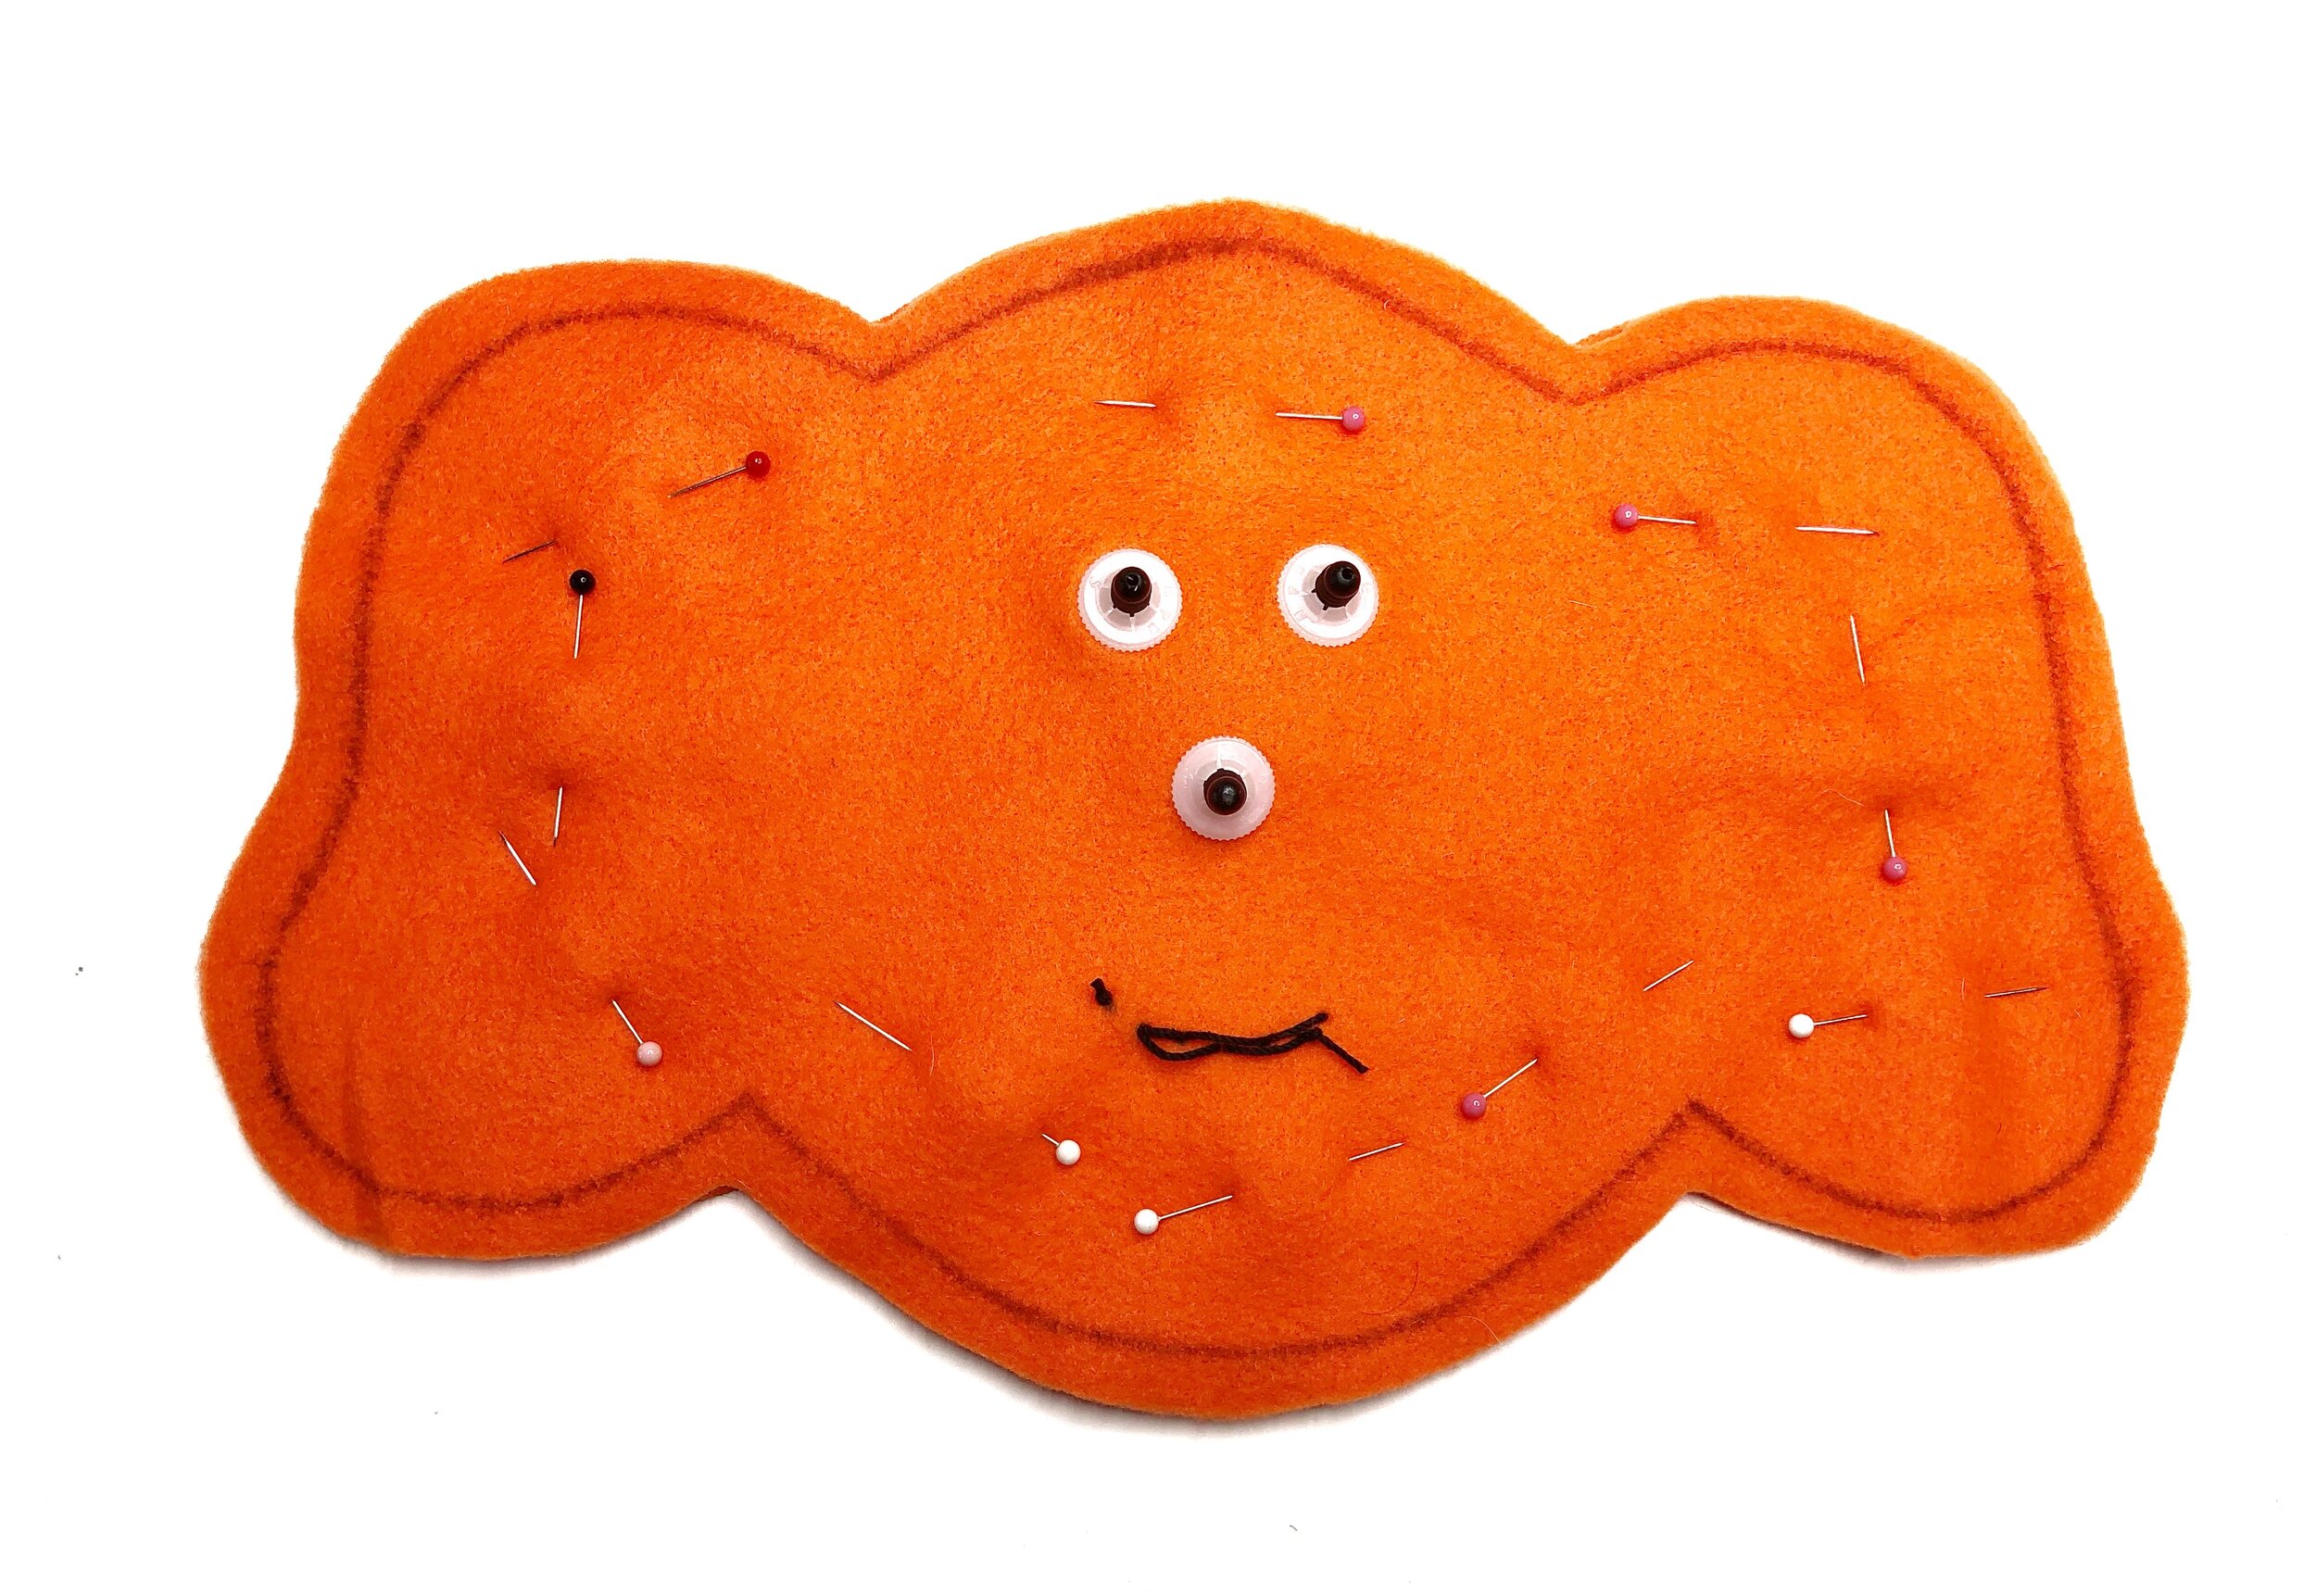
Awake Face
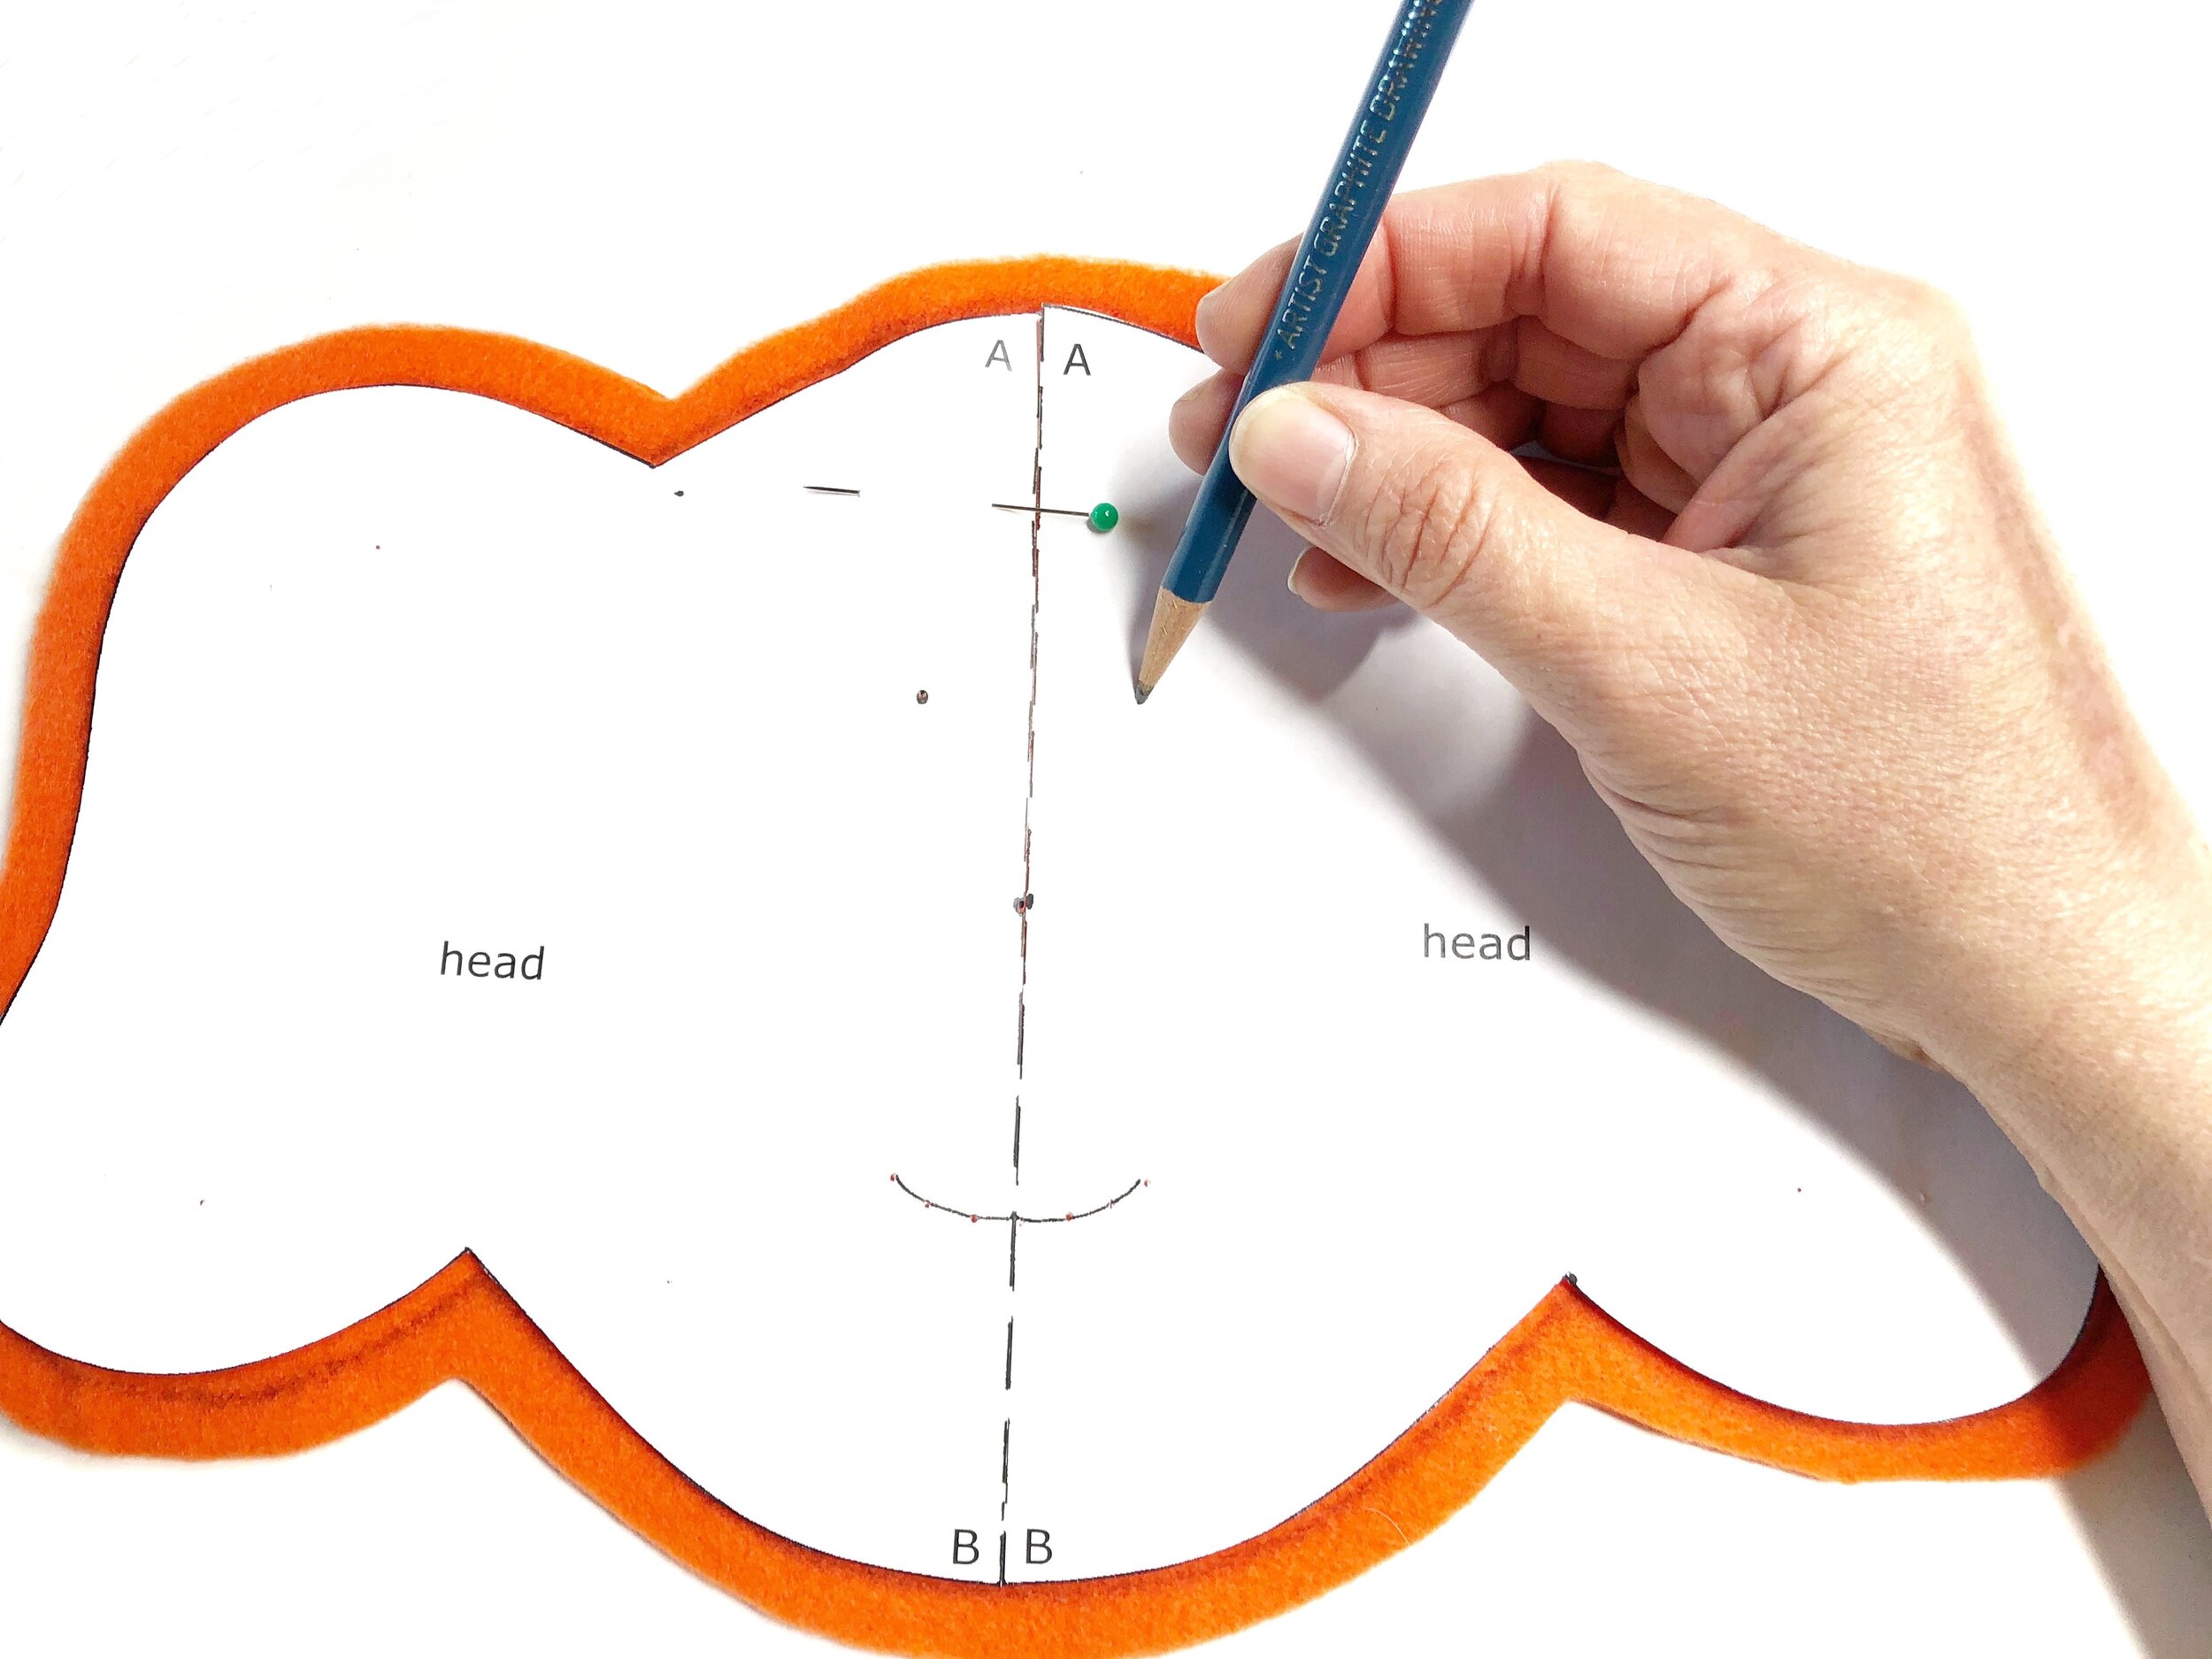
Turn one of the head fabric pieces to the right side and mark the location of the eyes, nose and mouth on the outside of the face. To do this, pin the paper pattern to one of the head fabric pieces. Poke holes through the paper pattern at the location of the eyes, nose and along the mouth with a large needle.
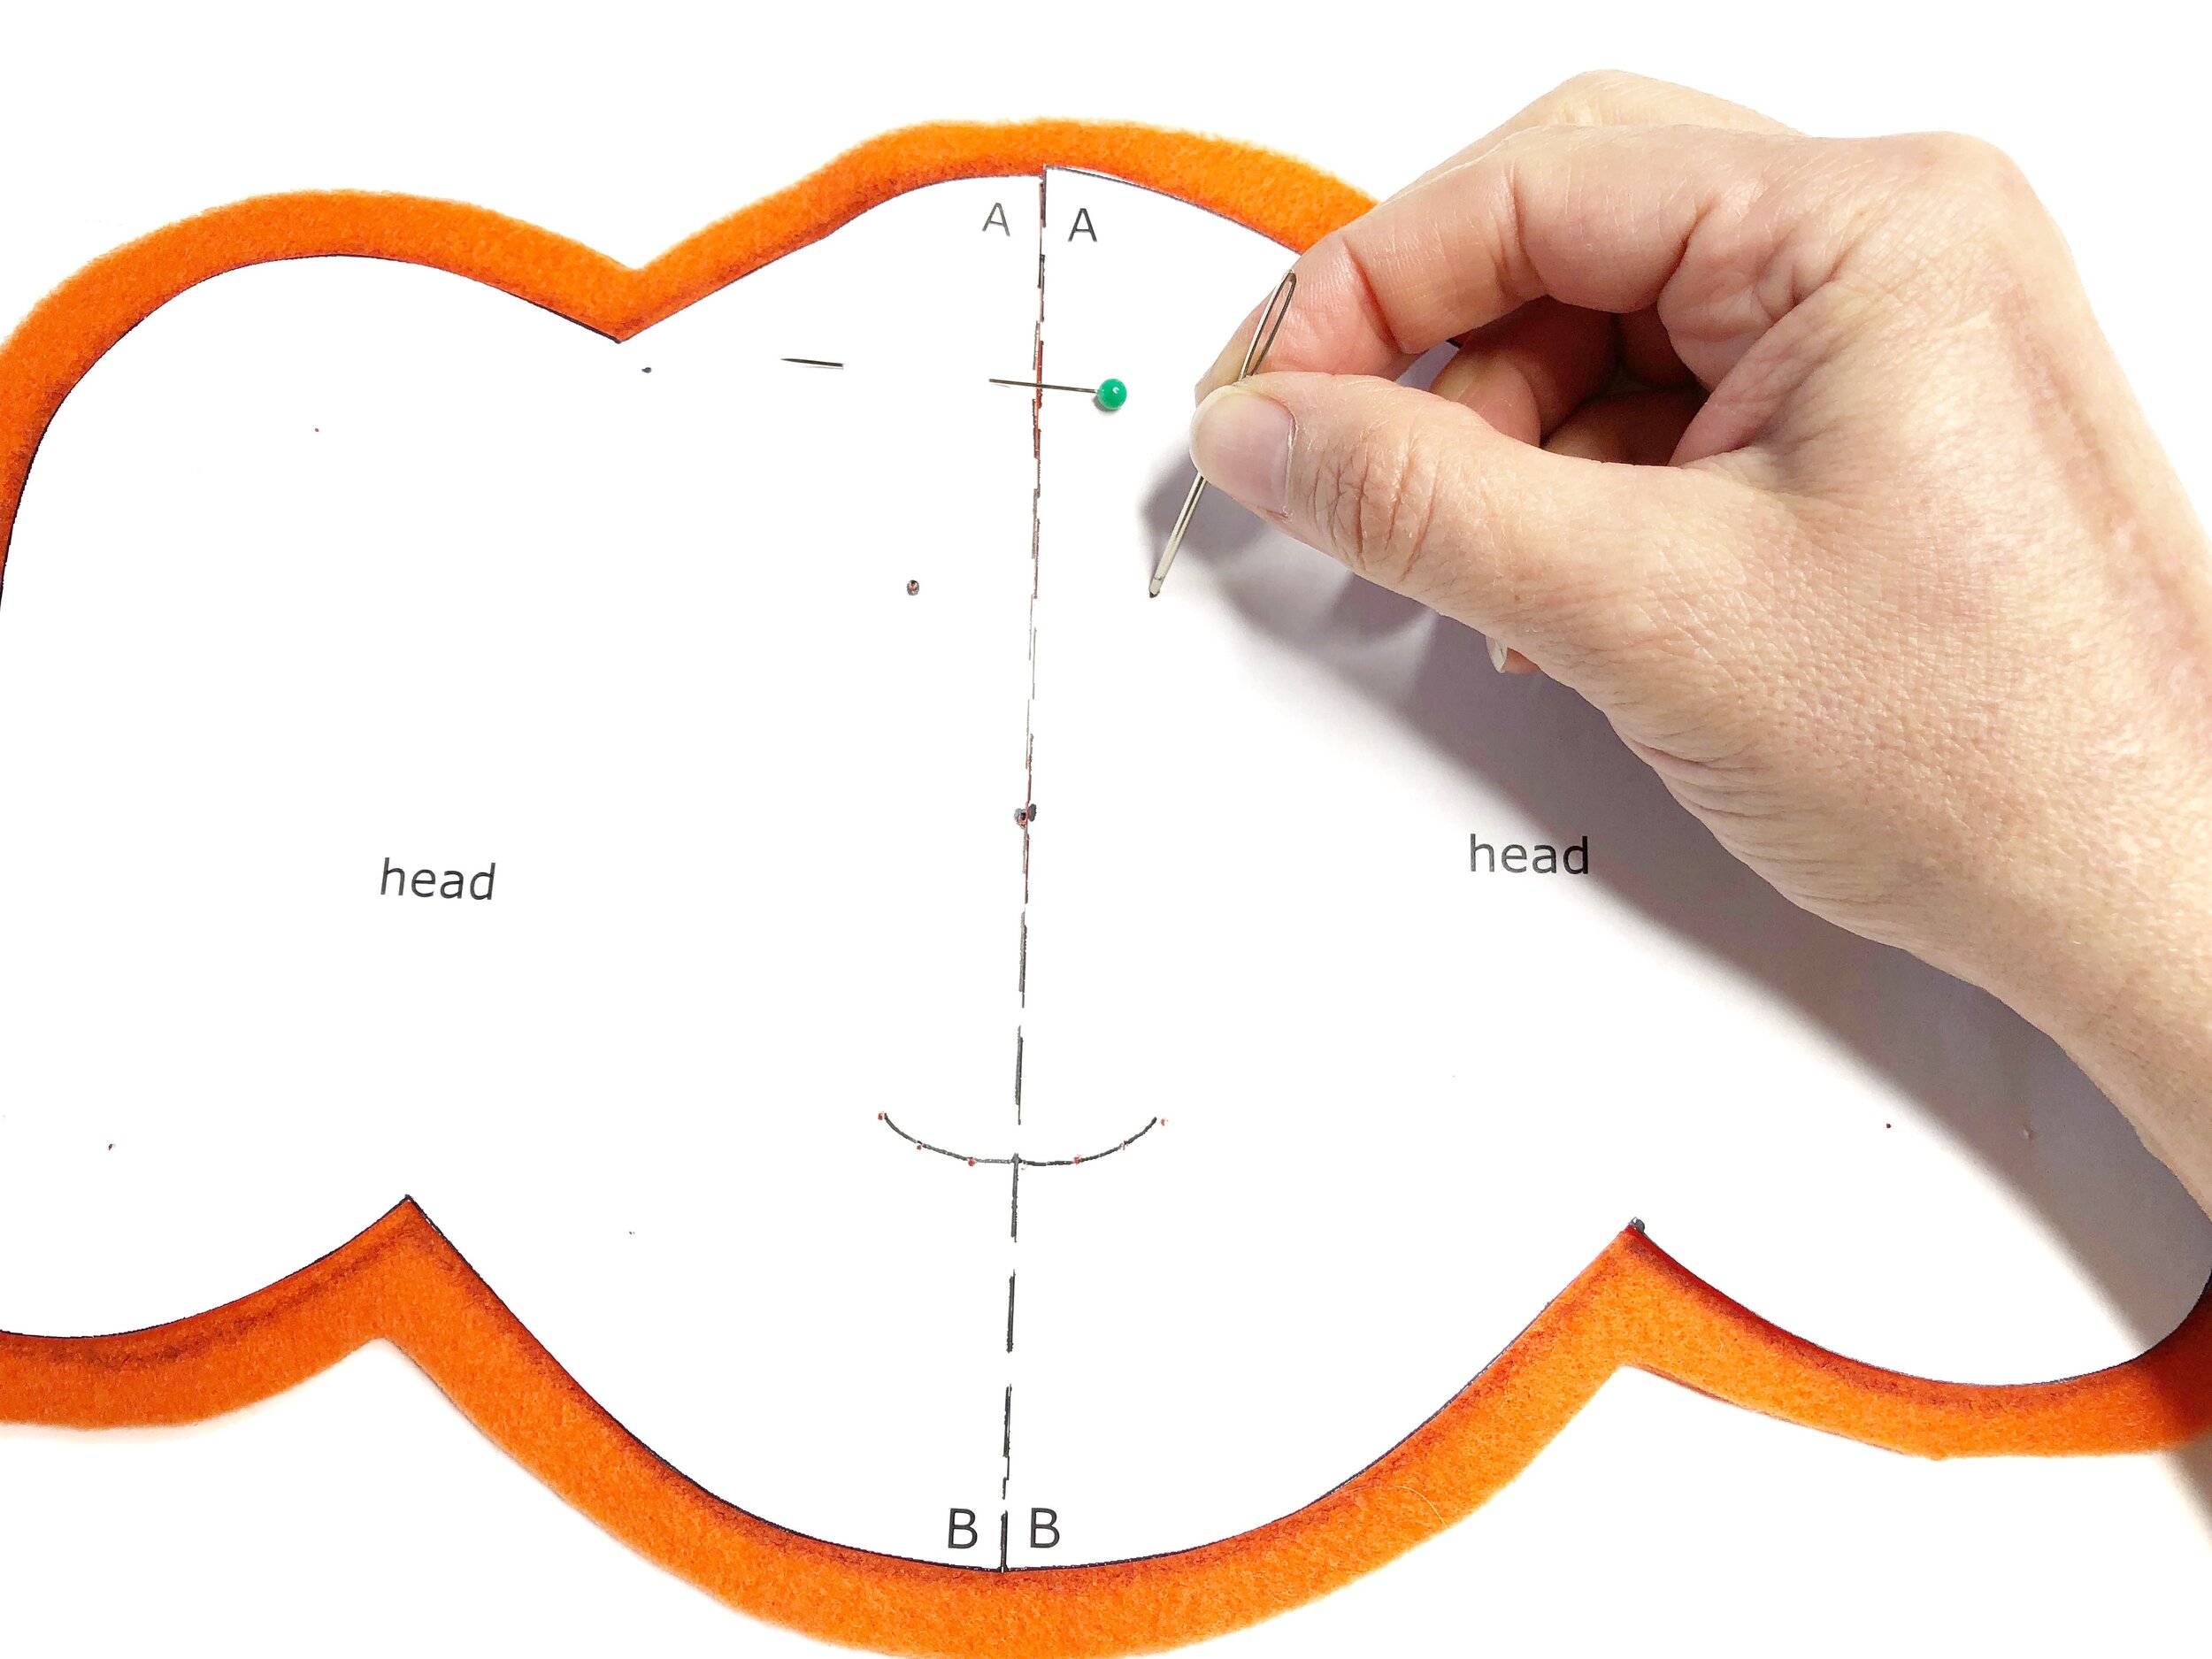
Mark a dot through each hole onto the fabric using a pencil. Remove the paper pattern. The marks will be a guide to creating the face.

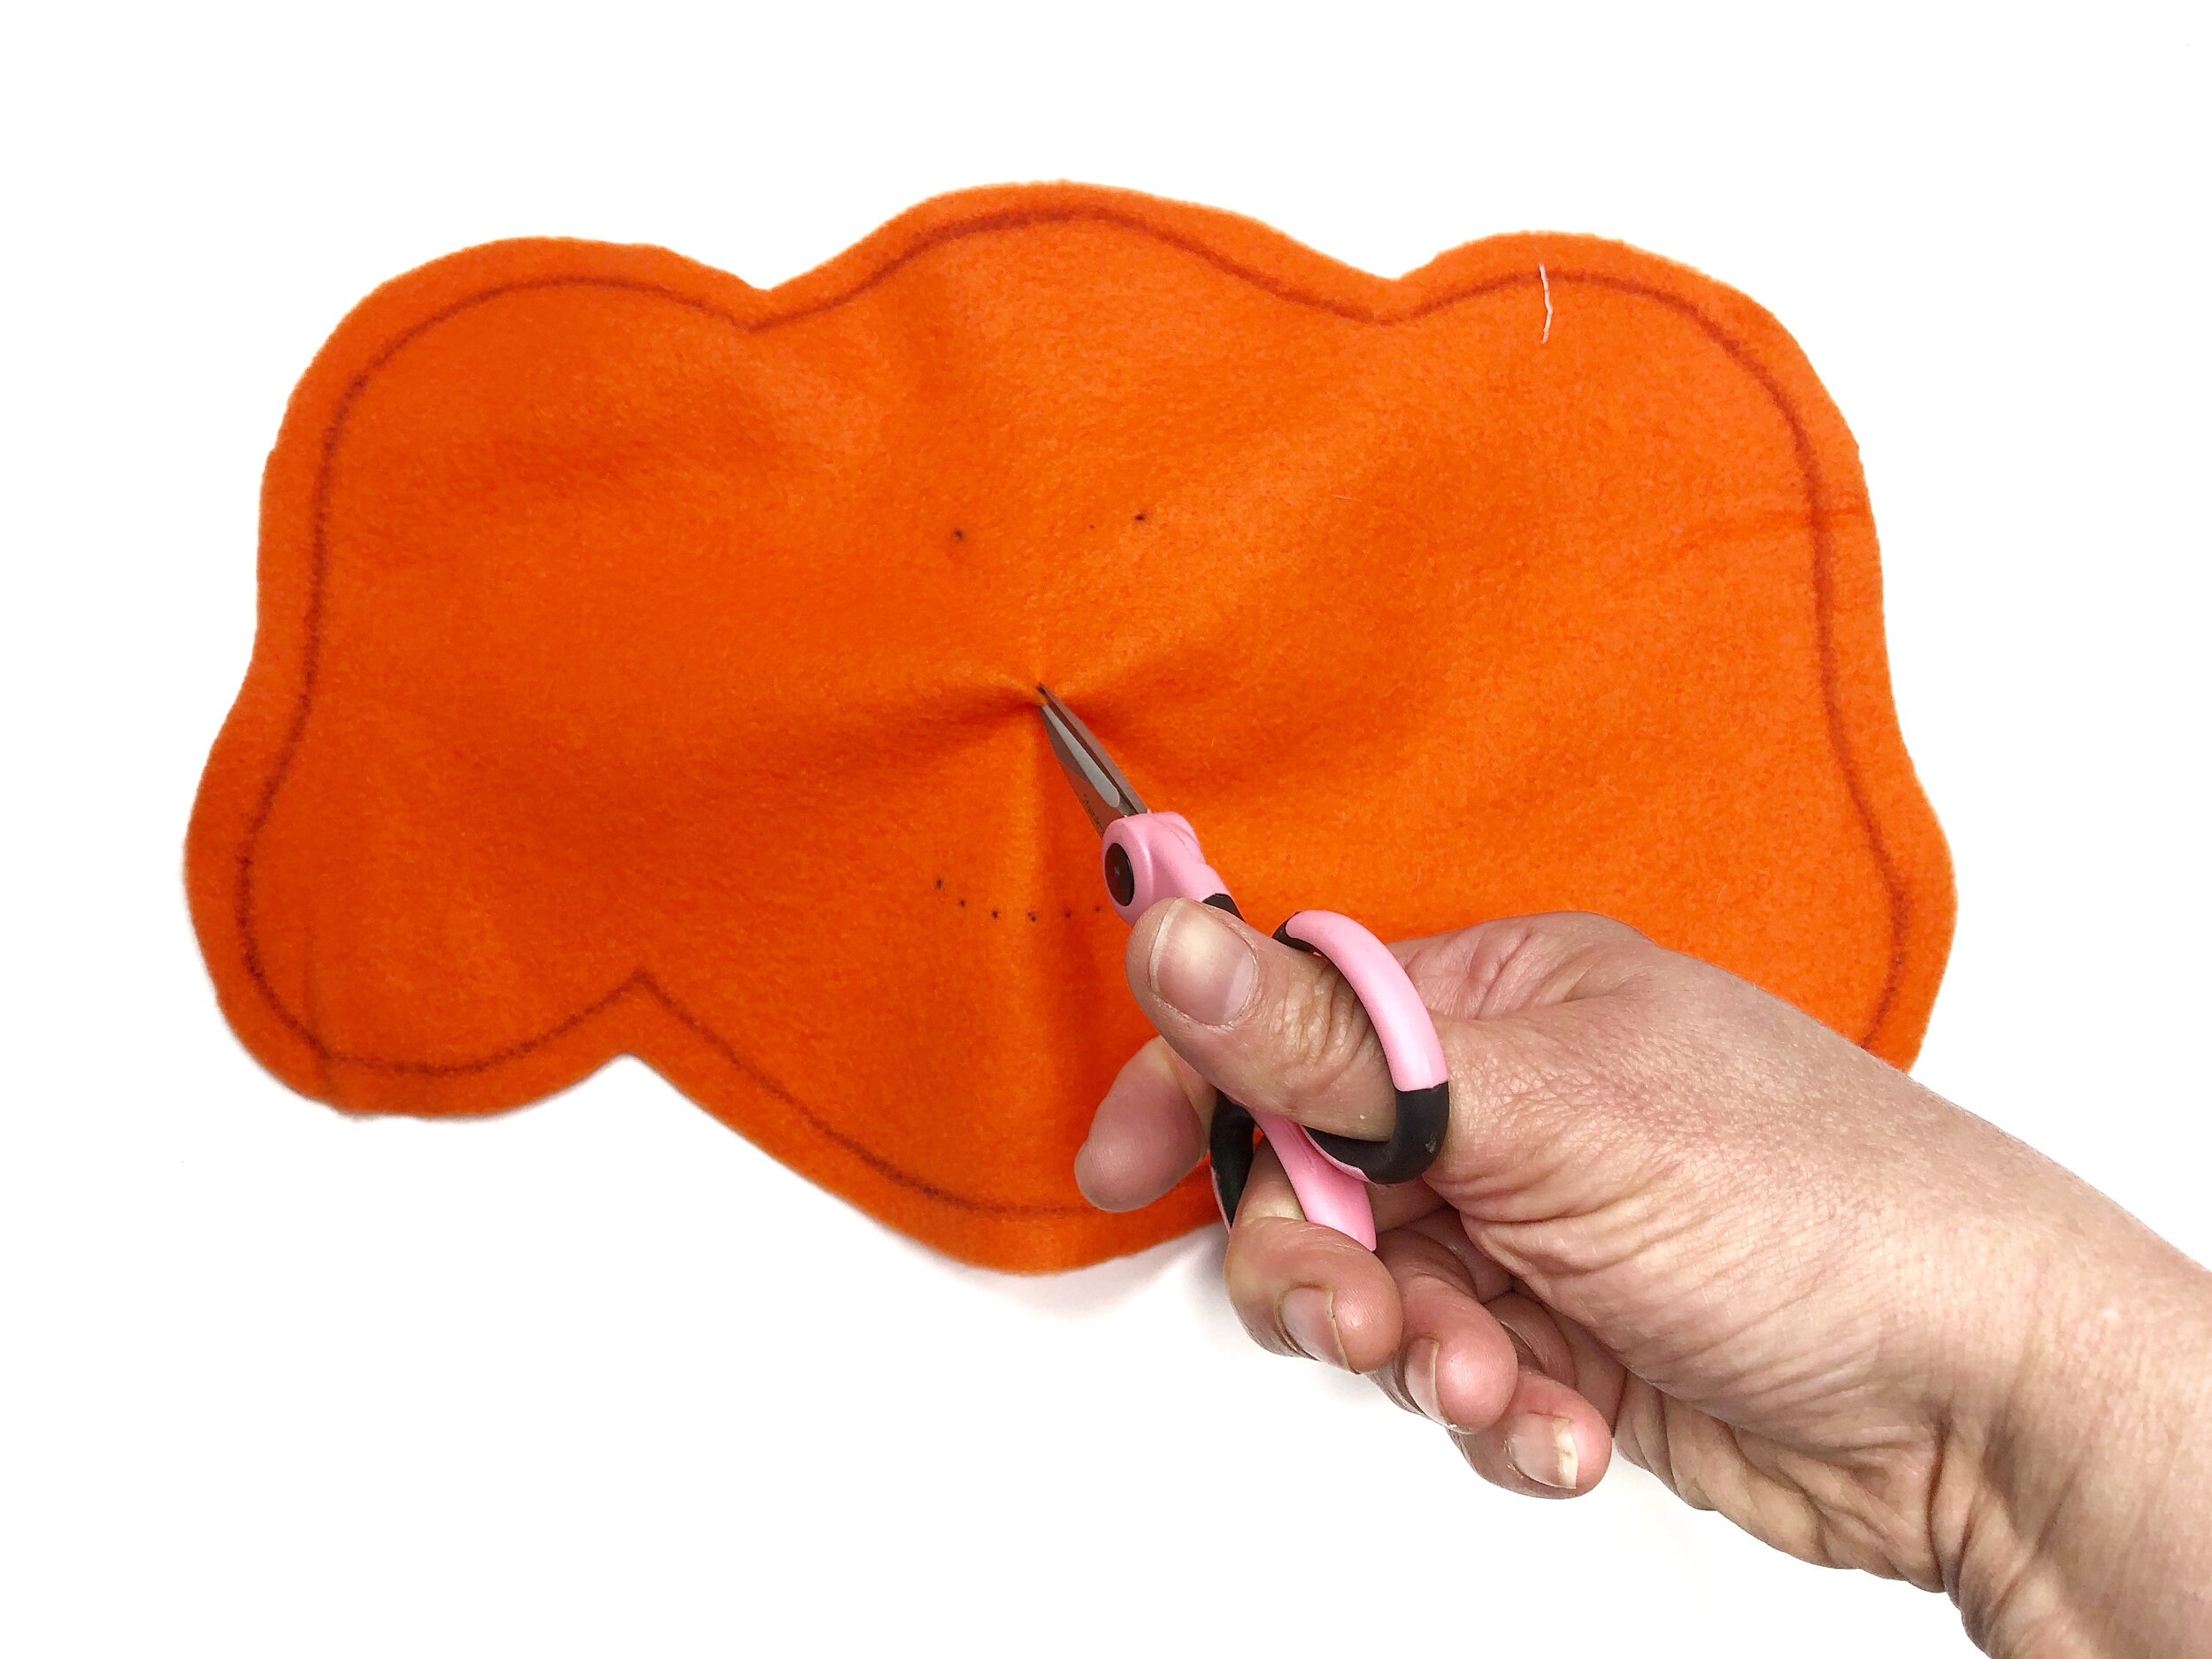
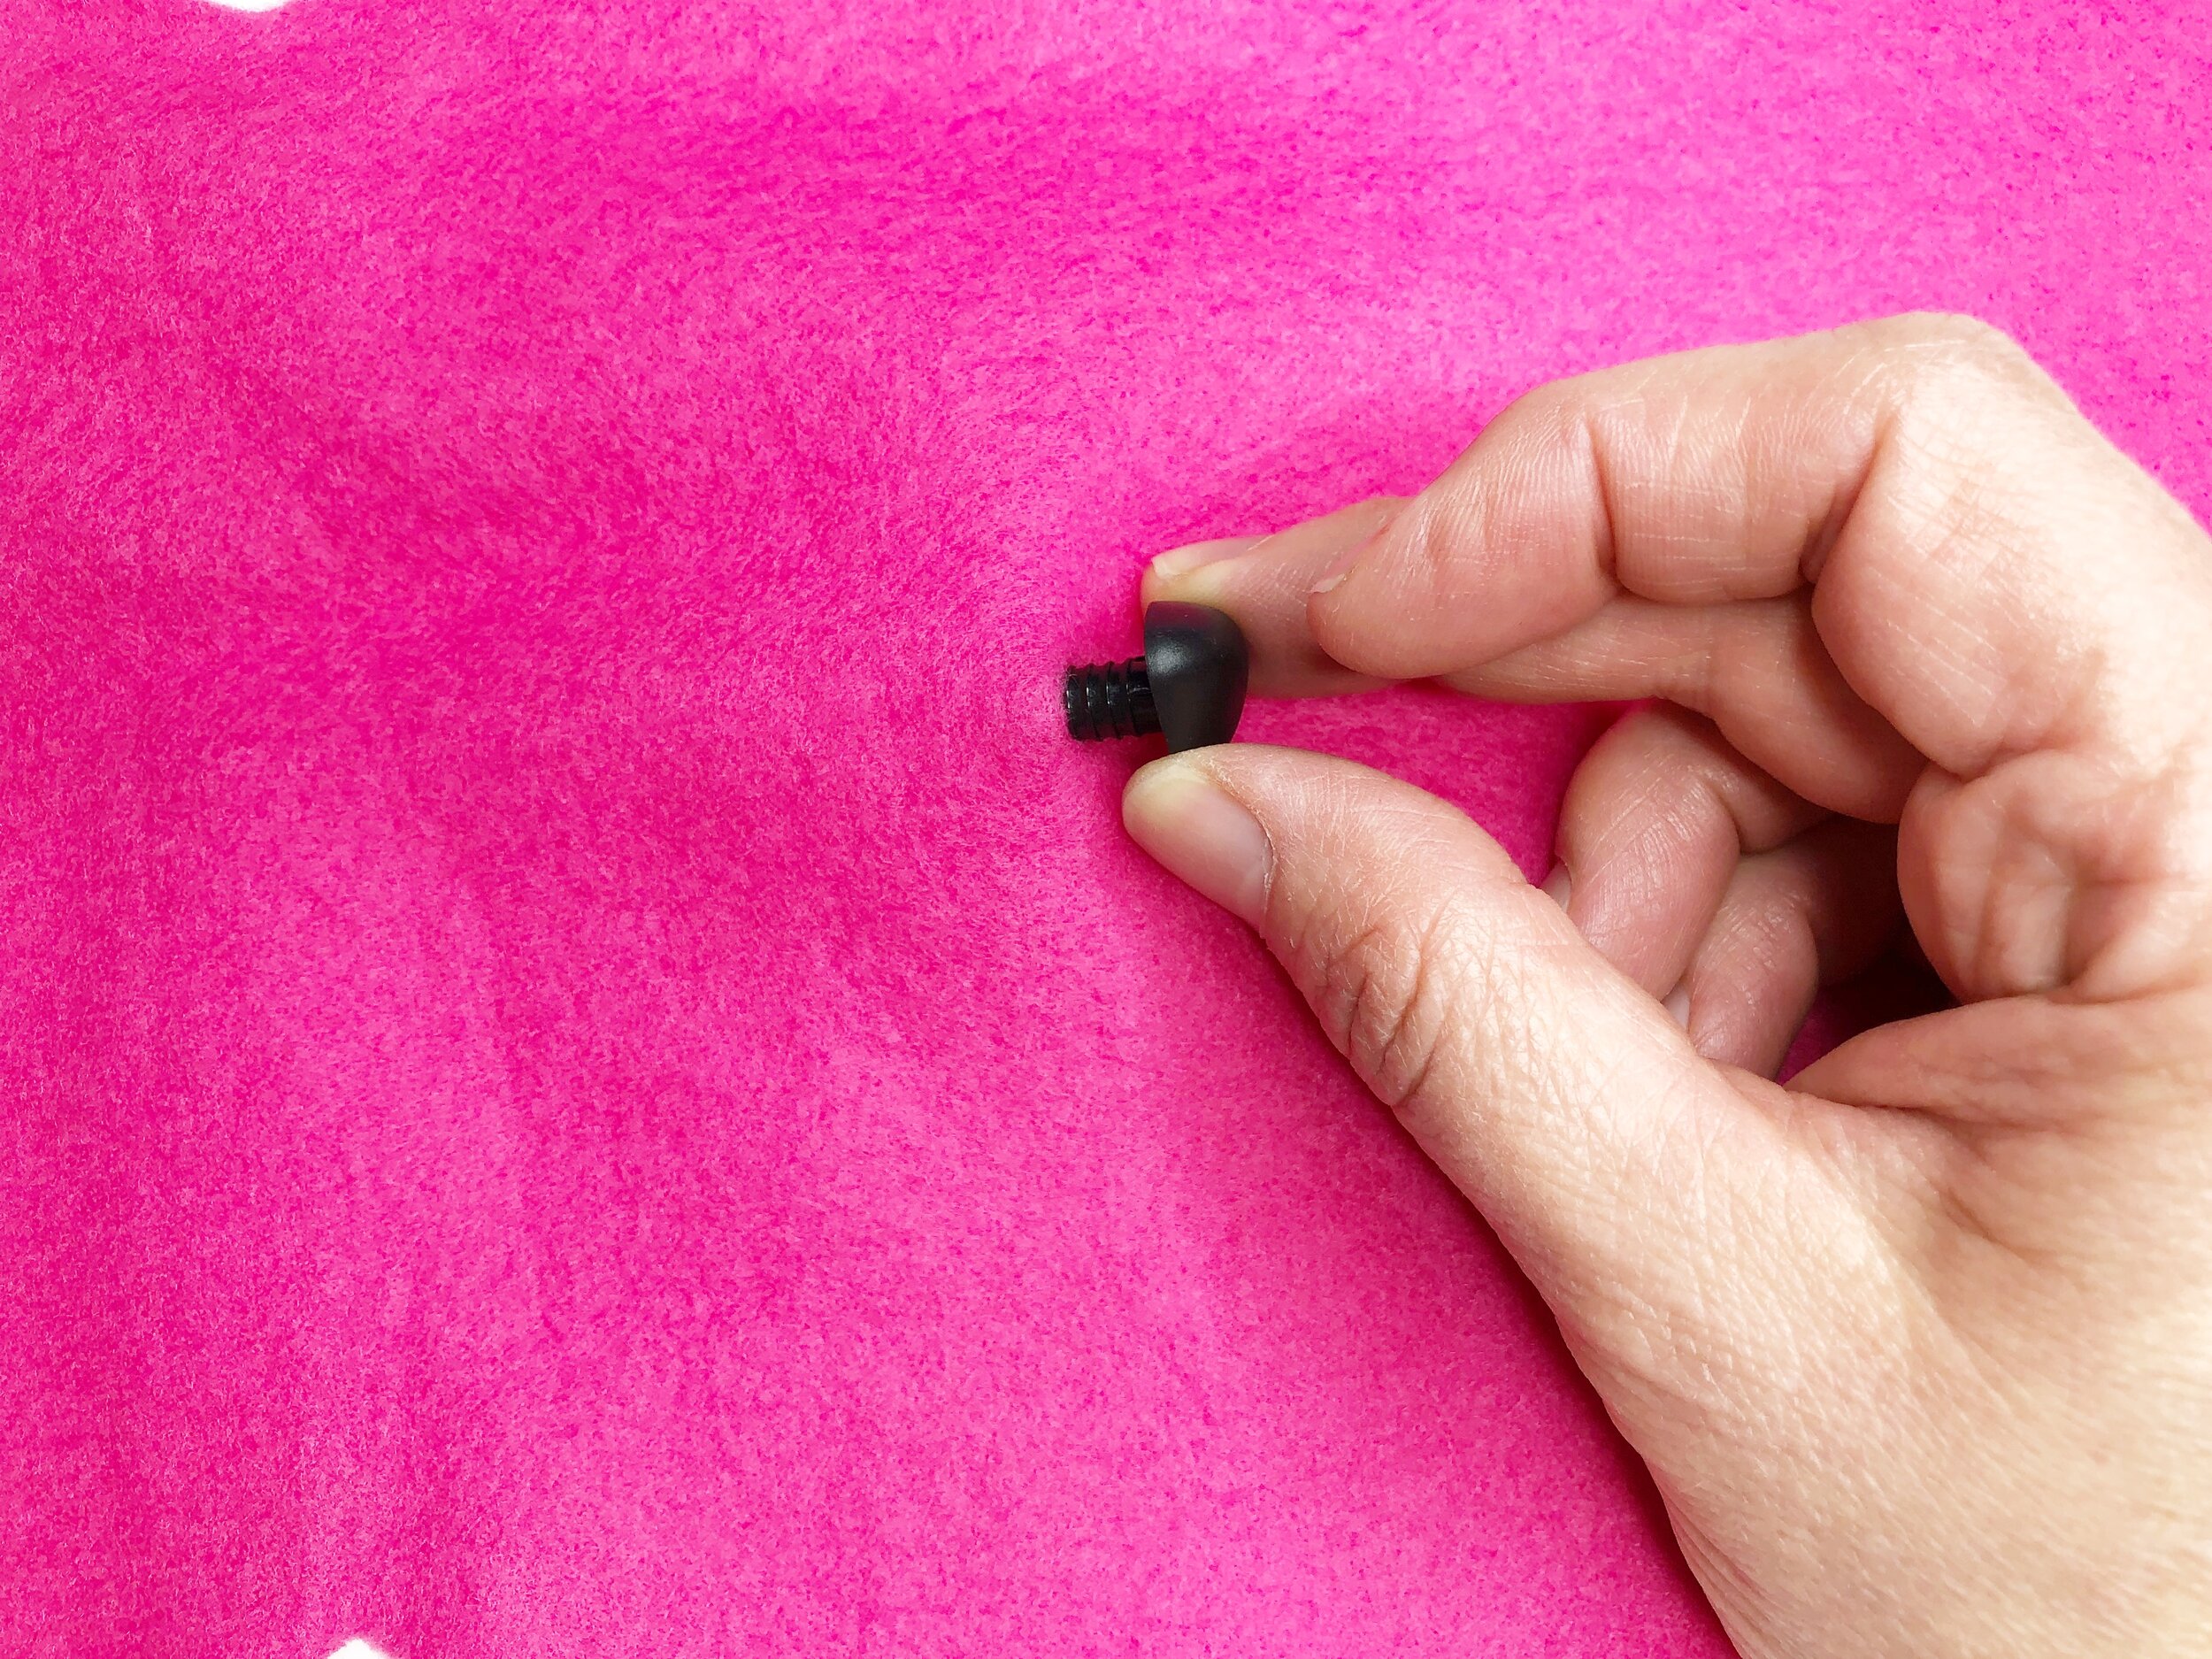
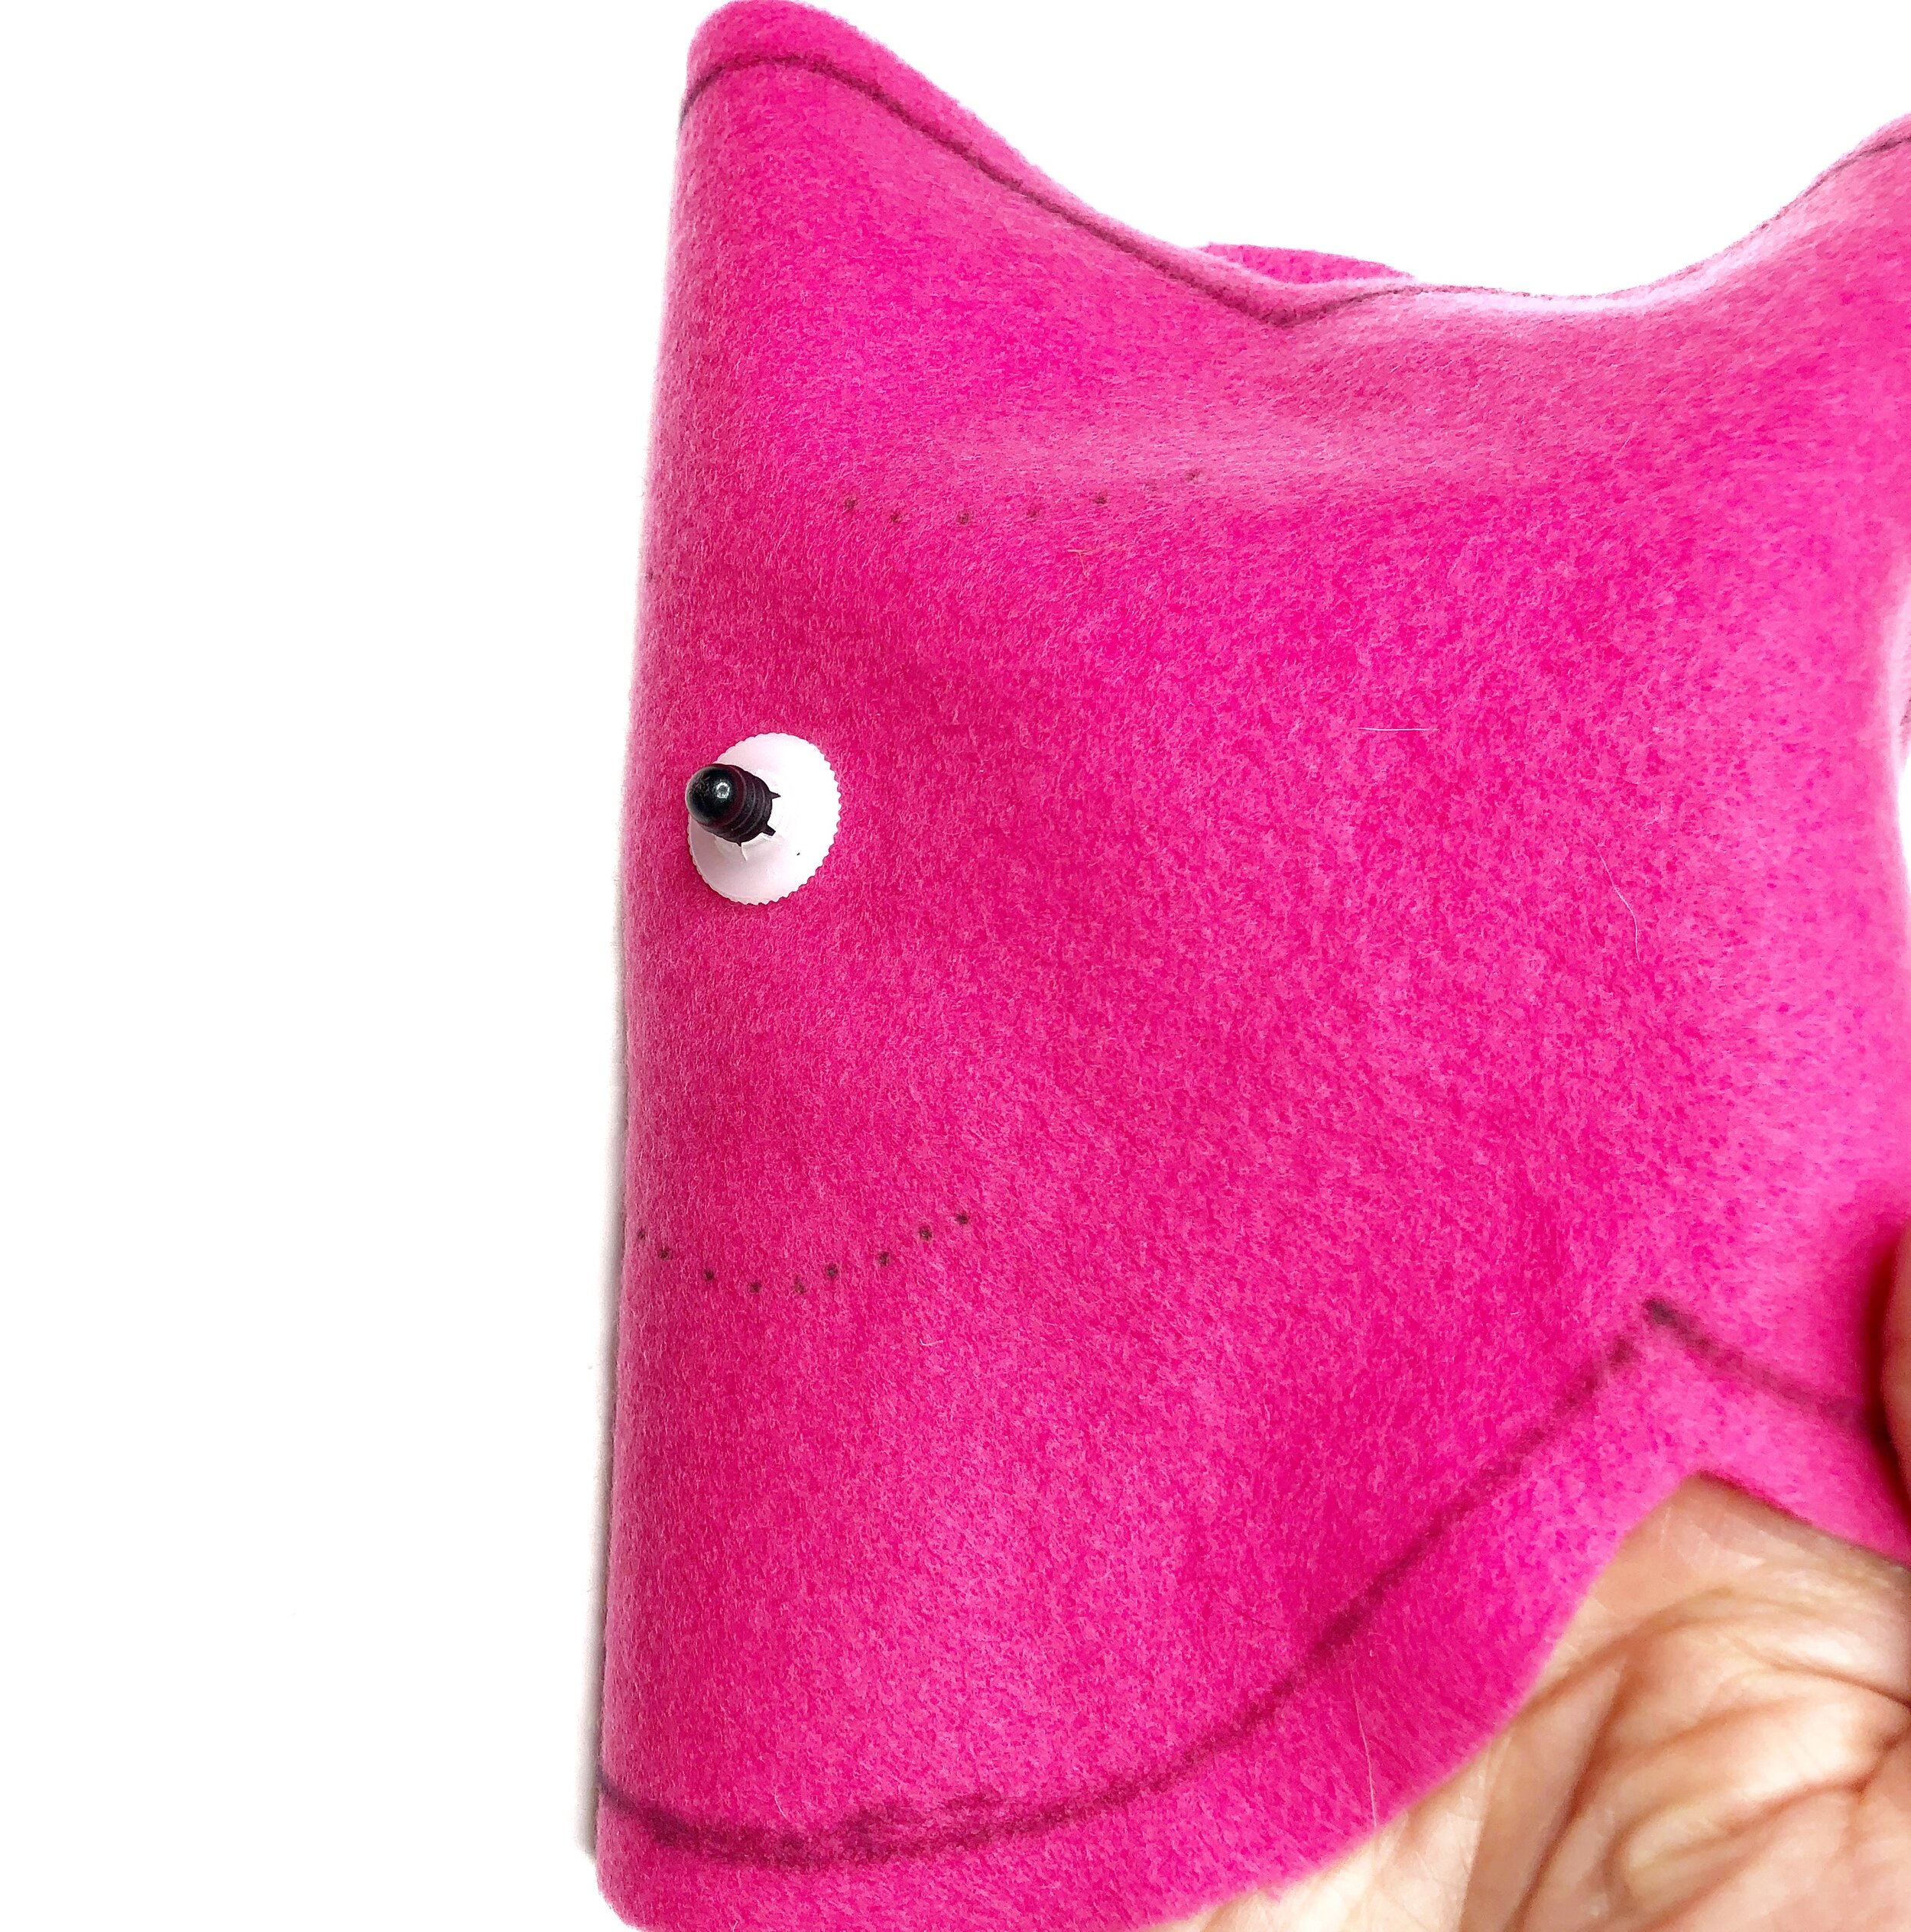
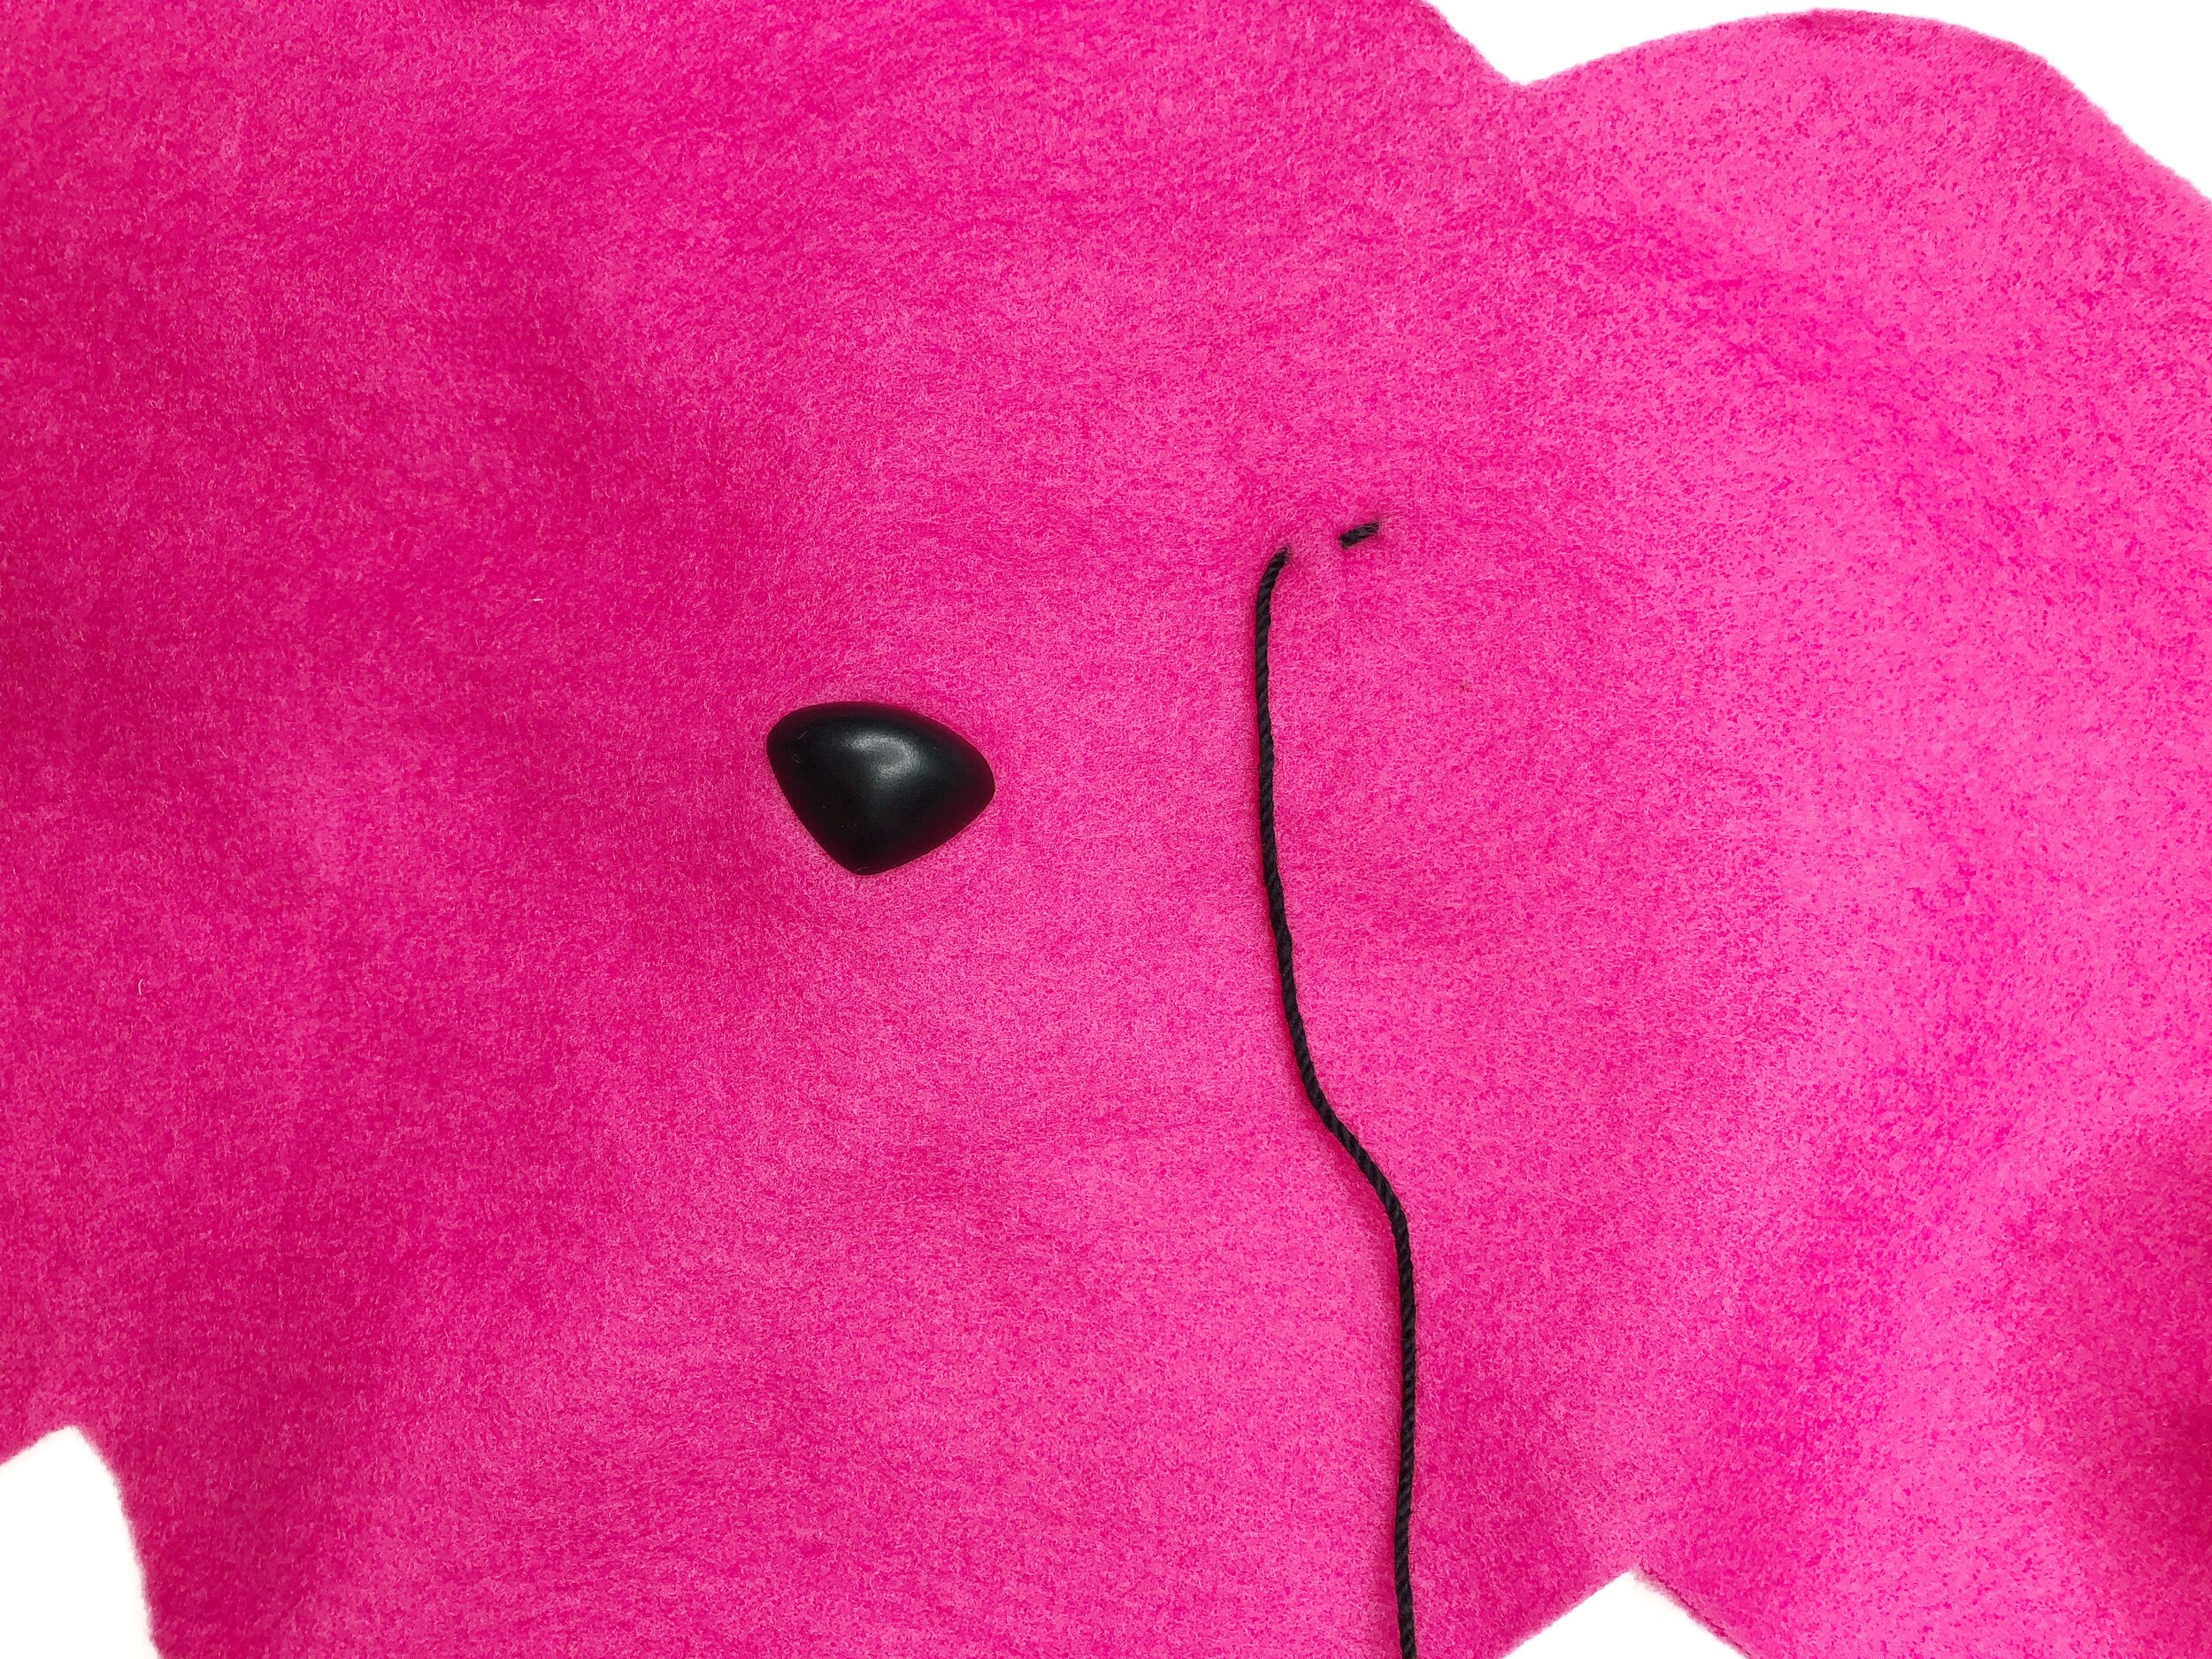
Snip a tiny hole for the nose with the edge of a pair of scissors.
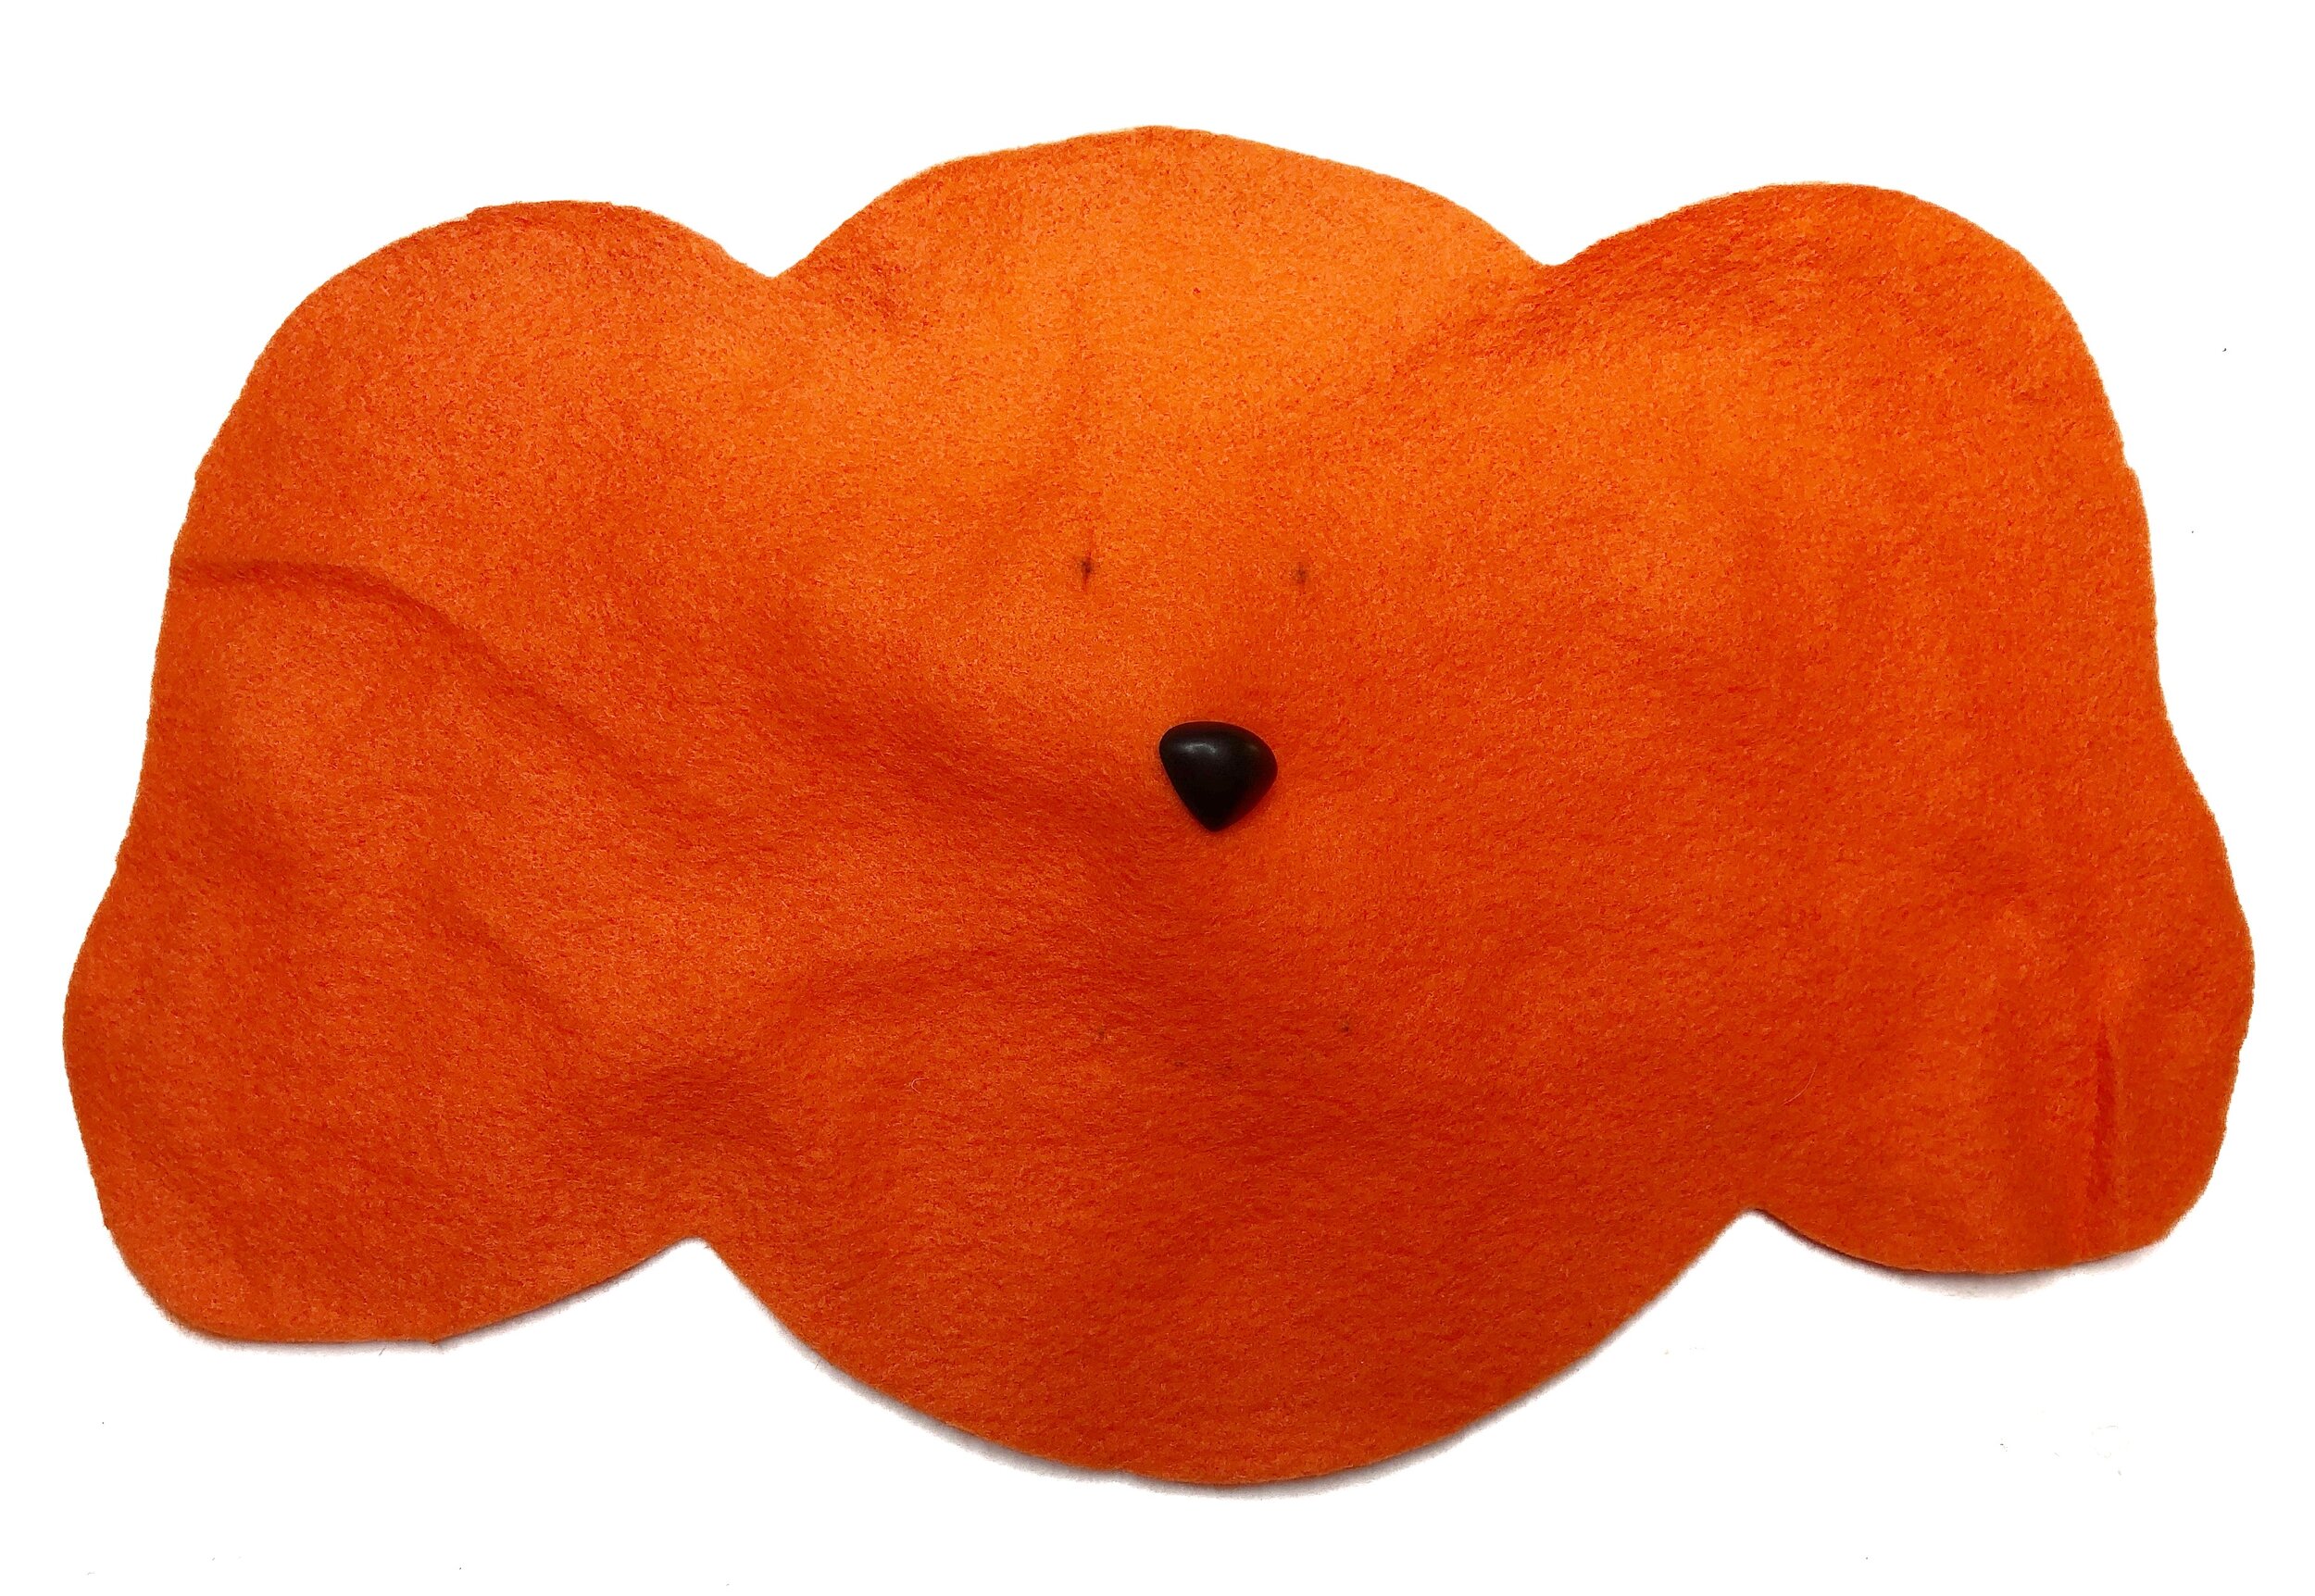
Insert plastic nose and snap into place.


Snip a tiny hole for each eye with the edge of a pair of scissors. Insert each eye on the right side of the fabric and snap into place on the wrong side.


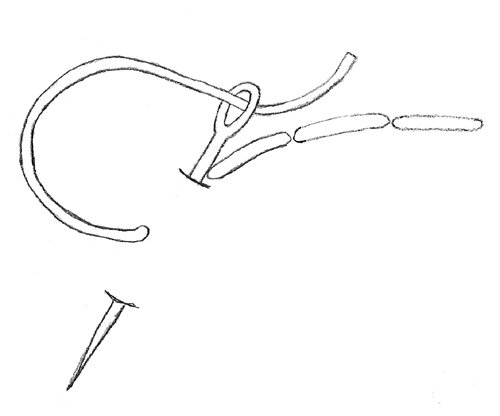
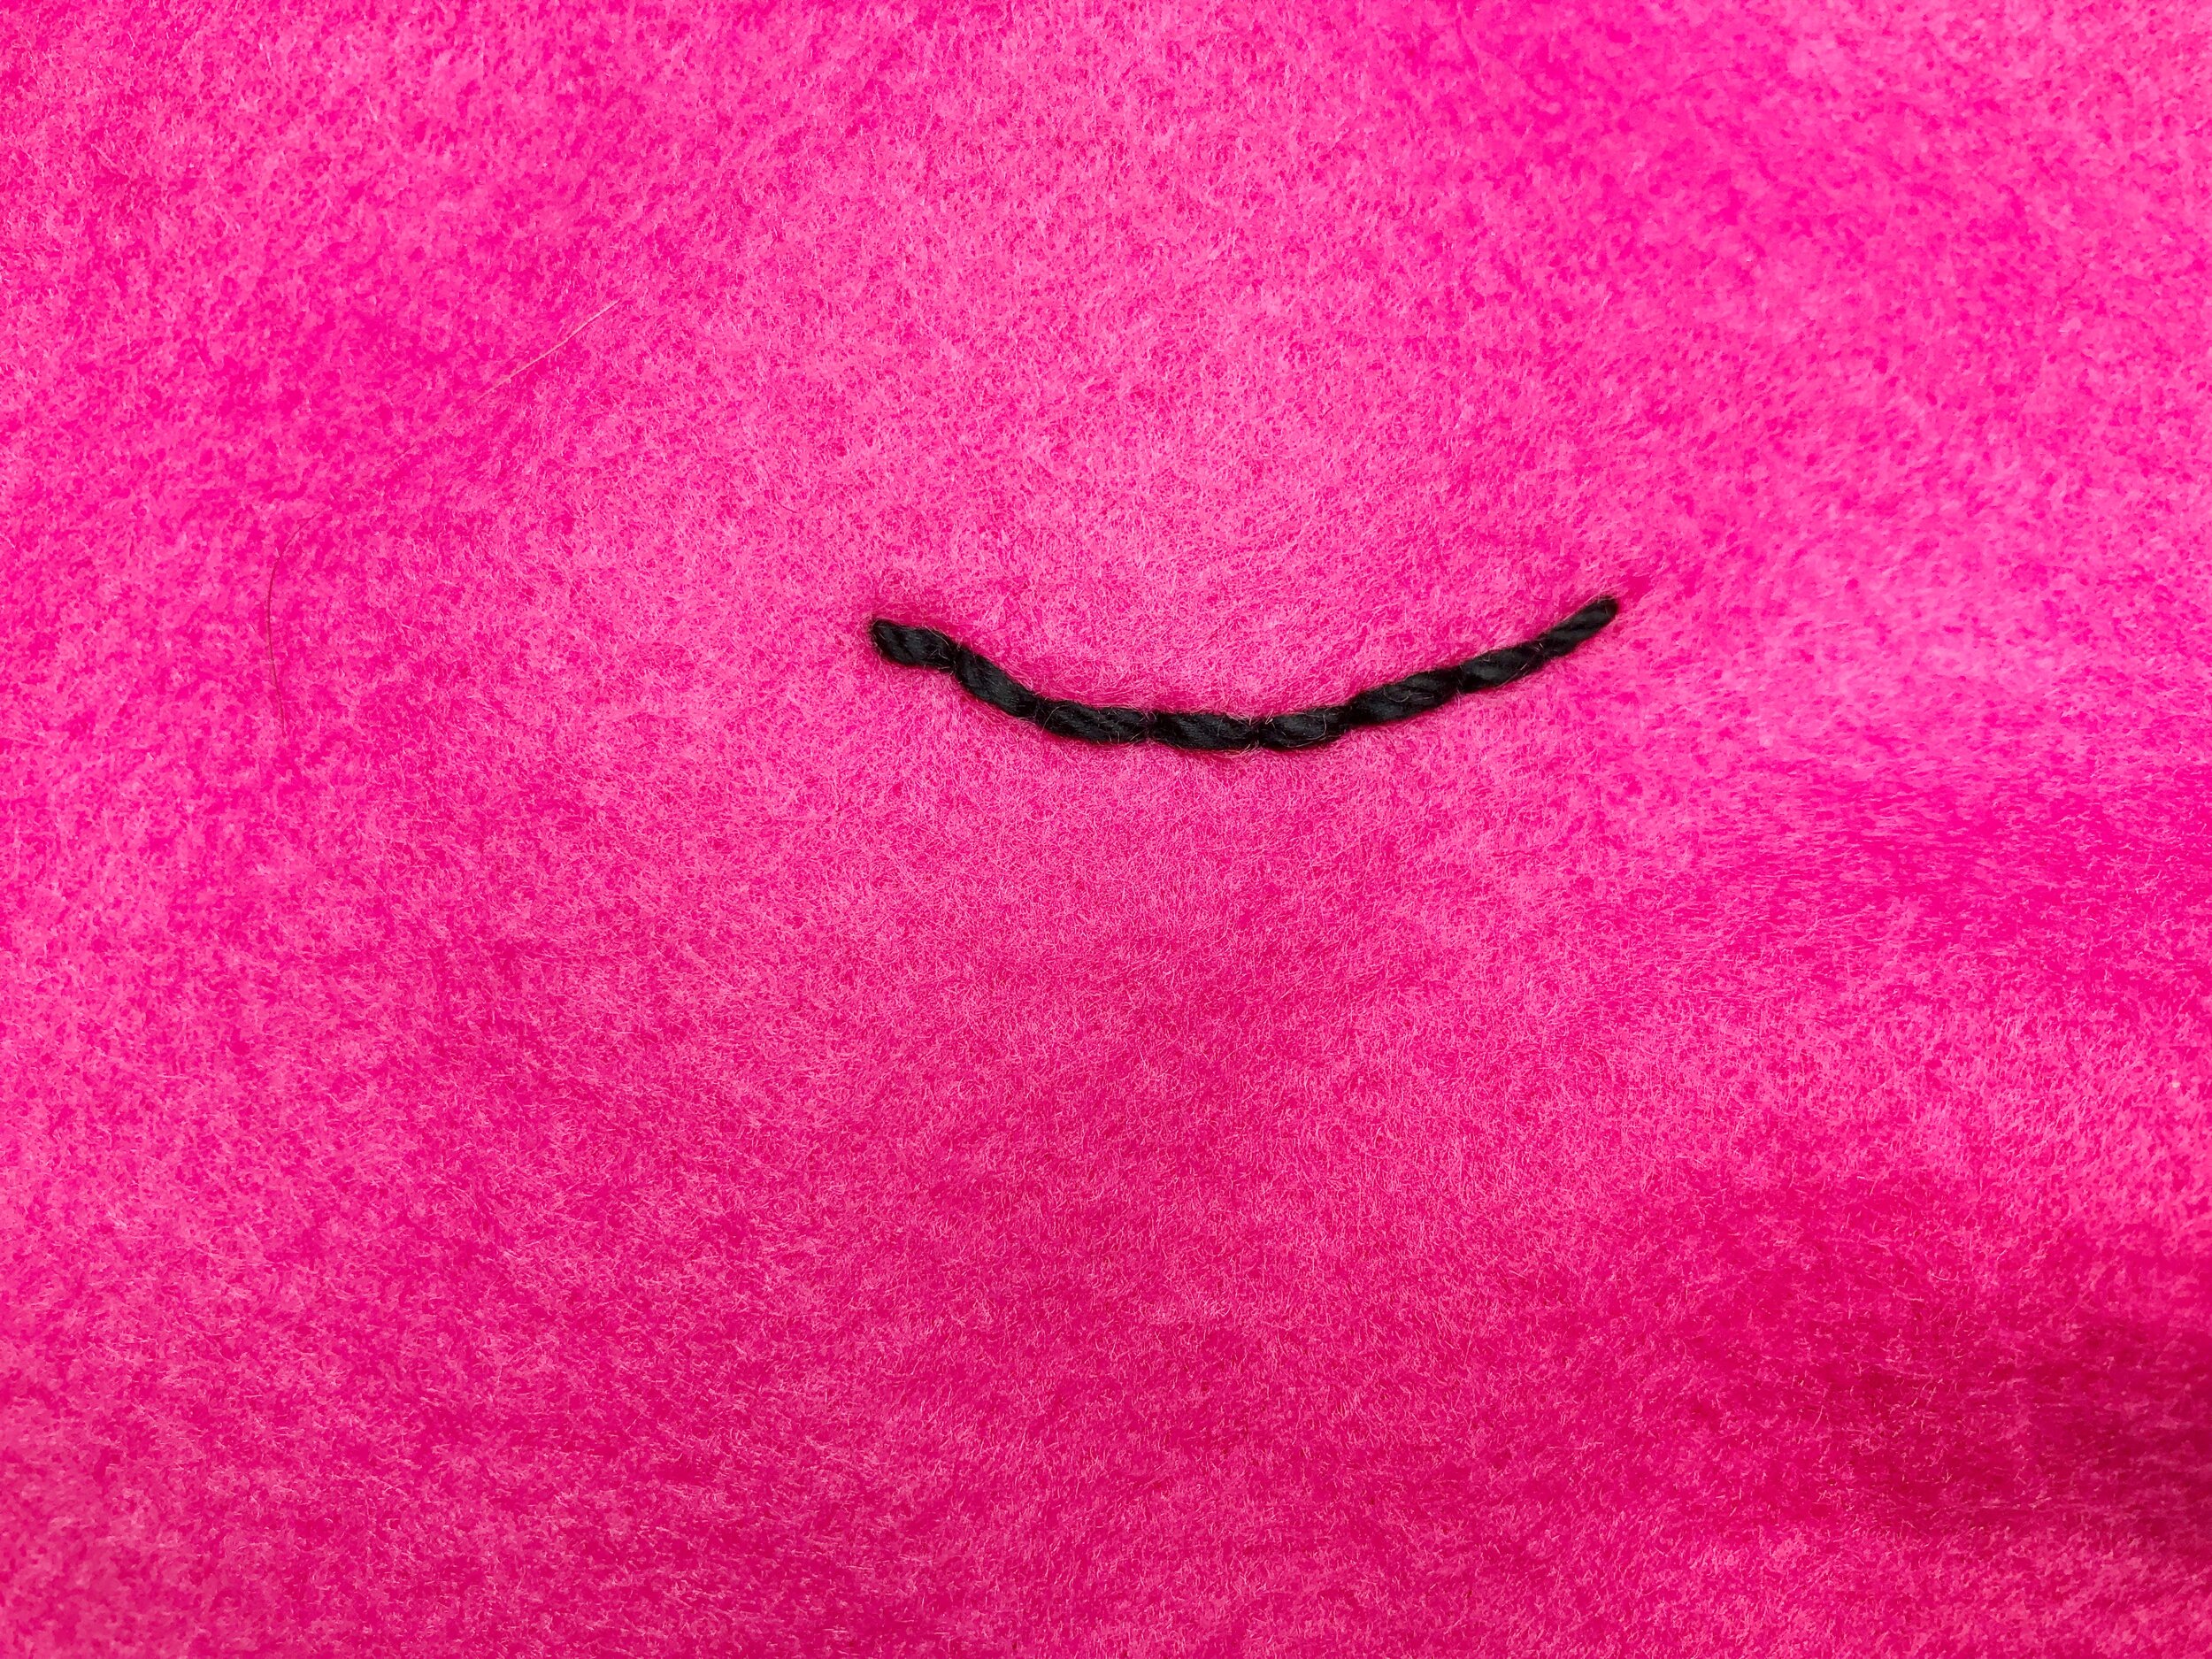
Using black embroidery floss or crotchet thread and needle, backstitch the mouth. Begin on the wrong side of the fabric and one end of the smile. Your first stitch will be forward. Click here for a backstitch tutorial.

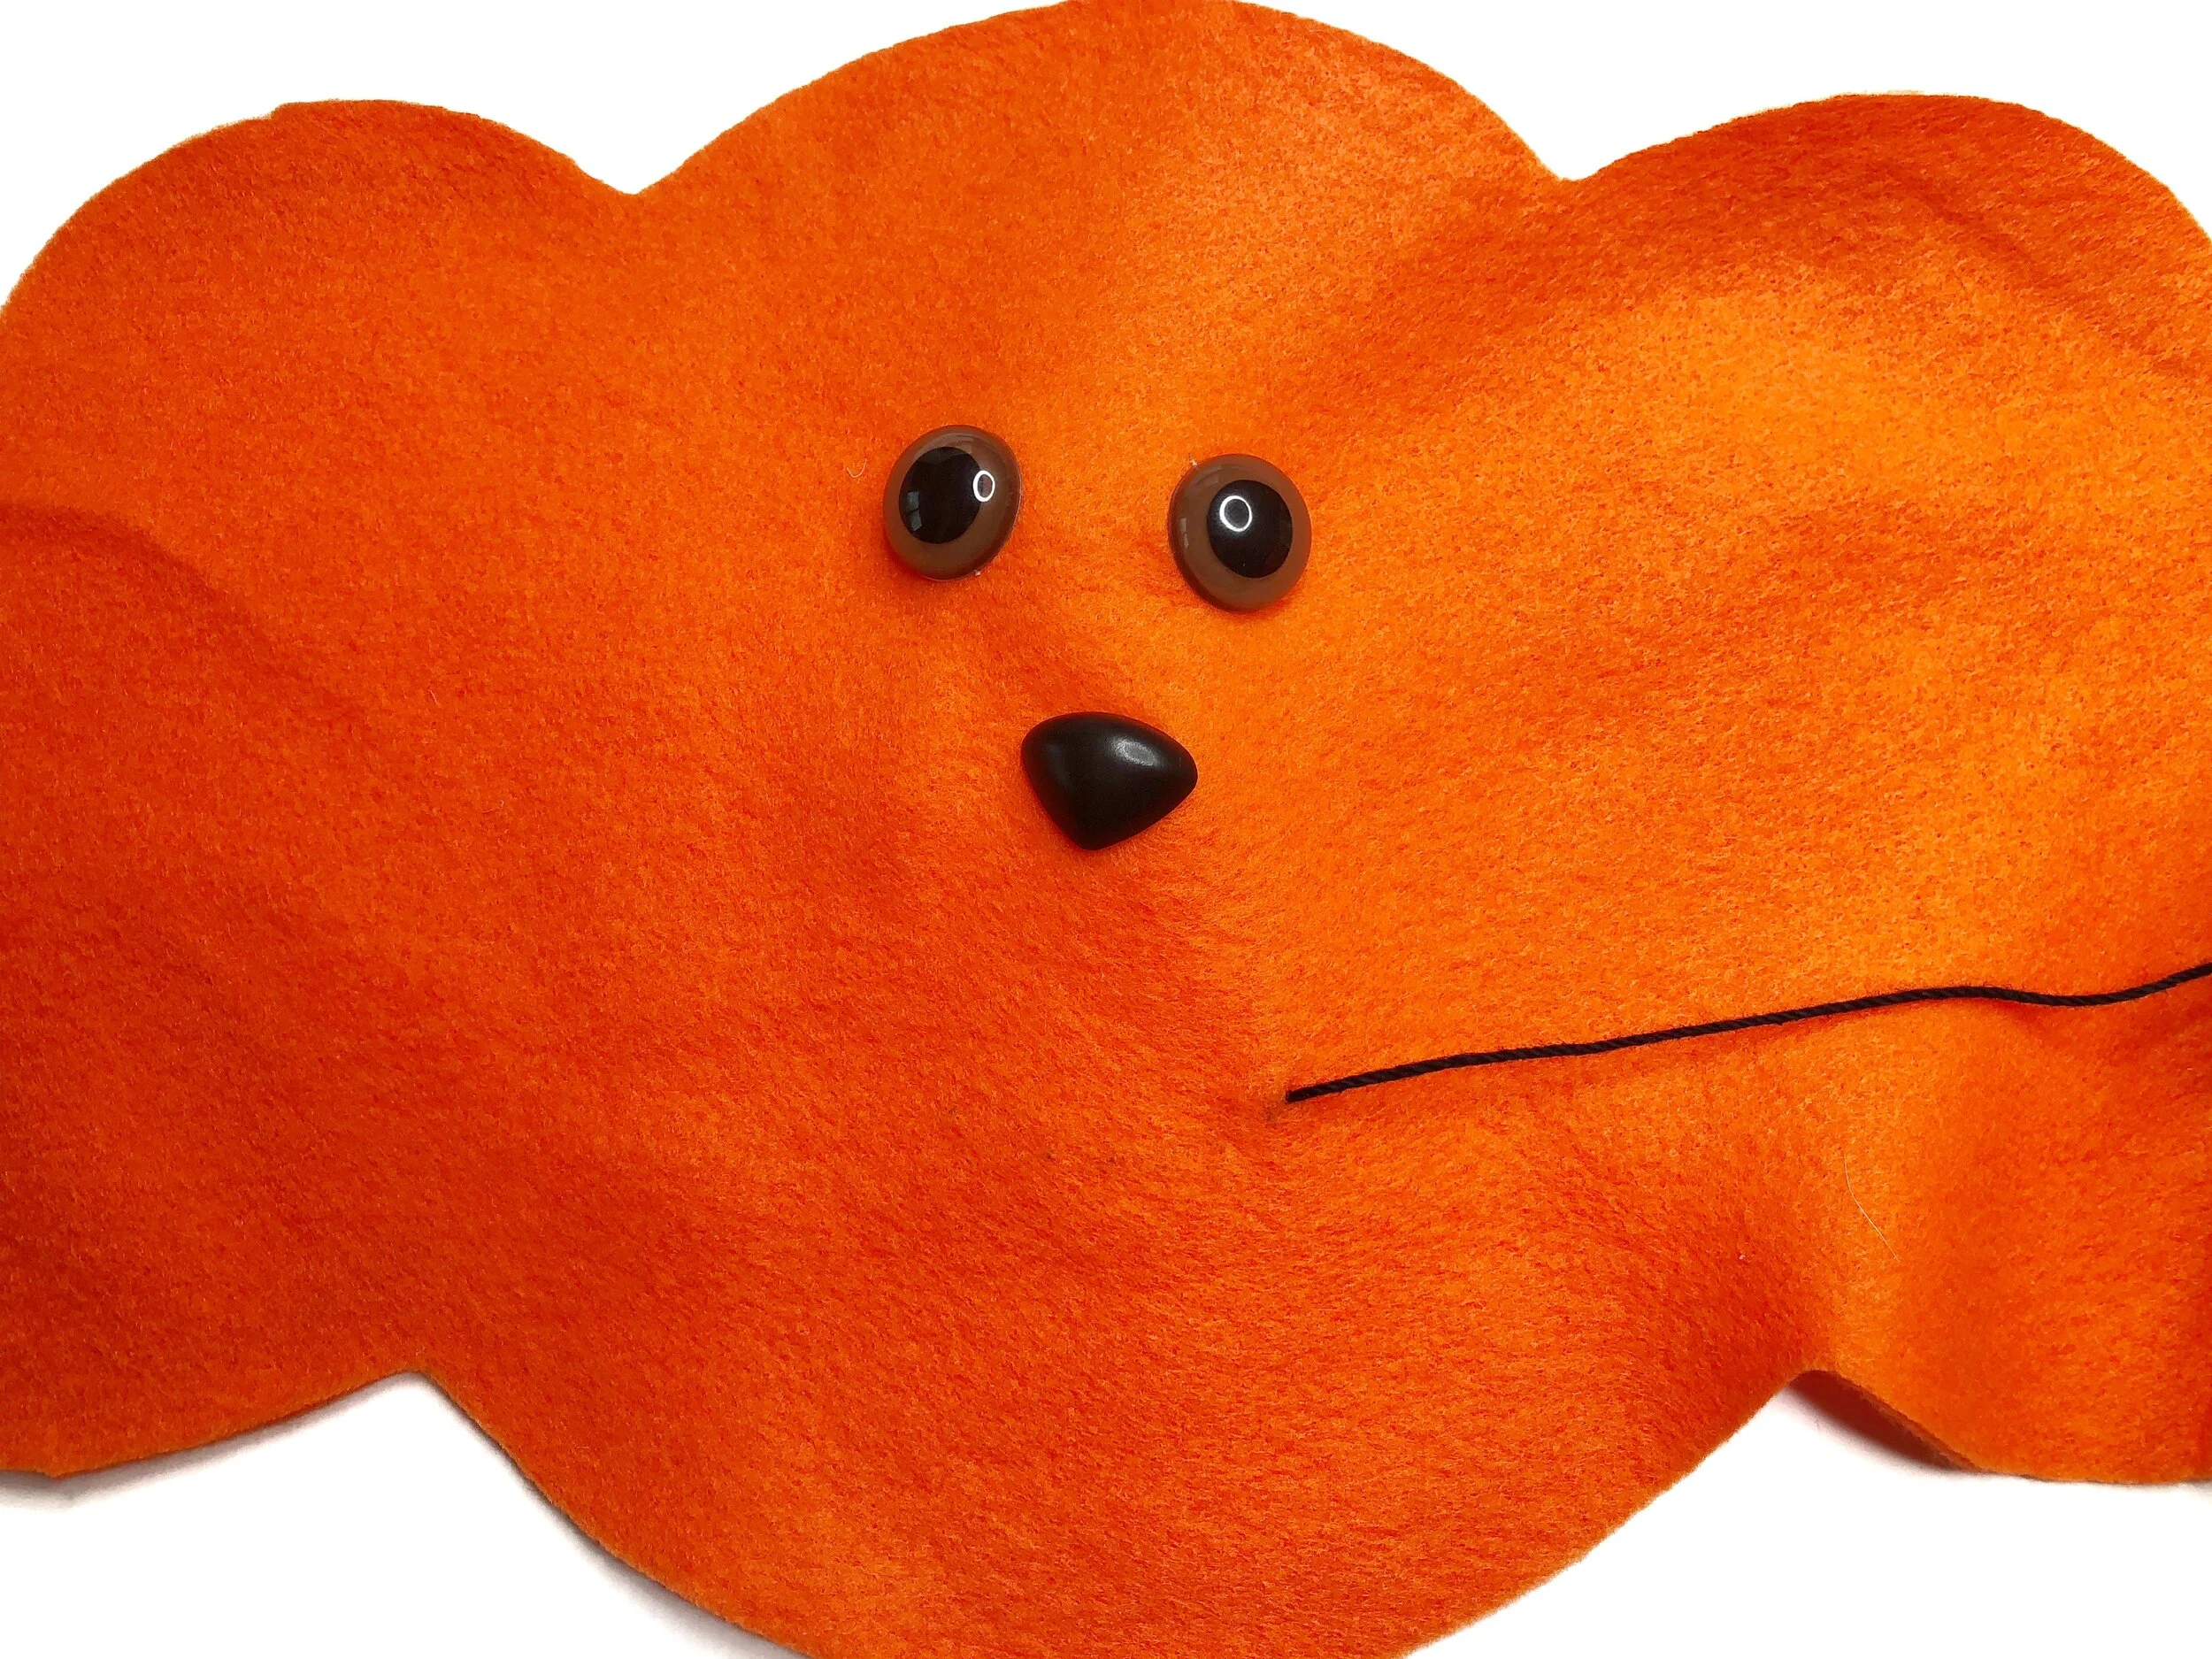
Backstitch the rest till the smile is complete.

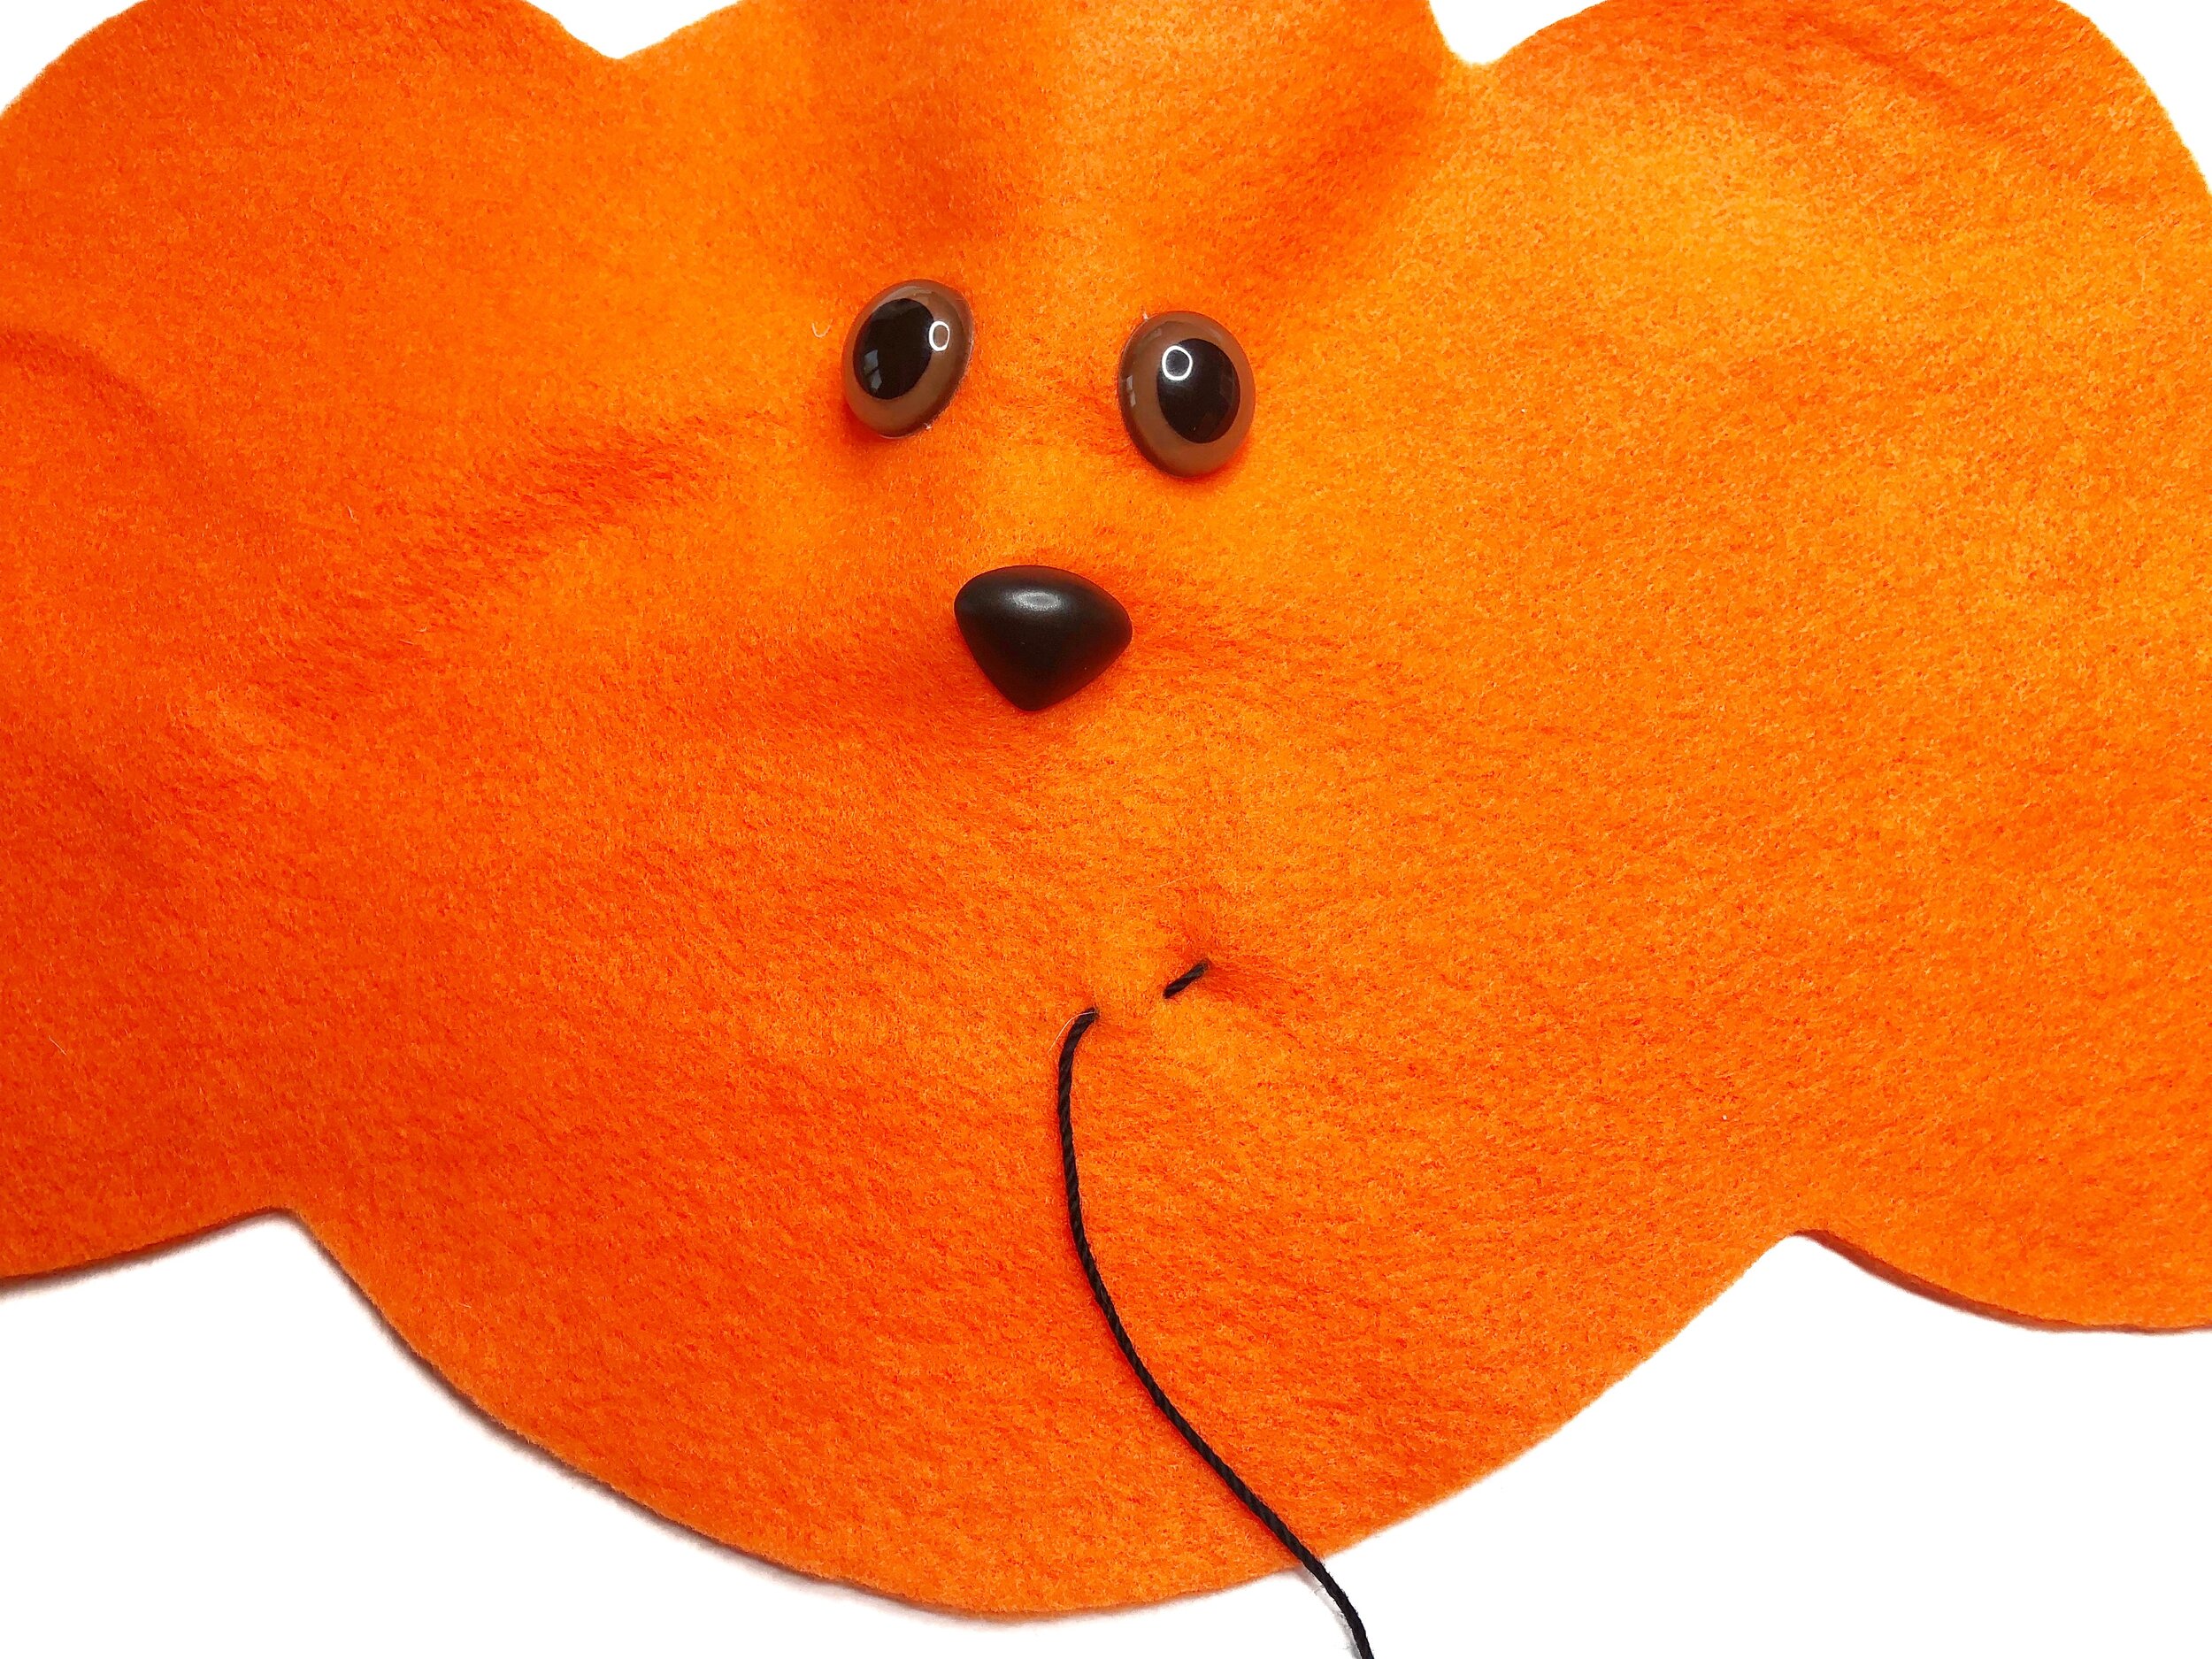
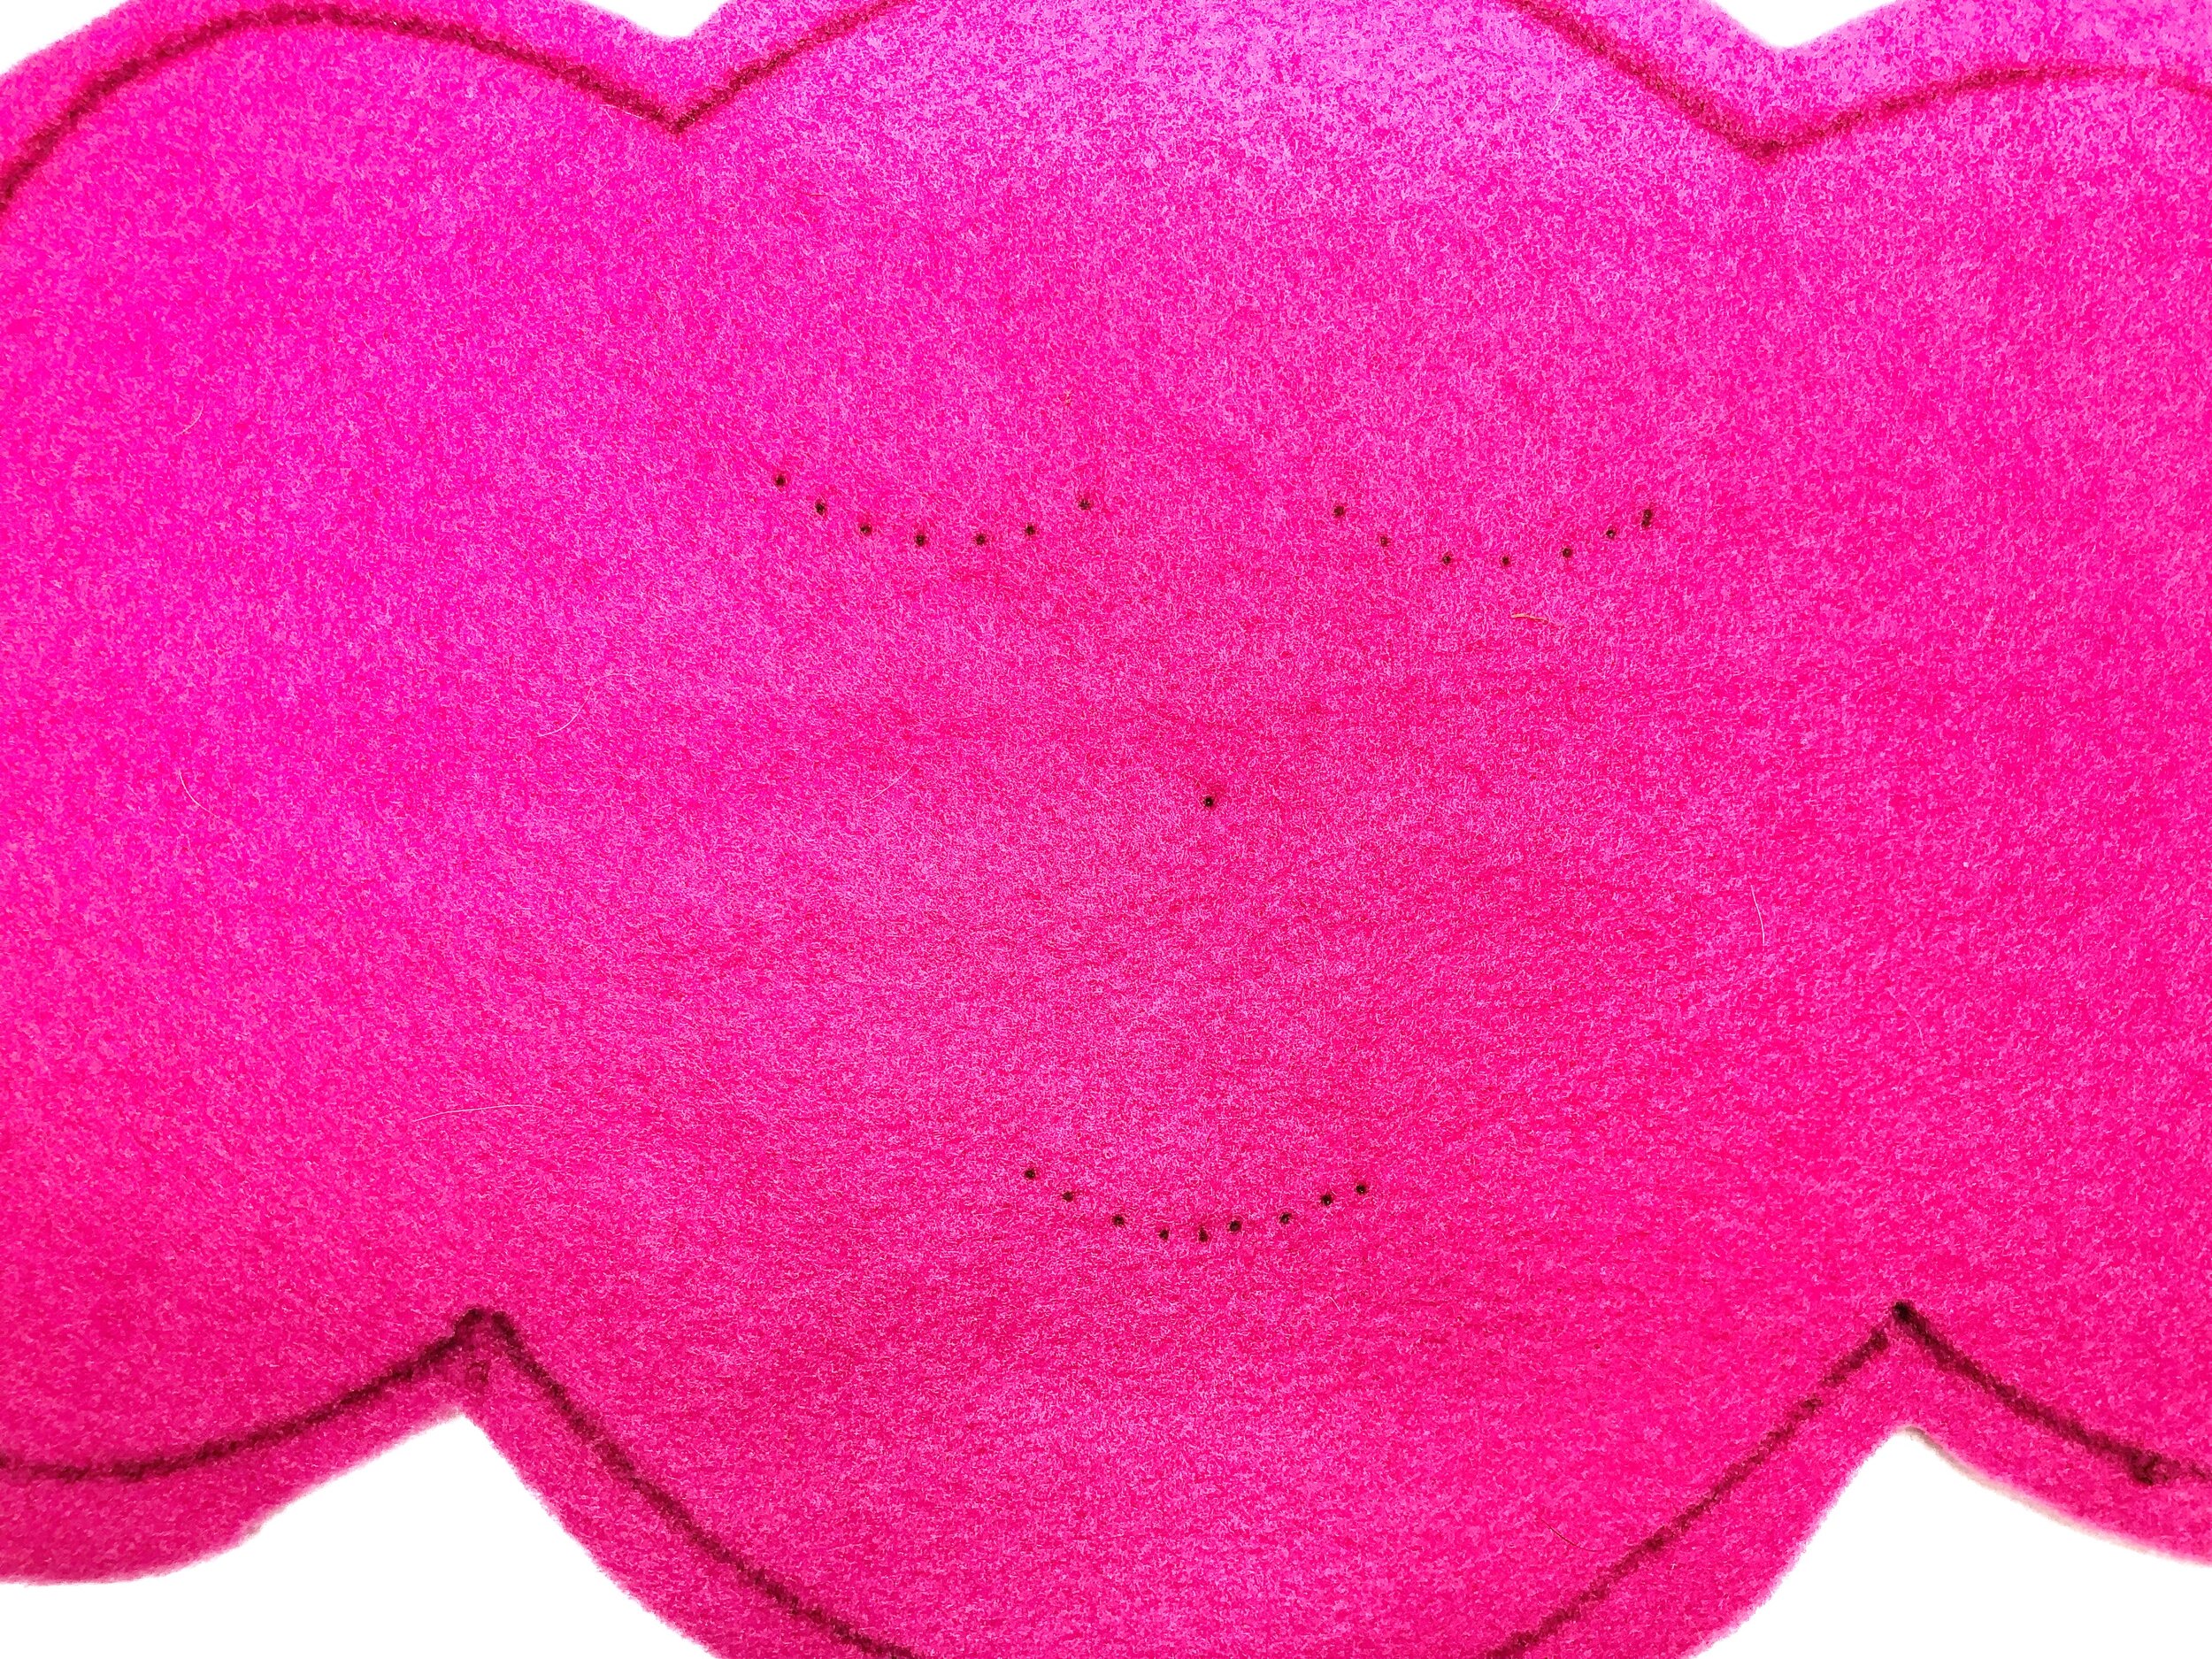
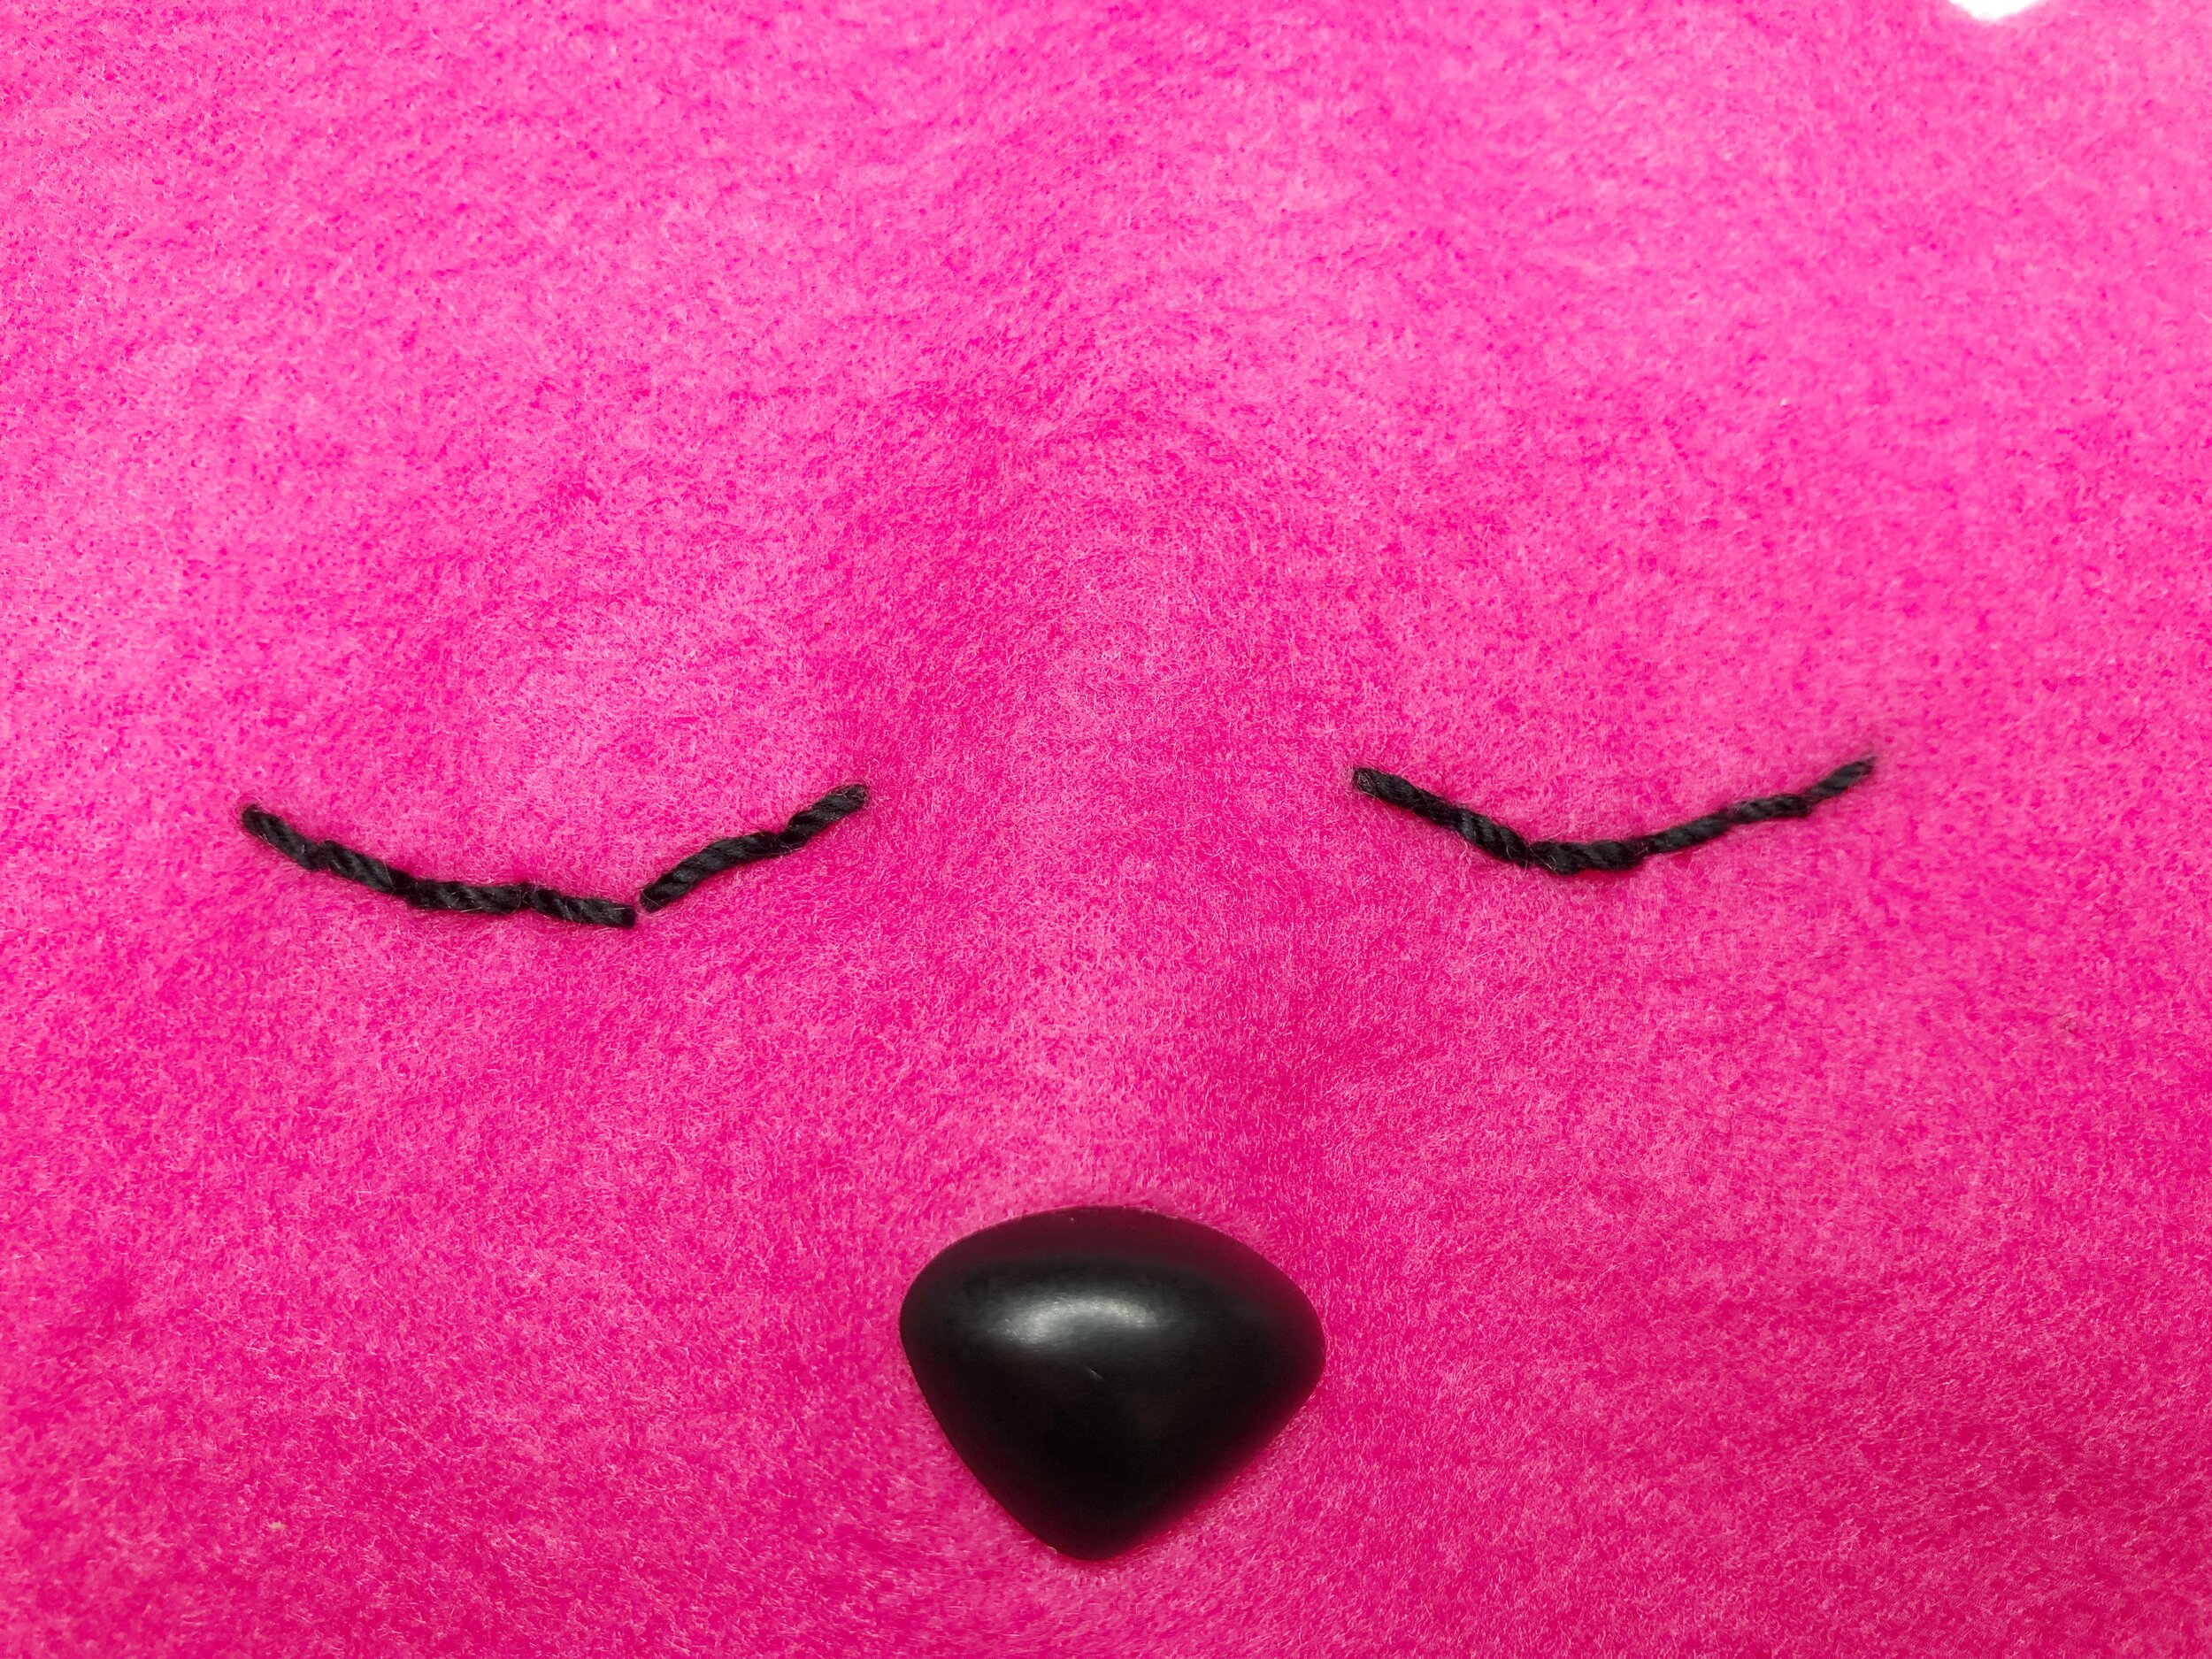
Sleeping Face
Turn one of the head fabric pieces to the right side and mark the location of the eyes, nose and mouth on the outside of the face. To do this, pin the paper pattern to one of the head fabric pieces. Poke holes through the paper pattern at the location of the nose and along the eyes and mouth with a large needle. Mark a dot through each hole onto the fabric using a pencil or thin marker. Remove the paper pattern. The marks will be a guide to creating the face.
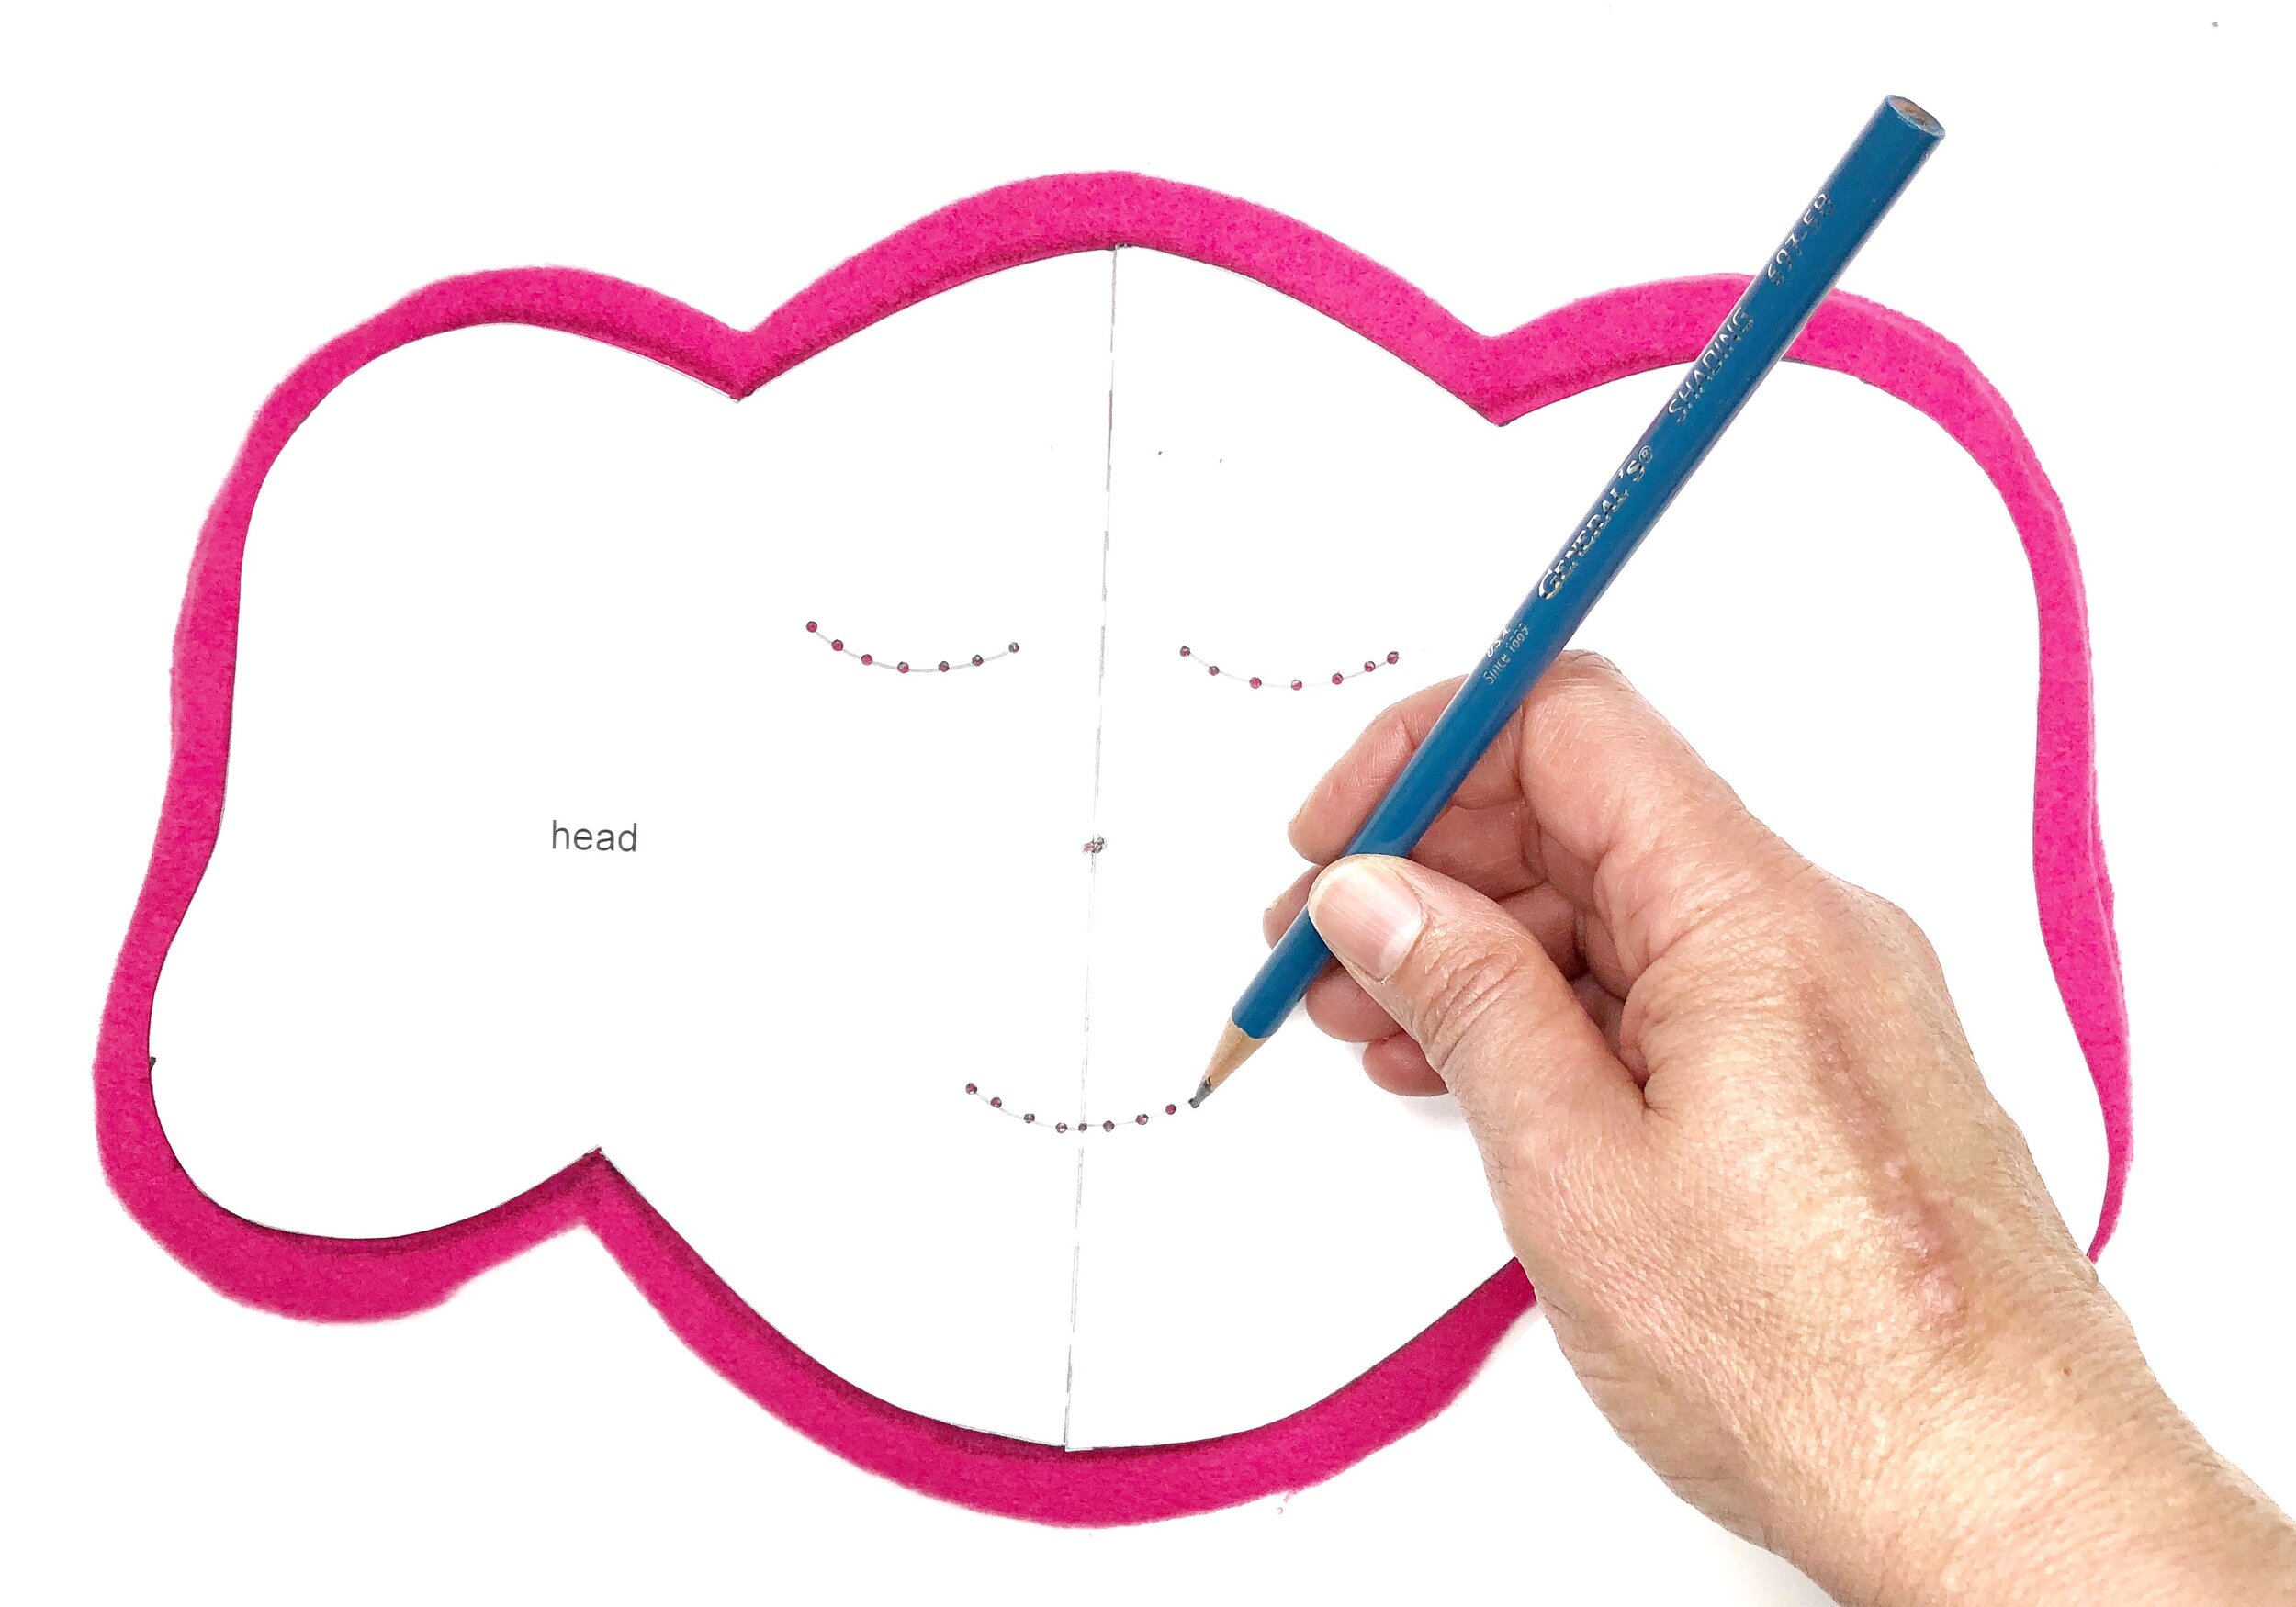
Snip a tiny hole for the nose with the edge of a pair of scissors.
Insert plastic nose and snap into place.

Using embroidery floss and a needle, backstitch the mouth and eyes. Begin on the wrong side of the fabric at one end of the smile. Your first stitch will be forward. Backstitch the rest till the smile is complete. Click here for a backstitch tutorial.

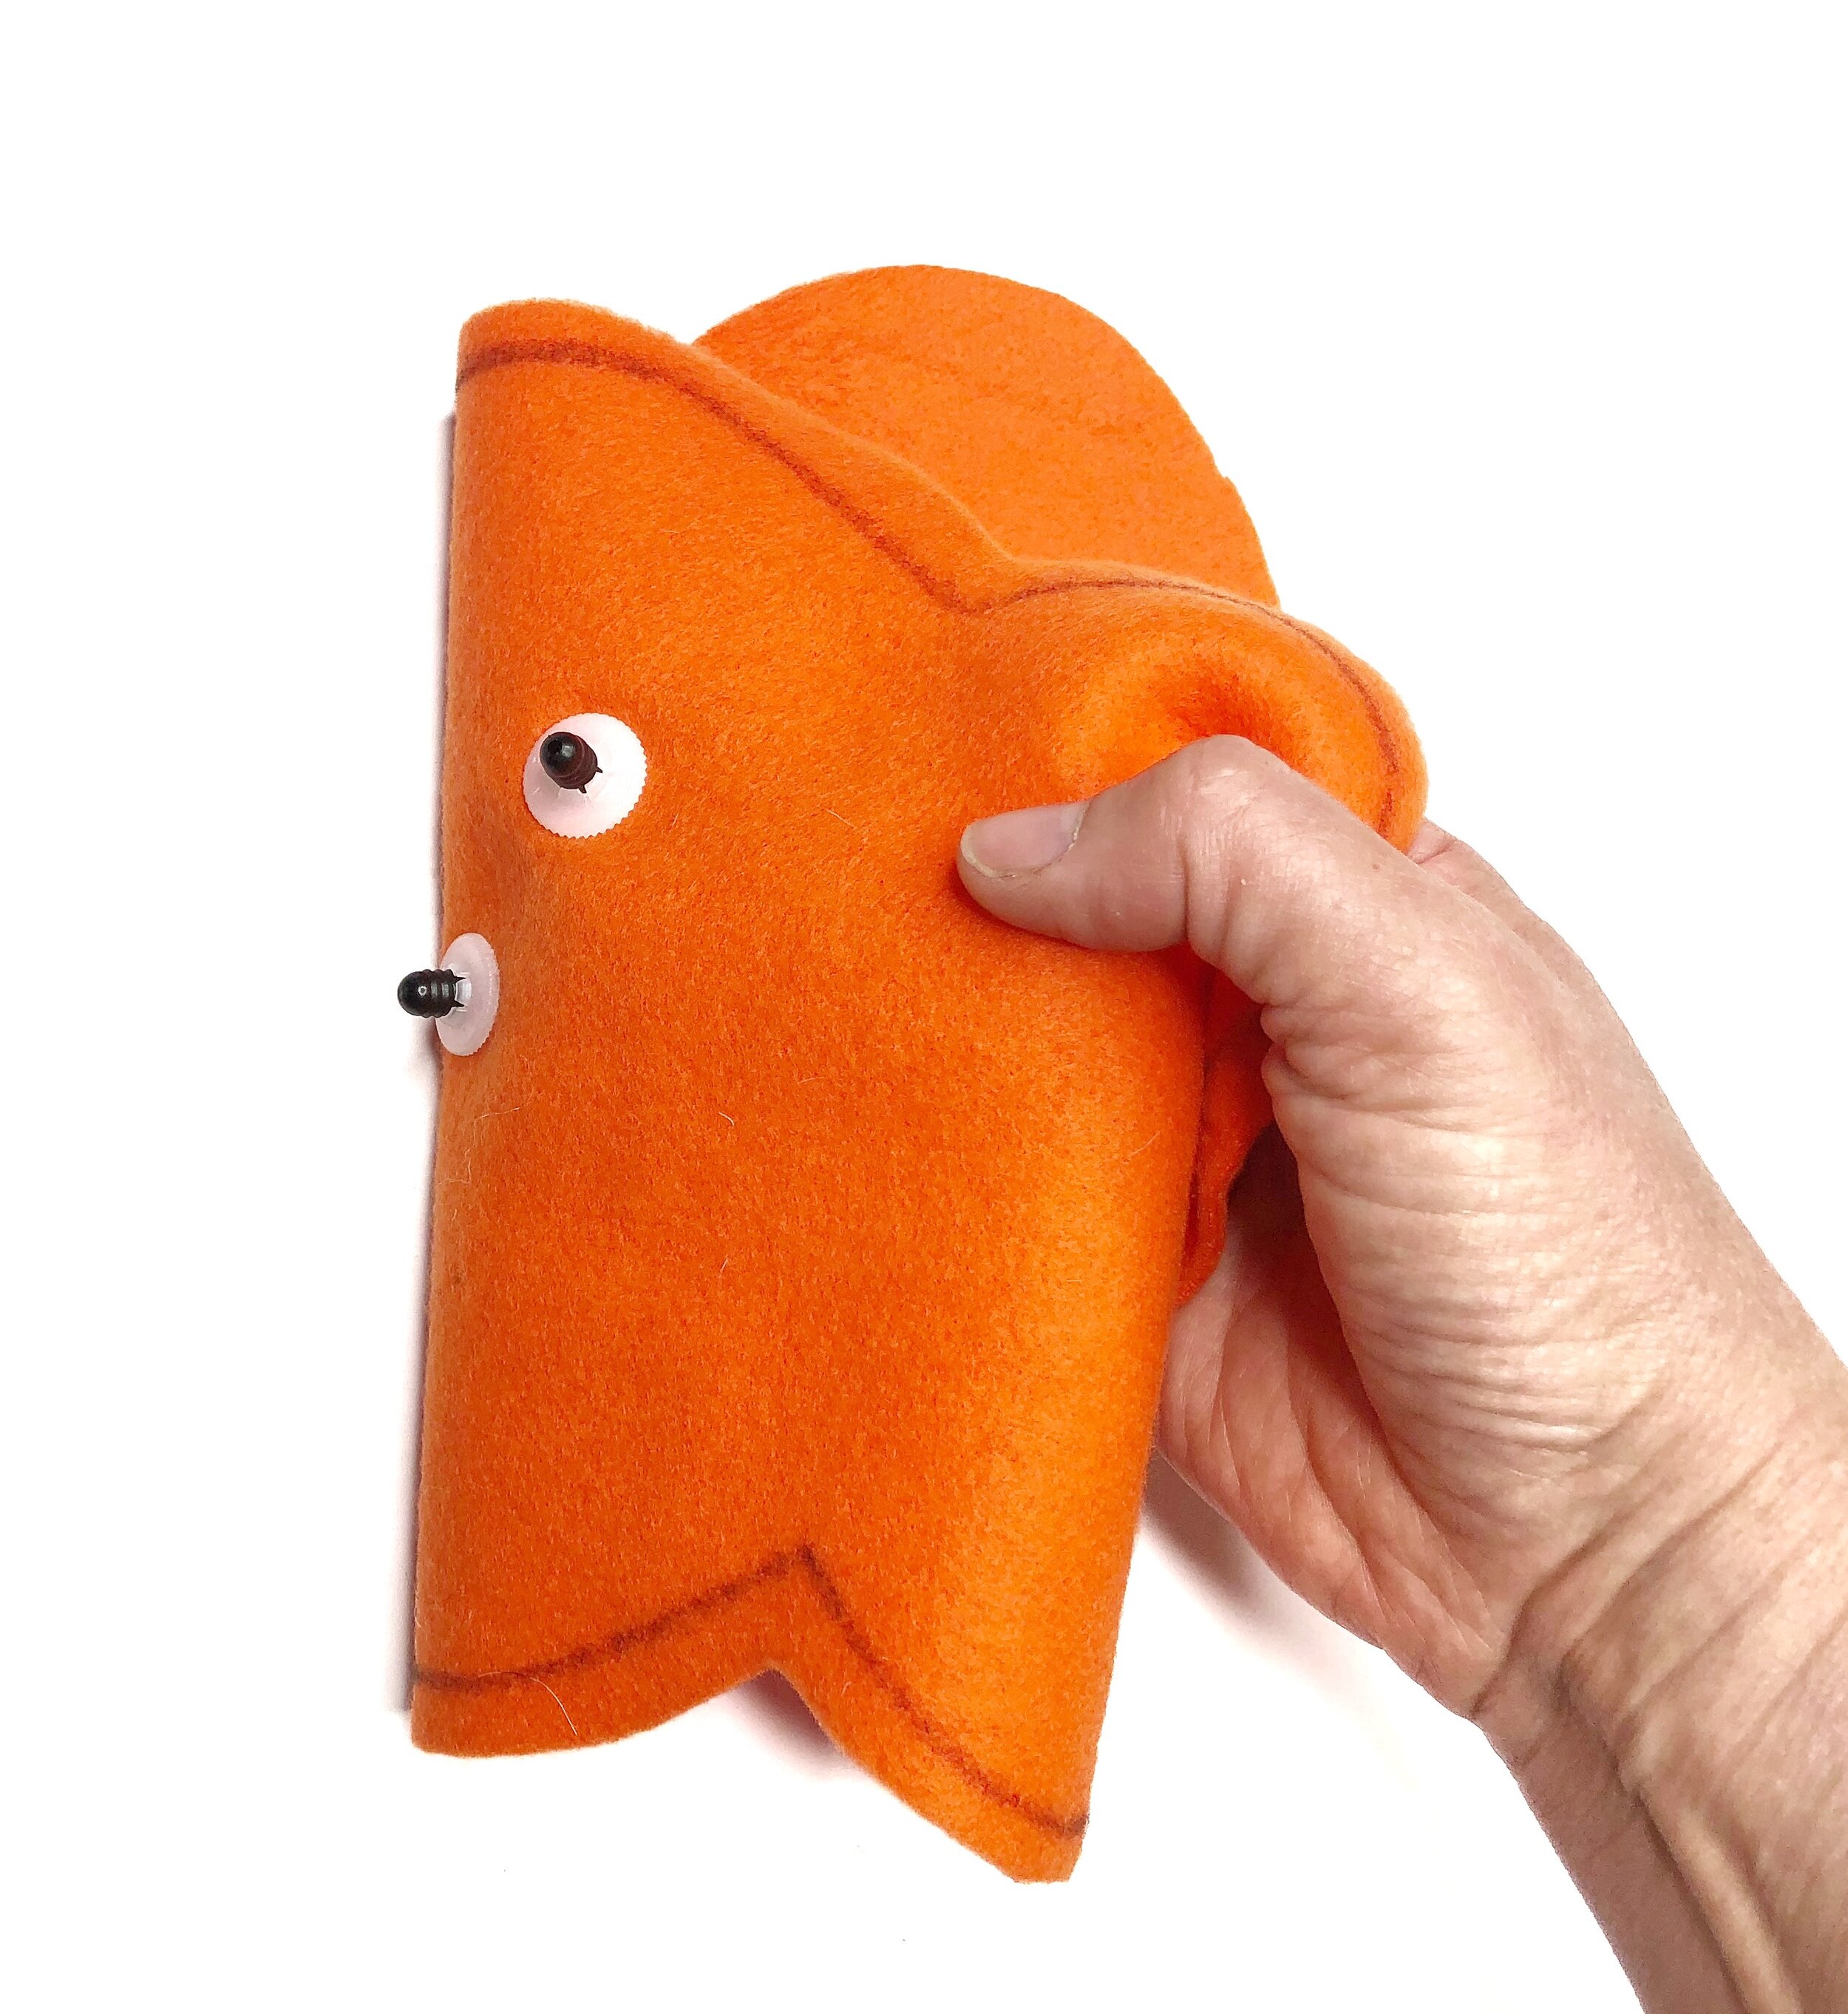
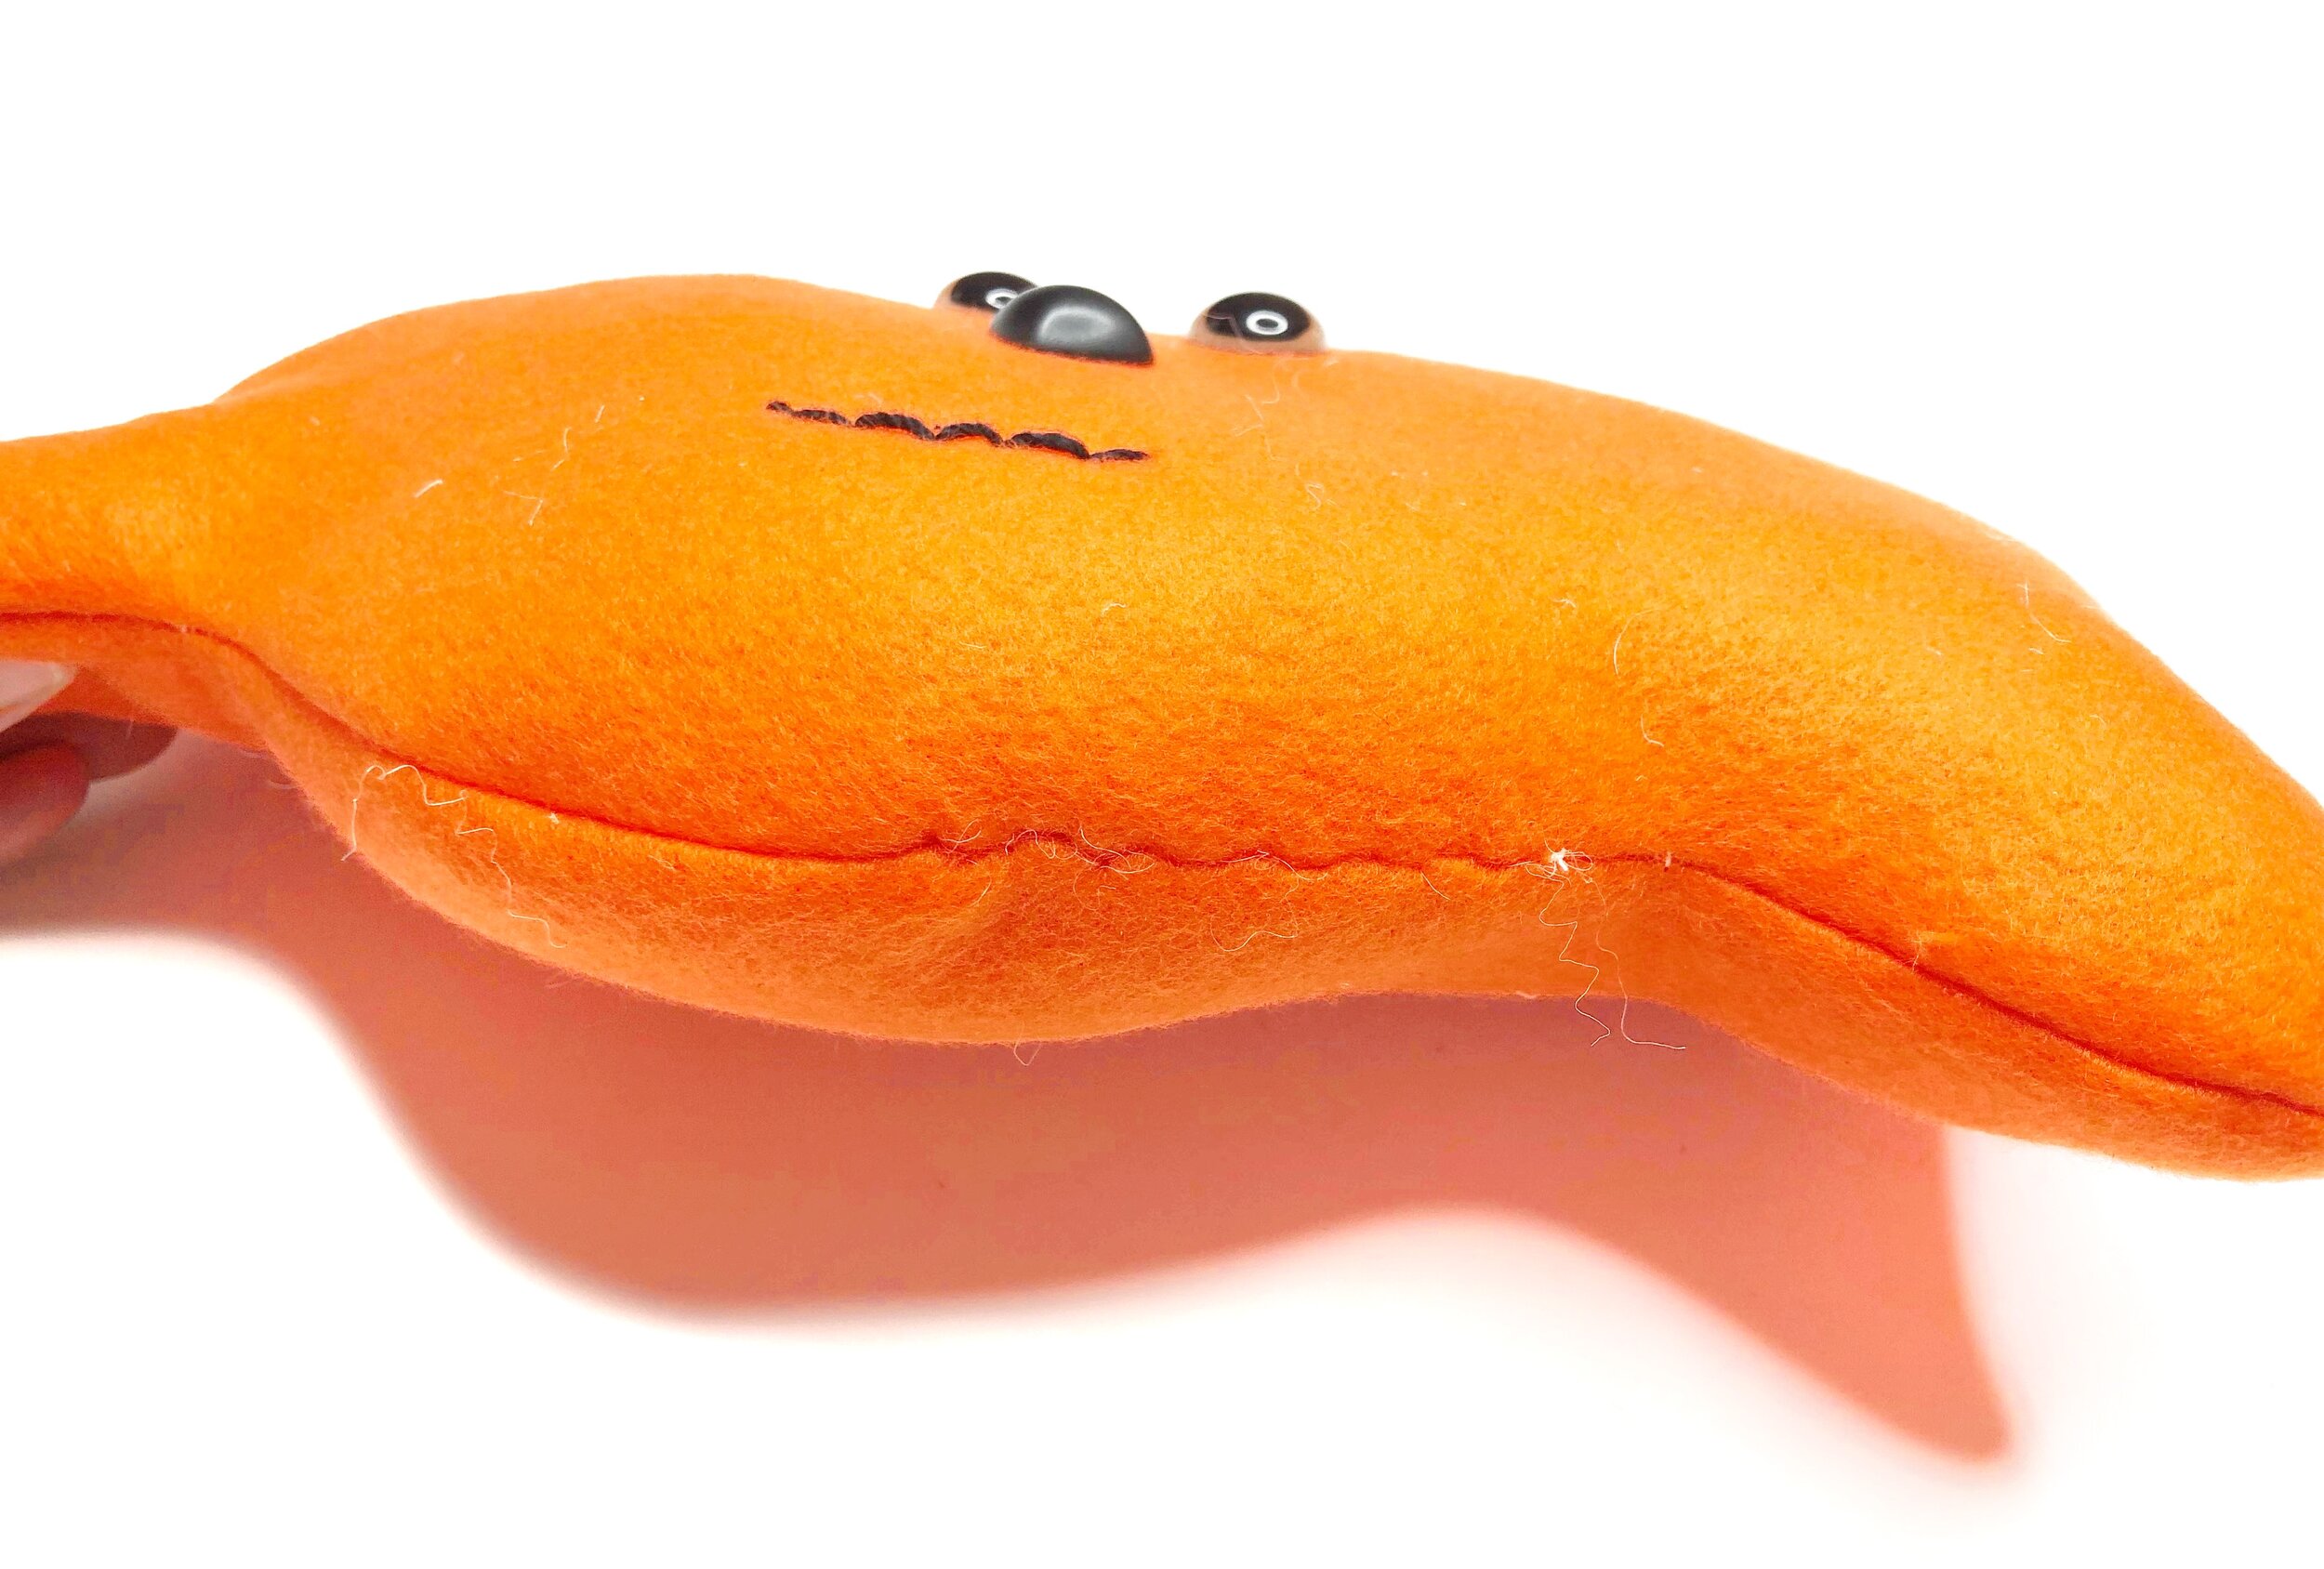
With fabric right sides together, stitch the head pieces leaving an opening to reverse and stuff.
Clip the inward seams at the curves around the head.
Reverse right side out.
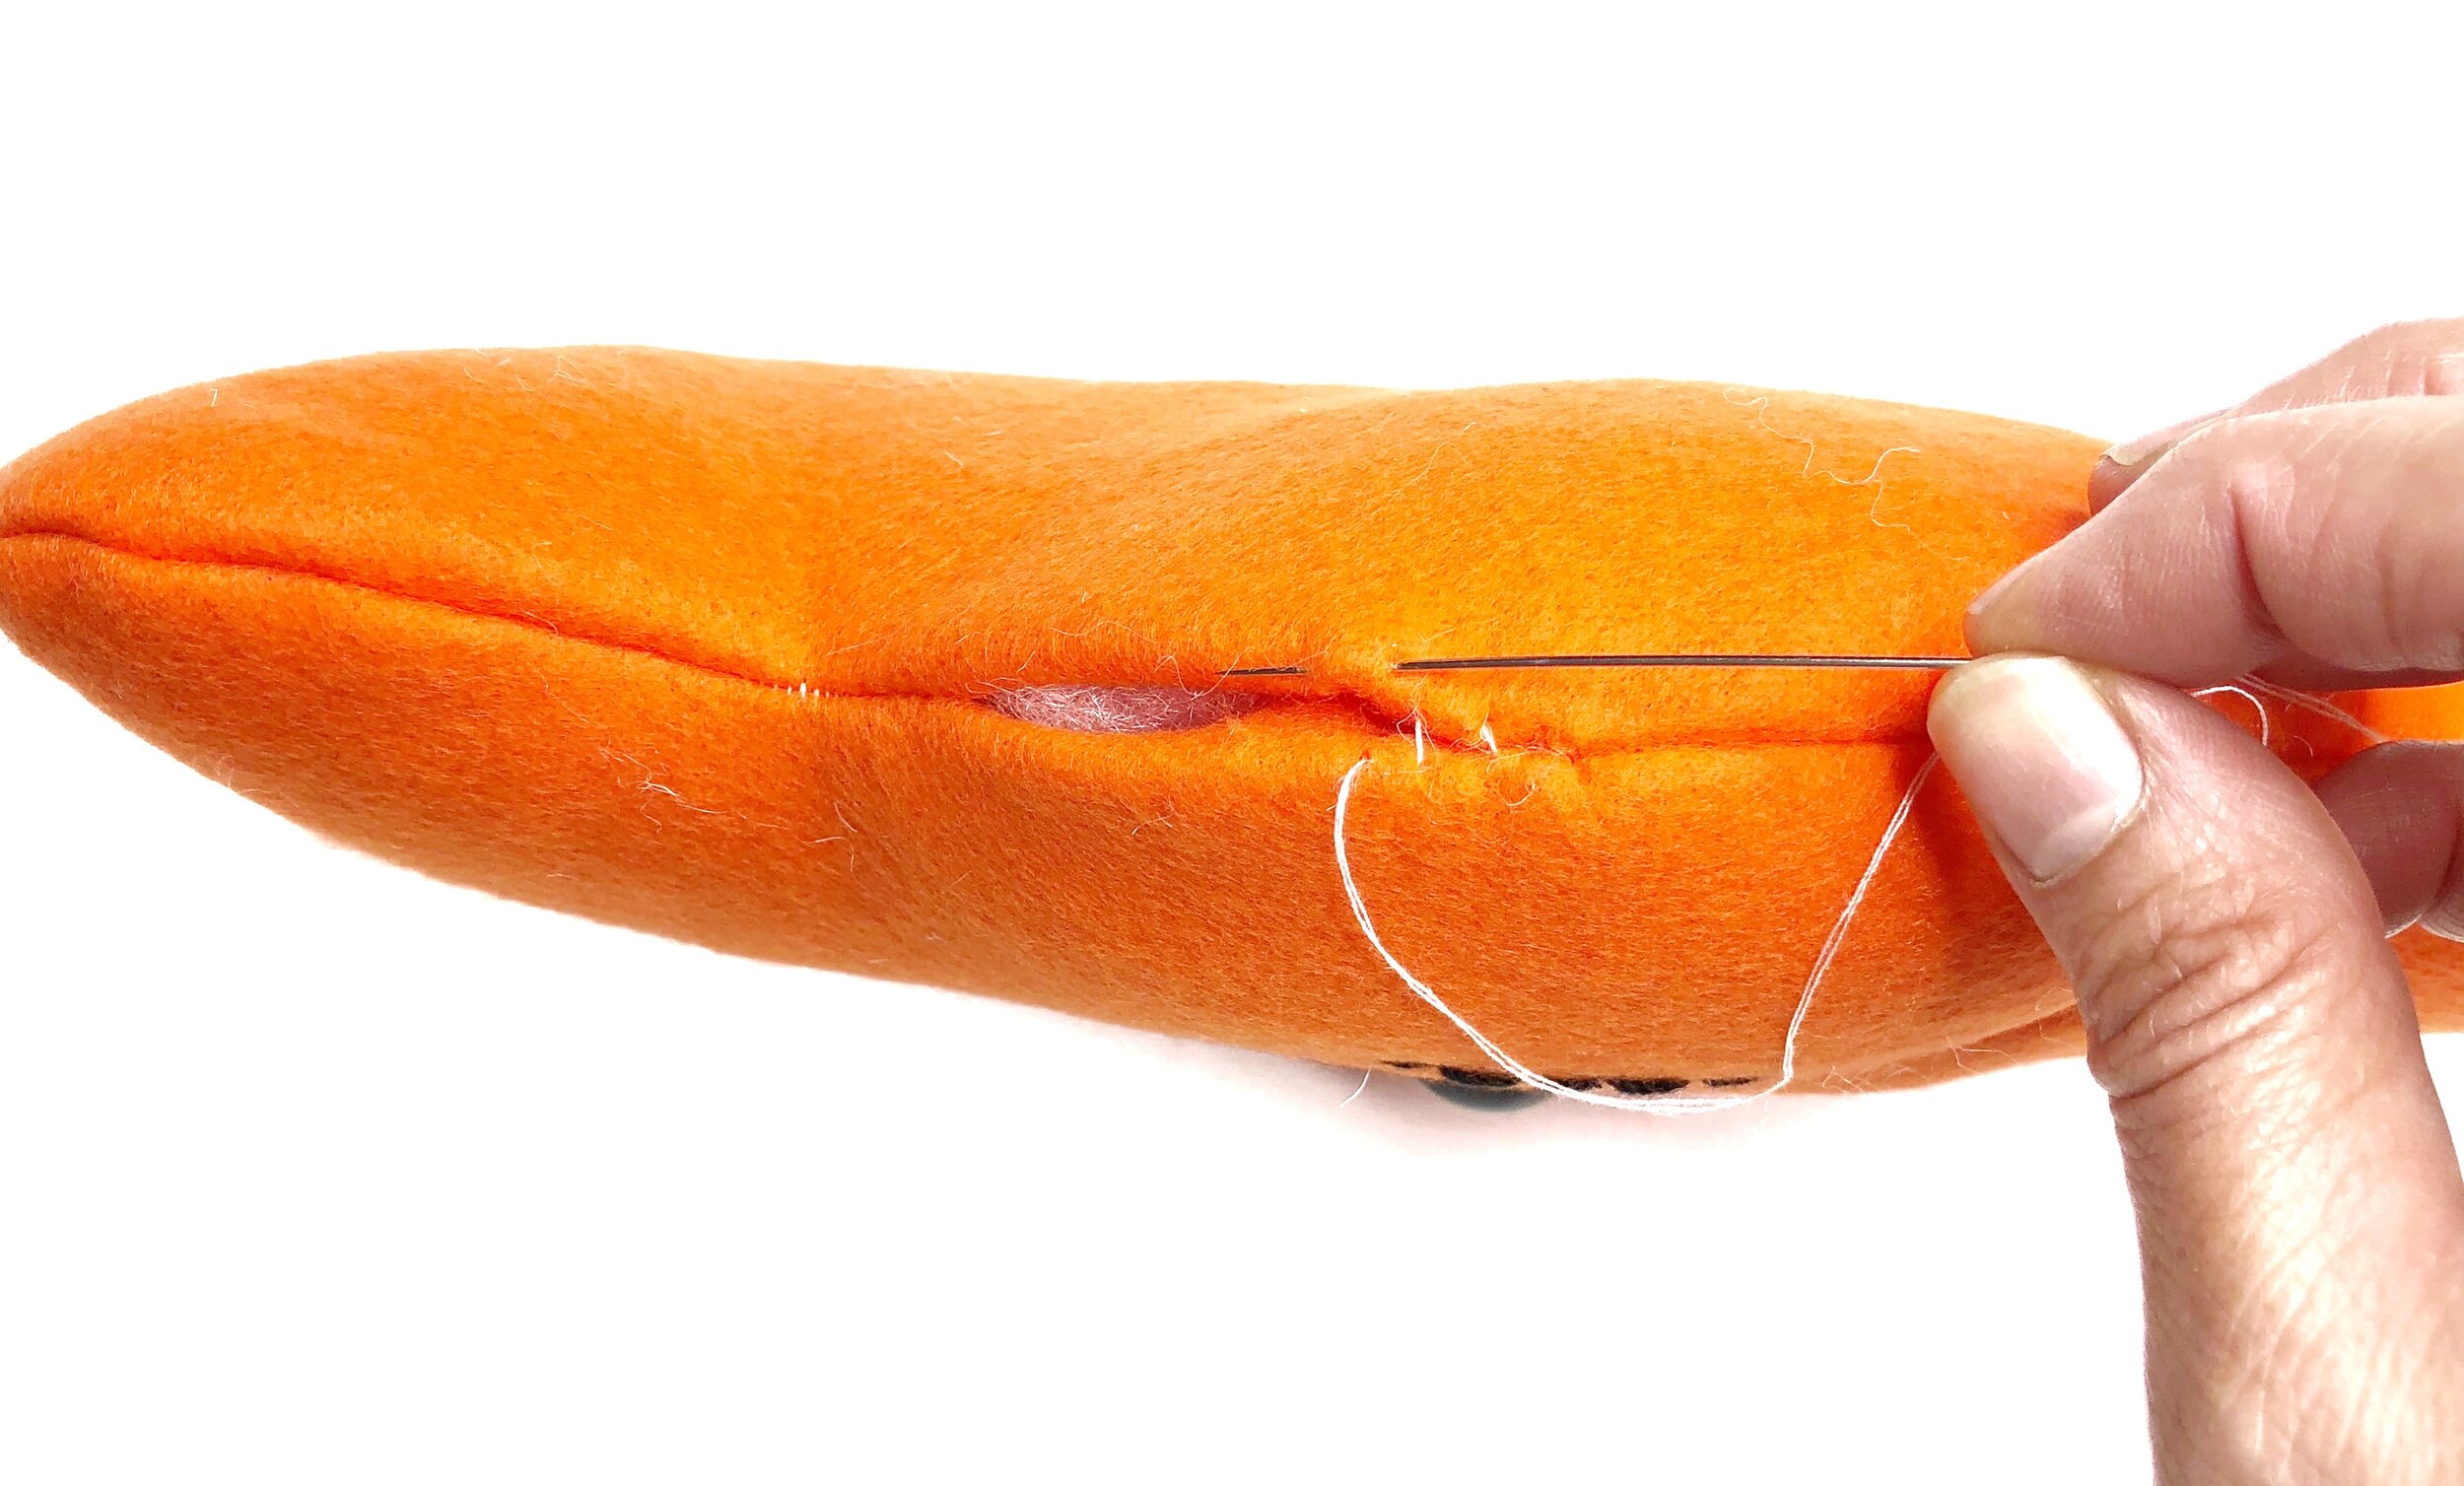
Stuff with polyester stuffing.
Stitch the opening closed by hand using a ladder stitch.
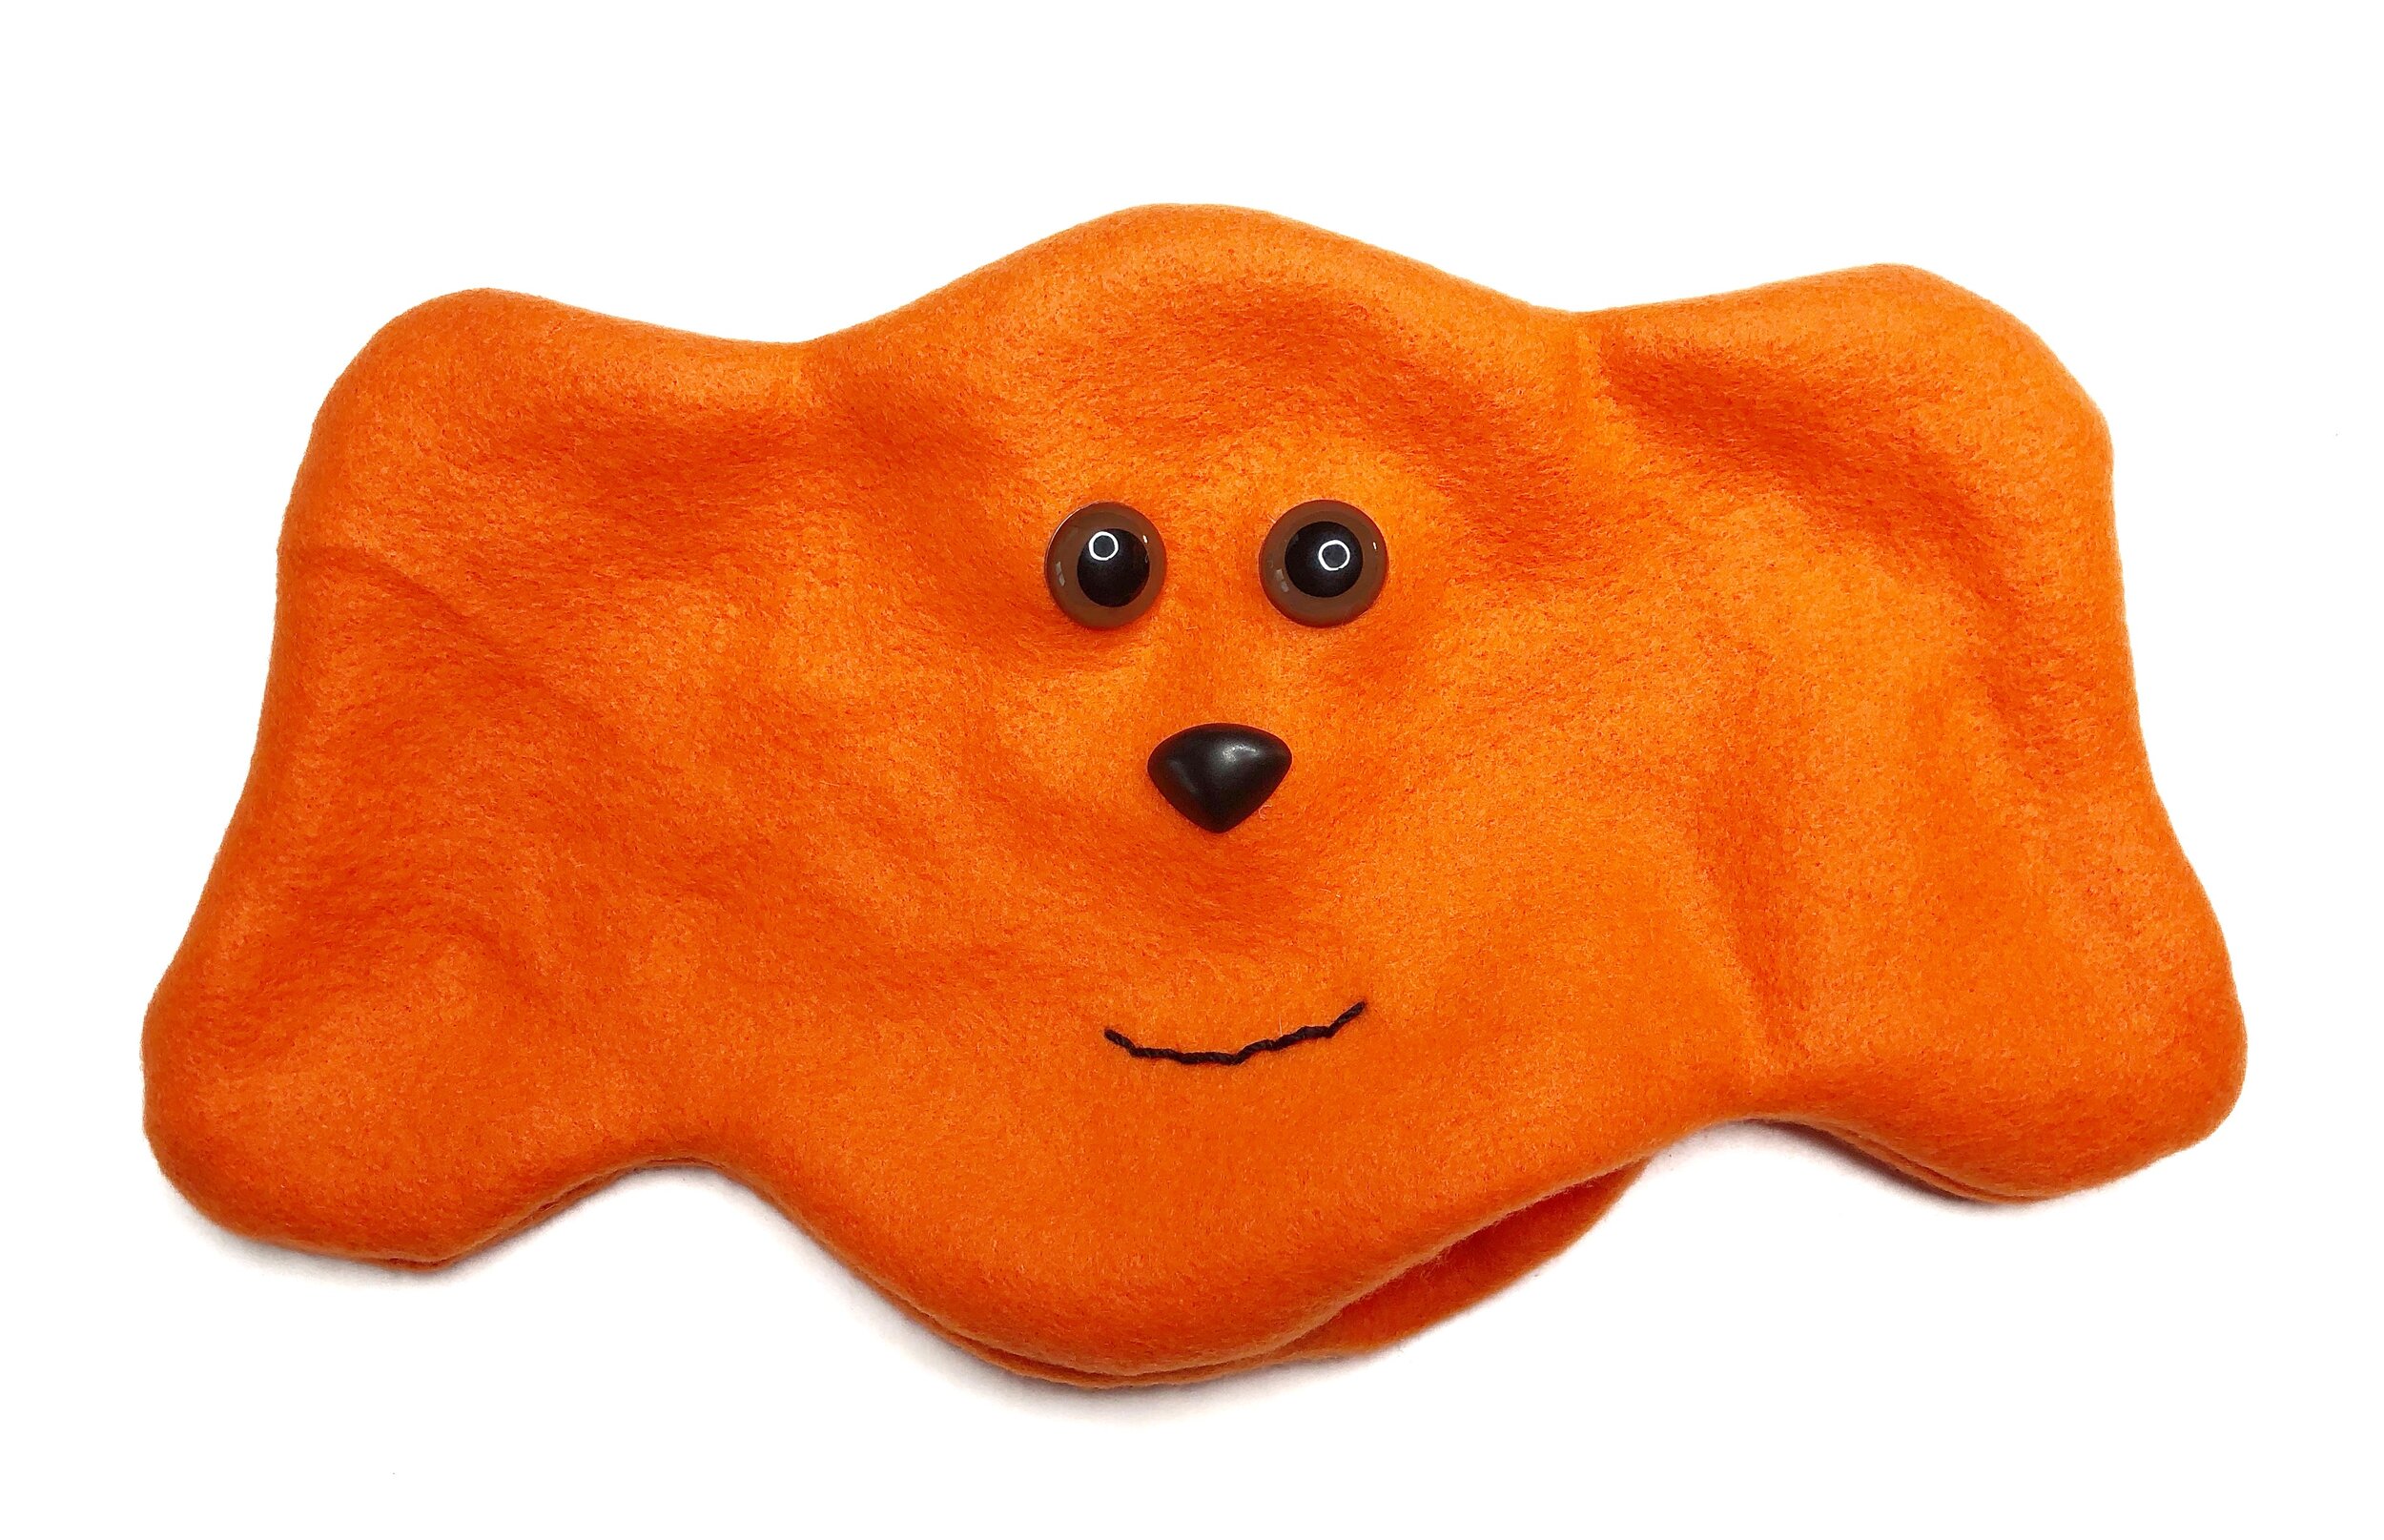
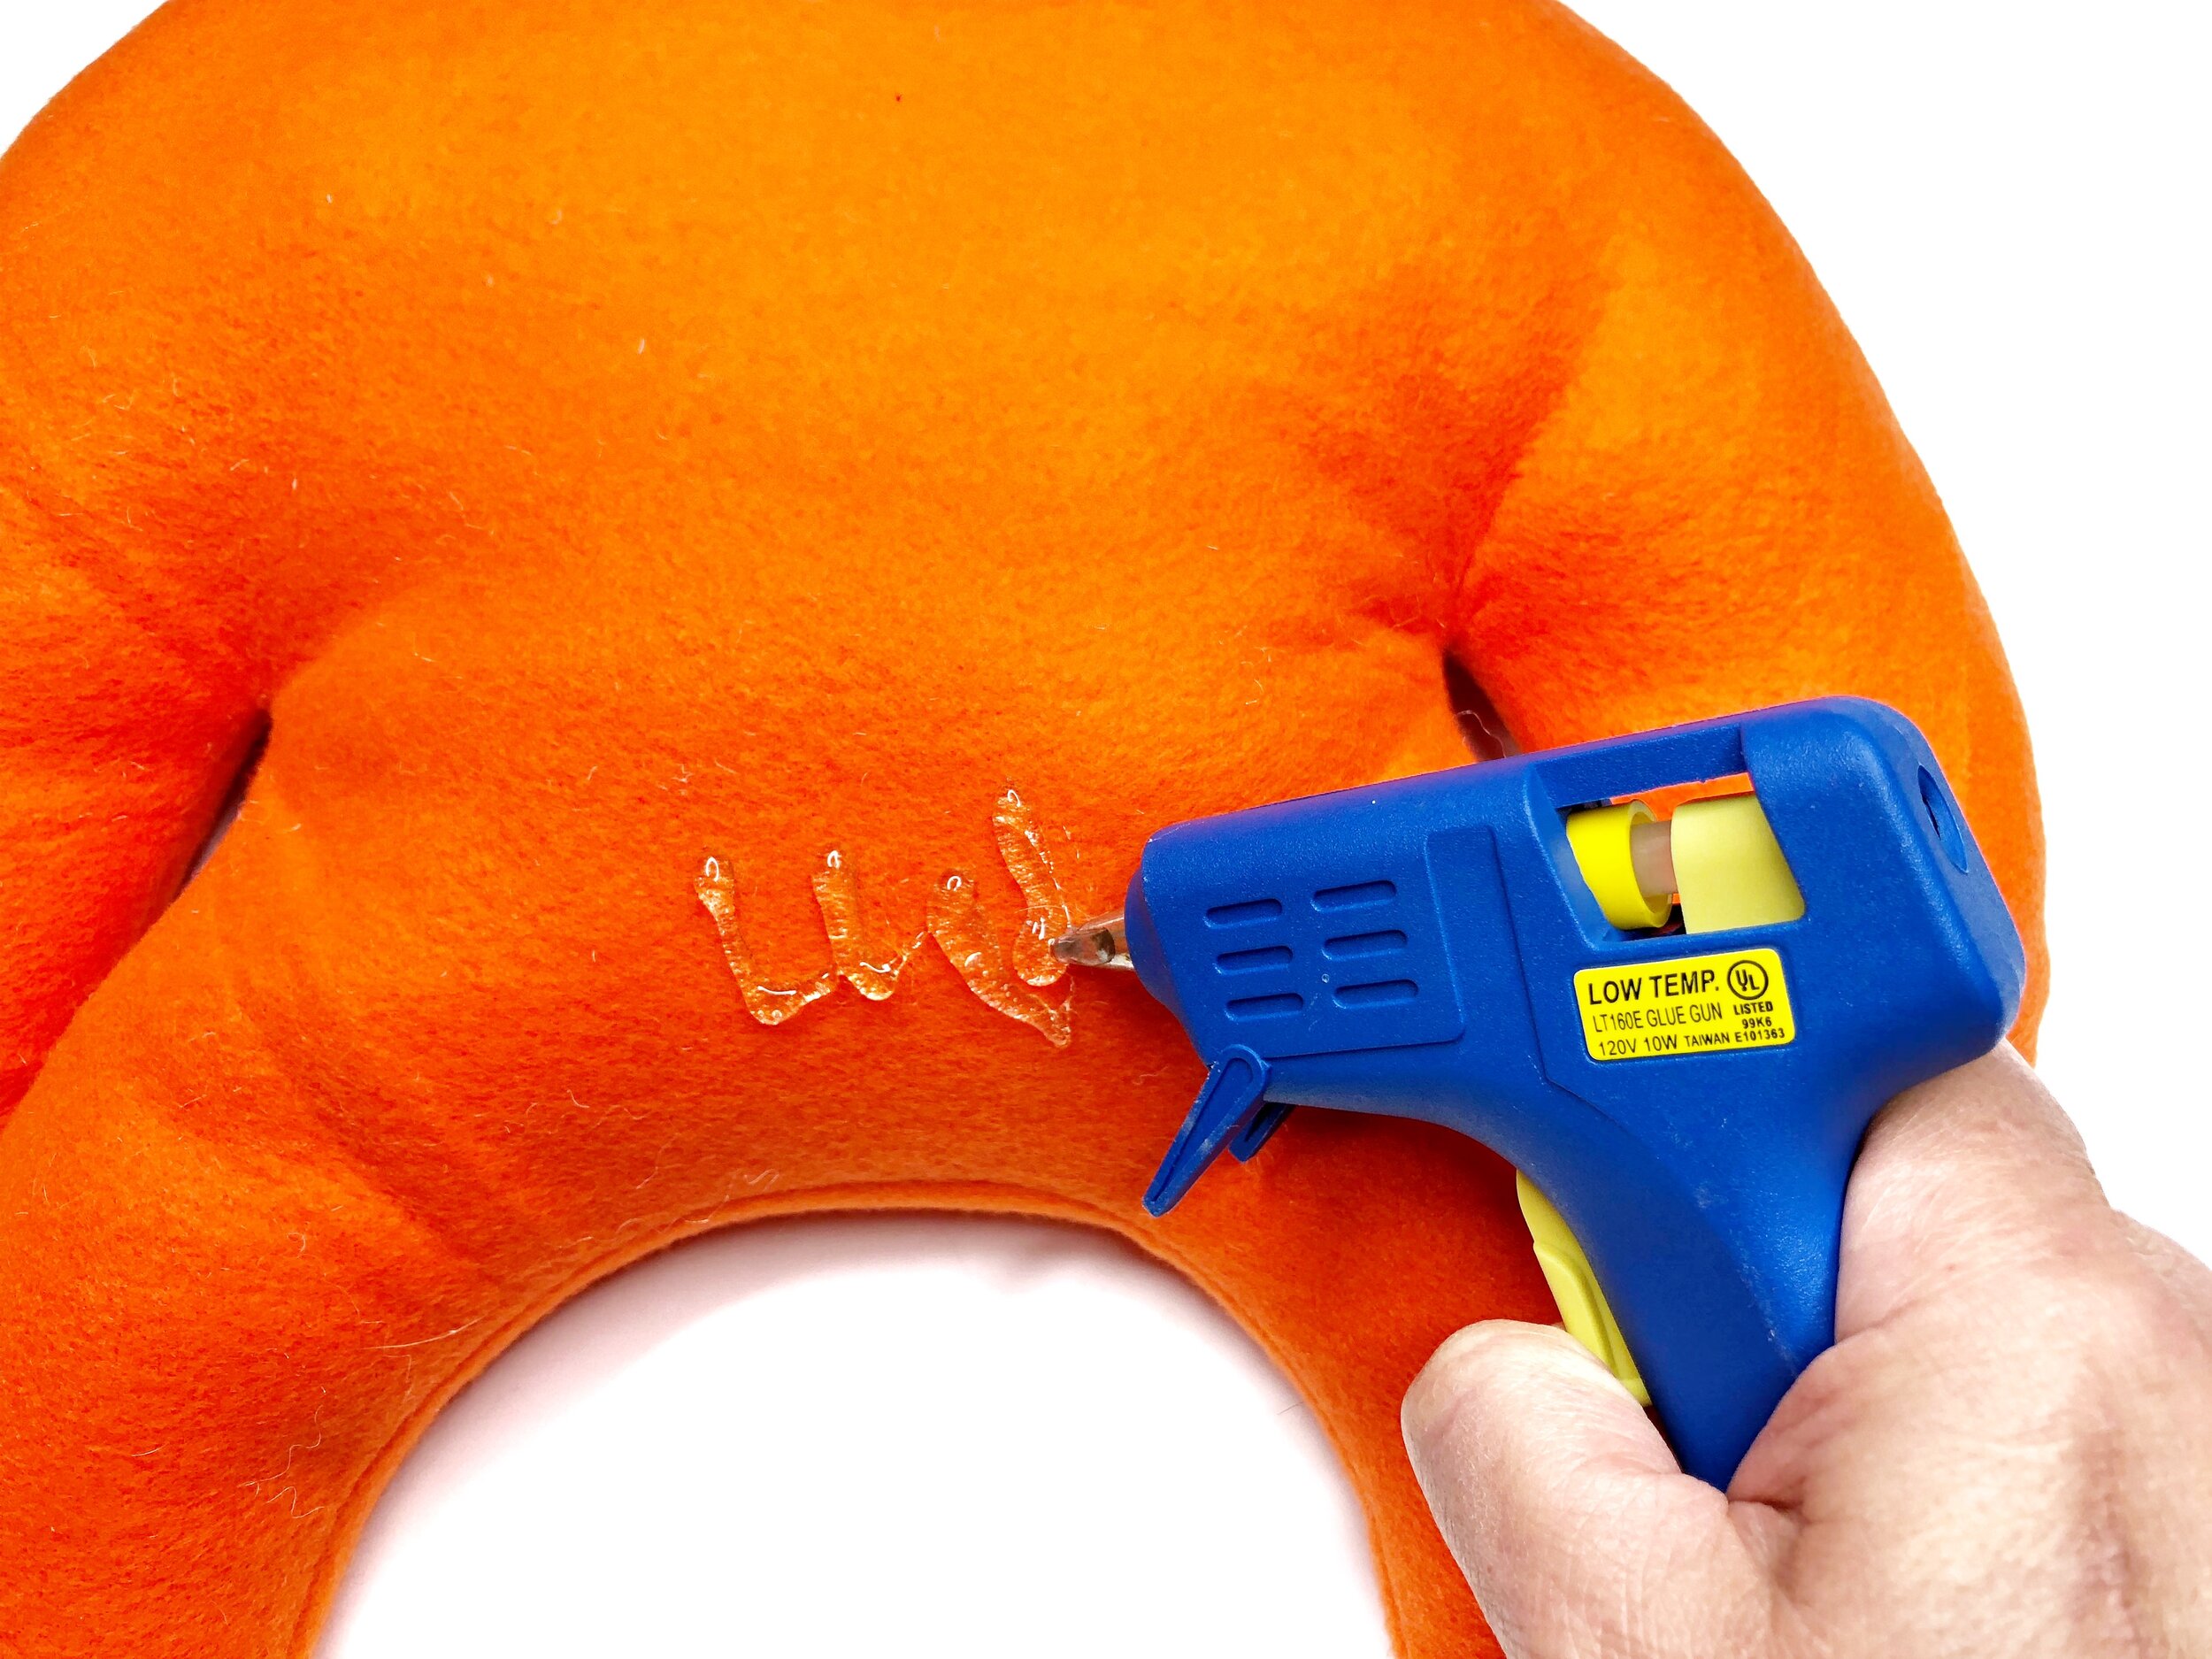
Hot glue the head to the front of the body so it’s resting on the front legs.

Time to take your new puppy for a walk, assuming you made the awake face! If not, it’s naptime!!!
