Welting in Sewing
Welting is a versatile and decorative technique that adds a professional finish to a variety of sewing projects. Whether you're making cushions, upholstery, bags, or garments, welting can enhance the overall look and durability of your creations. In this post, we'll dive into the basics of welting, explore different types, and provide a step-by-step guide on how to add welting to your projects.
What is Welting?
Welting, also known as piping, is a strip of fabric that is sewn into the seams of a sewing project. It typically contains a cord or filler that gives it a rounded, raised appearance. Welting can be made from the same fabric as your project for a seamless look or from a contrasting fabric to add visual interest.
Types of Welting
Single Welting: The most common type, featuring one row of welting inserted into a seam.
Double Welting: Consists of two rows of welting, often used in upholstery for a more decorative effect.
Flat Welting: Lacks the cord or filler, providing a flatter, less pronounced edge.
Decorative Welting: Features trims or embellishments for a unique look.
Supplies You'll Need
Fabric: Choose a fabric that complements your project. Cotton, linen, and upholstery fabrics work well.
Cording: Available in various thicknesses; choose one that suits your project.
Zipper Foot: Essential for sewing close to the cording.
Sewing Machine: A reliable sewing machine like the Brother CS6000i (affiliate link).
Thread: Matching or contrasting, depending on your design preference.
Scissors or Rotary Cutter: For cutting fabric strips.
Step-by-Step Guide to Adding Welting
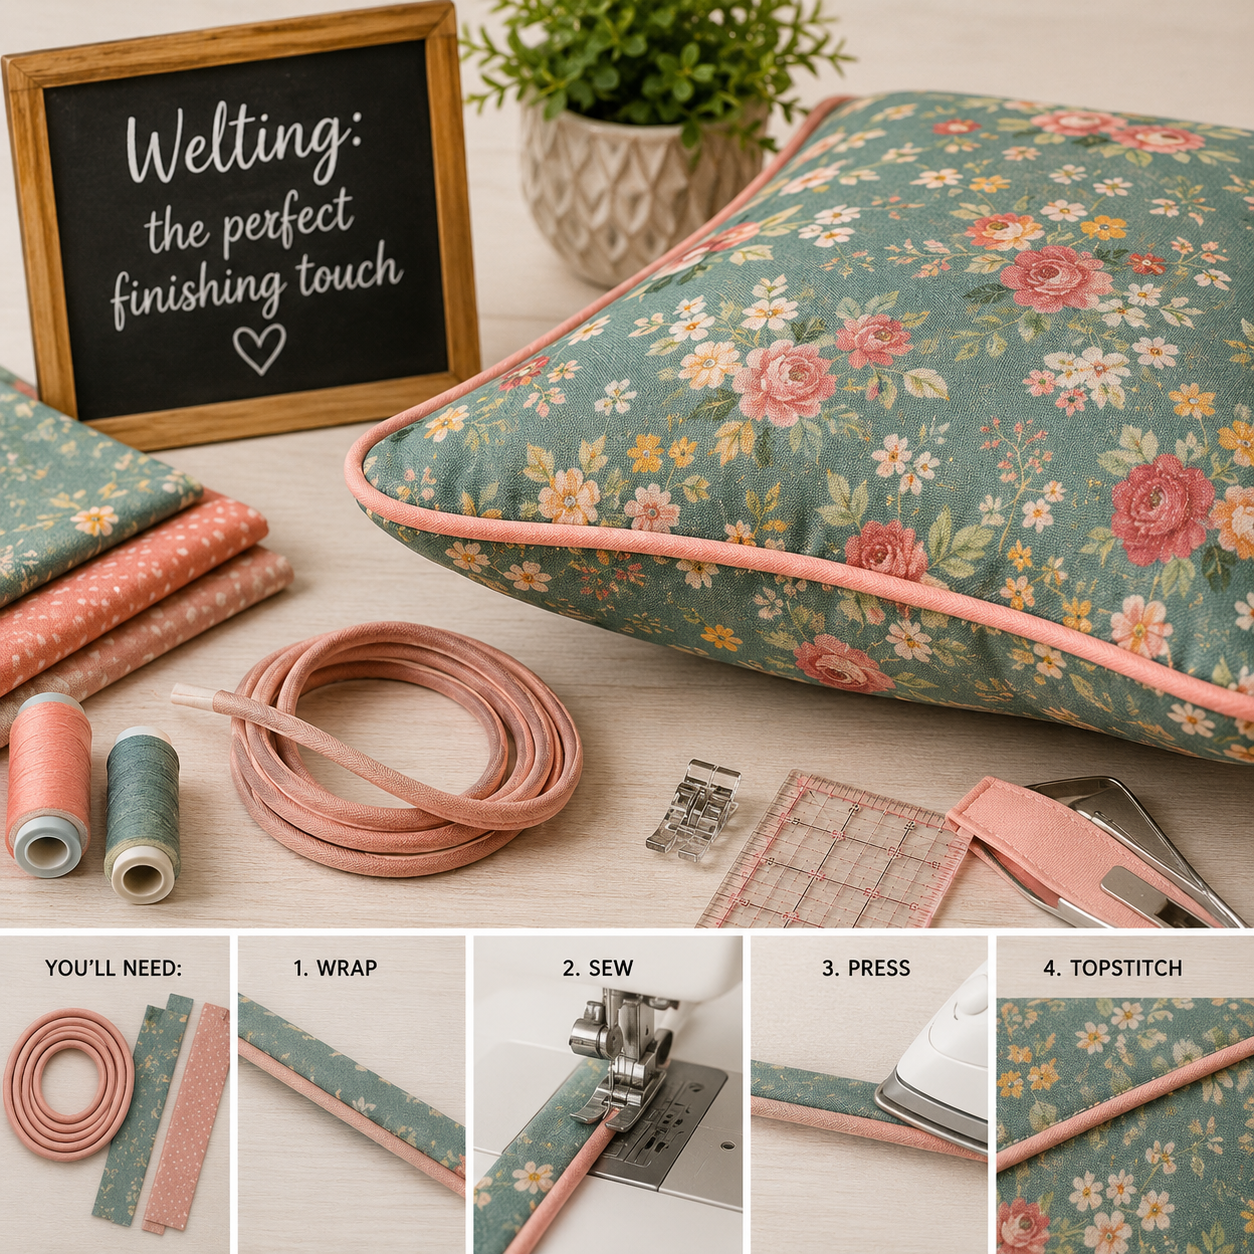
Prepare Your Fabric Strips: Cut strips of fabric on the bias (diagonal to the grain) to allow for flexibility around curves. The width of your strips should be the circumference of the cording plus seam allowance.
Cover the Cording: Fold the fabric strip around the cording and pin or clip in place. Using a zipper foot, sew close to the cording to encase it in the fabric.
Attach the Welting: Pin the covered cording to the right side of your fabric, aligning the raw edges. Use a basting stitch to hold it in place.
Sew the Seams: Place the other piece of fabric on top, right sides together, and sew the seam using the zipper foot to get close to the cording.
Finish the Edges: Trim any excess fabric and finish the edges with a serger or zigzag stitch to prevent fraying.
Tips for Perfect Welting
Practice on Scraps: If you're new to welting, practice on fabric scraps before applying it to your project.
Use a Seam Ripper: If your stitching isn't perfectly close to the cording, use a seam ripper to carefully adjust and resew.
Match or Contrast: Decide whether you want your welting to blend in or stand out. Matching fabric creates a subtle look, while contrasting fabric adds a decorative element.
Sewing Bee University
For more detailed tutorials and sewing tips, visit our Sewing Bee University.

Affiliate Links
Looking for the best supplies? Check out these affiliate links to get everything you need for your welting projects:
Welting is a fantastic way to elevate your sewing projects with a polished and professional finish. Whether you're making cushions, bags, or garments, adding welting can make a big difference. Follow our step-by-step guide and tips to master this technique, and don't forget to check out our Sewing Bee University for more sewing inspiration and tutorials. Happy sewing!