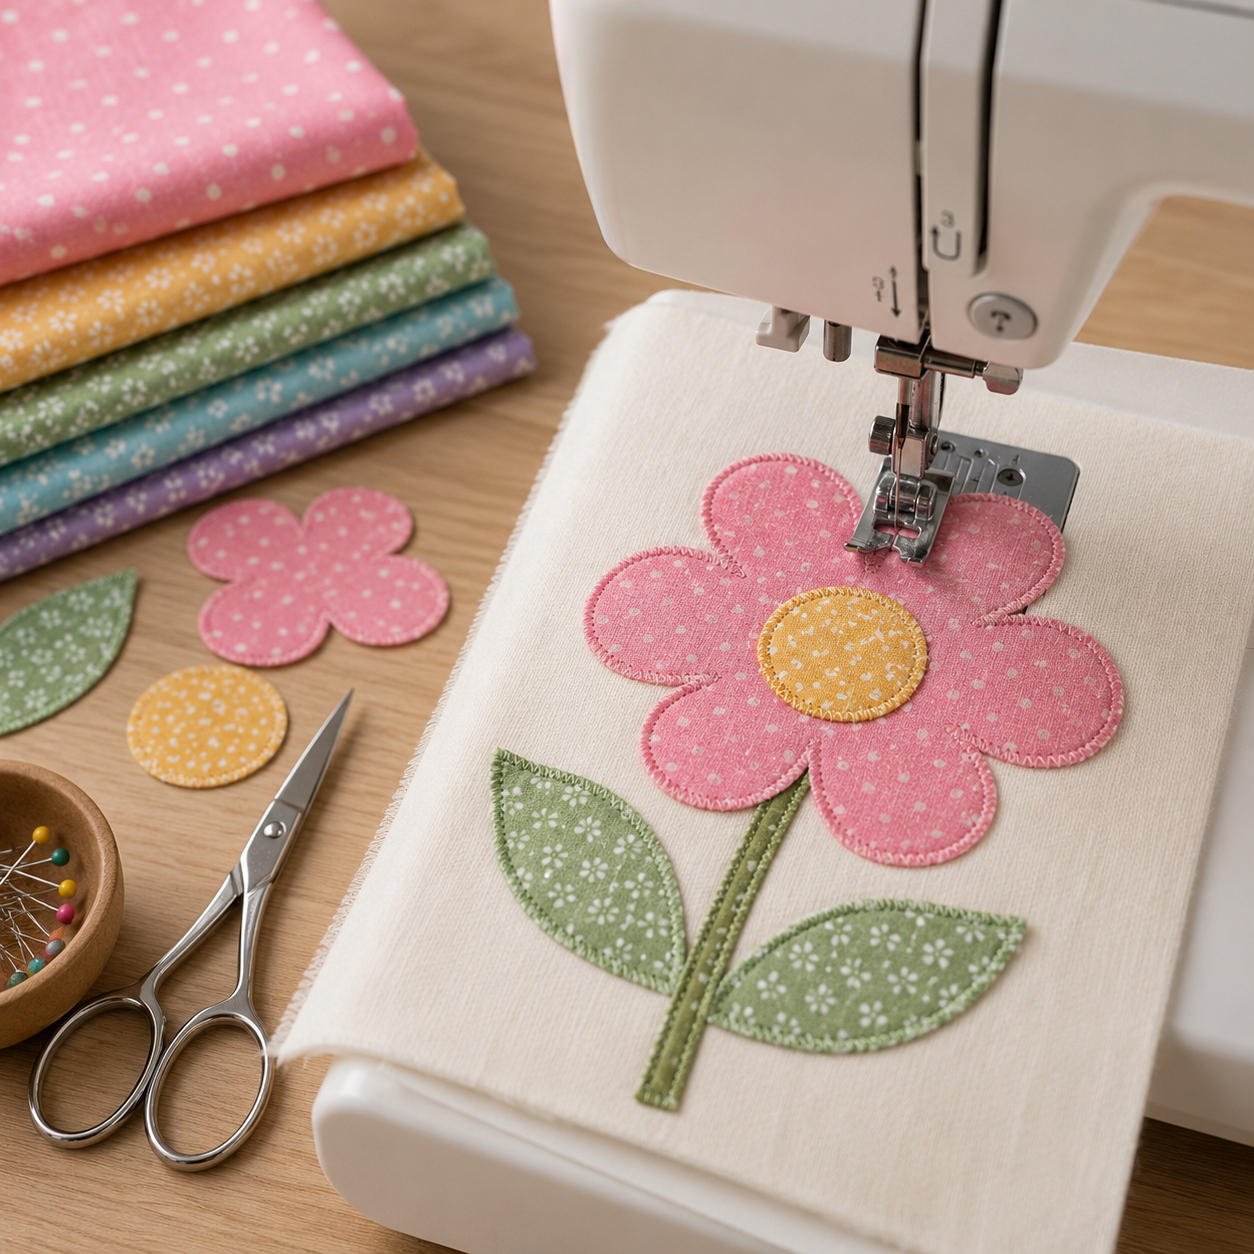
Sewing Appliqués: A Step-by-Step Guide
Adding appliqués to your sewing projects can transform ordinary pieces into extraordinary works of art. Whether you’re personalizing clothing, decorating home textiles, or crafting unique gifts, appliqués offer endless creative possibilities. In this post, we’ll walk you through everything you need to know to start sewing appliqués like a pro.
What is an Appliqué?
Appliqué is a decorative technique where pieces of fabric are sewn onto a larger fabric surface to create designs or patterns. This technique can be as simple or as intricate as you like, making it perfect for both beginners and experienced sewists.
Materials You’ll Need
Base Fabric: This is the fabric you’ll be adding the appliqué to.
Appliqué Fabric: Smaller pieces of fabric that form the design.
Fusible Webbing: This helps to stick the appliqué pieces to the base fabric before sewing.
Sewing Machine and Needles: A basic sewing machine will do, though a machine with decorative stitches can add extra flair.
Thread: Match the color to your appliqué fabric for a seamless look, or choose contrasting colors for a bold effect.
Scissors or Rotary Cutter: For cutting fabric shapes.
Iron and Ironing Board: To adhere the fusible webbing.
Step-by-Step Guide to Sewing Appliqués
Choose Your Design:
Sketch your design on paper or use pre-made patterns.
Keep in mind the scale of your project and the complexity of the design.
Prepare Your Fabrics:
Wash and iron both the base fabric and the appliqué fabric to prevent any shrinkage or distortion later on.
Cut Out Your Appliqué Pieces:
Apply fusible webbing to the wrong side of the appliqué fabric according to the manufacturer’s instructions.
Trace your design onto the paper backing of the fusible webbing and cut out your shapes.
Position the Appliqués:
Peel off the paper backing and place the appliqué pieces on the base fabric.
Rearrange the pieces until you’re happy with the layout.
Use an iron to fuse the appliqué pieces to the base fabric.
Sew the Appliqués:
Set your sewing machine to a zigzag or satin stitch. A narrow stitch is ideal for securing edges, while a wider stitch can create a decorative border.
Sew around the edges of each appliqué piece, keeping your stitches close to the edge.
For intricate designs, you may need to pivot your fabric frequently. Lower your needle into the fabric before lifting the presser foot to turn the fabric smoothly.
Finishing Touches:
Trim any loose threads and give your project a final press with the iron.
Consider adding embellishments like beads, sequins, or embroidery for extra detail.
Tips for Perfect Appliqués
Practice on Scraps: If you’re new to appliqué, practice your stitching on scrap fabric before working on your main project.
Stabilize Your Fabric: Use a stabilizer under your base fabric to prevent puckering, especially if the fabric is lightweight or stretchy.
Experiment with Stitches: Don’t be afraid to try different stitches and thread colors to see what works best for your design.
Applique pressing sheet
An appliqué pressing sheet is a reusable, double-sided, transparent, non-stick crafting tool used by quilters and sewers for fusible appliqué designs. It can be made from materials like ultra high temperature glass coated with Polylon or Teflon. The sheet allows you to see your pattern through it, which can help with placement. It can also protect your iron and ironing board from glue and prevent fabric pieces from sticking together
Shop
Shop on Amazon:
Sewing appliqués is a wonderful way to add personality and style to your projects. With a bit of practice and creativity, you can master this technique and open up a world of decorative possibilities. Happy sewing!