Let’s Talk Interfacing!
If you’ve ever wondered why your handmade collars stand up like a champ or how your bag keeps its shape like it went to posture school, the answer is… interfacing! This humble helper adds structure, strength, and just the right amount of sass to your sewing projects. But which kind should you use? And how do you apply it without turning your fabric into a crinkly mess? Don’t worry—I’ve got you covered.
What Is Interfacing, Anyway?
Interfacing is a supportive material added to fabric to give it structure, shape, or stability. It's the unsung hero behind those crisp collars, sturdy waistbands, and professional-looking bags.
Types of Interfacing
Let’s break it down—because not all interfacing is created equal.
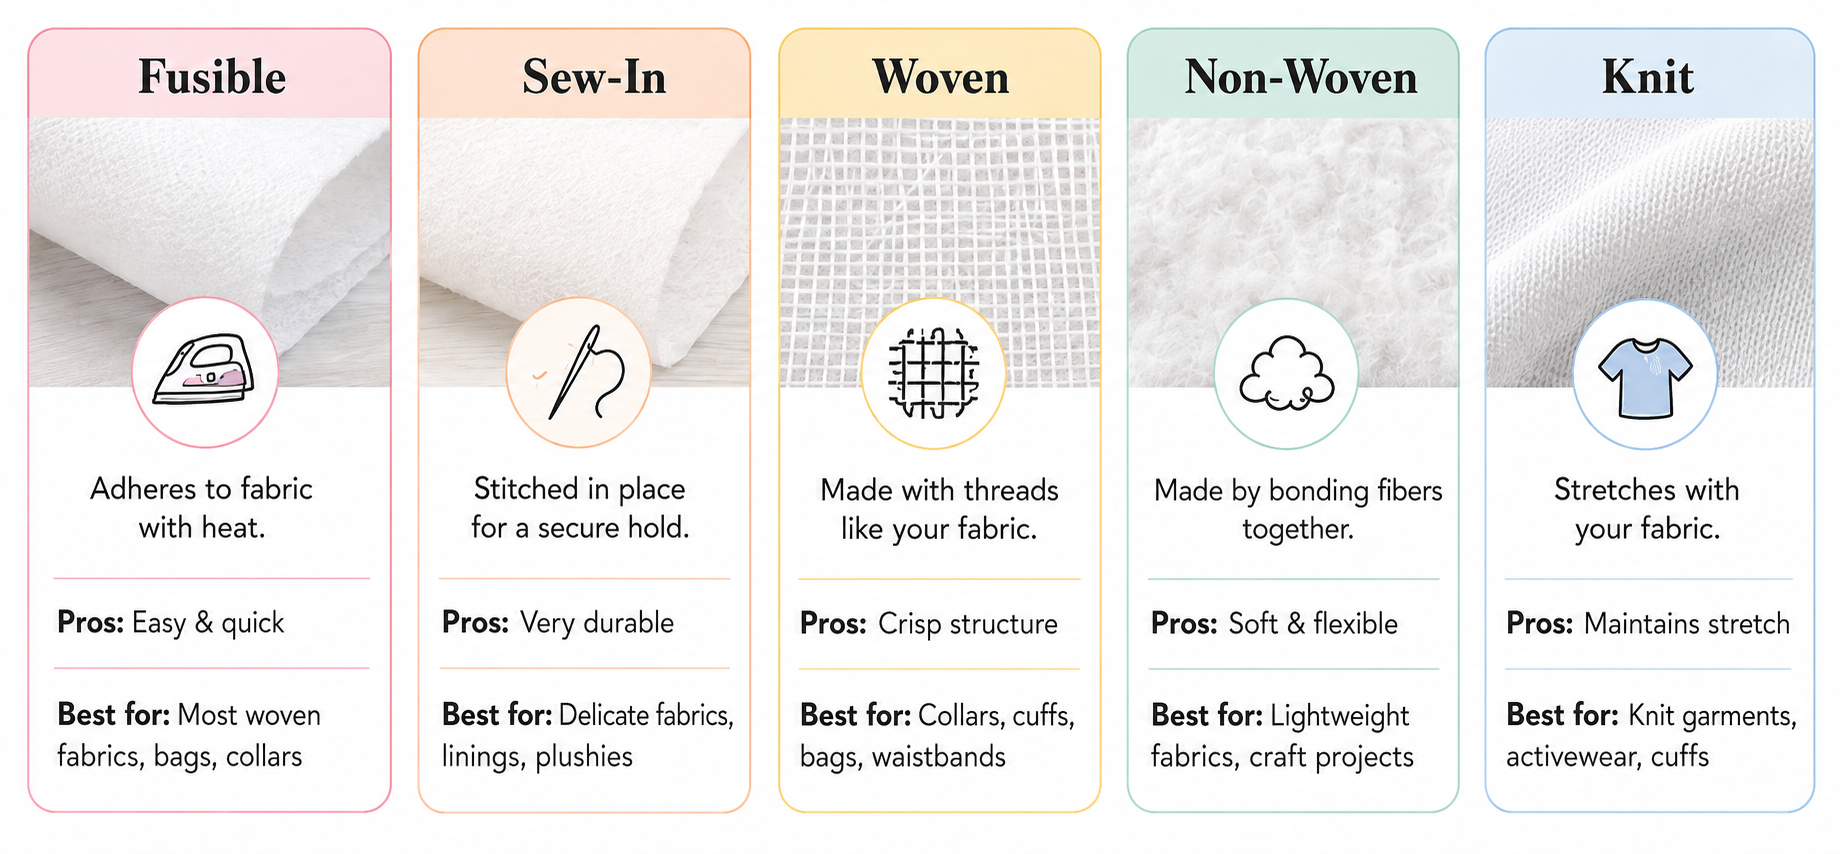
1. Fusible Interfacing (aka The Sticky Kind)
Applies with heat—just iron it on!
✅ Pros:
Quick and easy to apply
Great for beginners
No shifting while you sew
❌ Cons:
Not ideal for heat-sensitive fabrics
Can bubble if not applied correctly
Try this one:
Pellon SF101 Shape-Flex
2. Sew-In Interfacing (aka The Stitch-It-In Kind)
You sew it in like a lining—no heat involved!
✅ Pros:
Perfect for delicate or heat-sensitive fabrics
Offers a softer, more flexible finish
❌ Cons:
Takes longer to attach
Can shift if not basted well
Try this: Pellon 930 Sew-In Interfacing
3. Woven Interfacing
Has a fabric-like grain and feels more like actual cloth.
✅ Pros:
Moves with the fabric—great for garments
Adds structure without stiffness
❌ Cons:
Usually more expensive
Best when matched to fabric grain
Try this one: Pellon 950F Shir-Tailor
4. Non-Woven Interfacing
Has no grain—think of it like fabric paper.
✅ Pros:
Can be cut in any direction
Widely available and affordable
❌ Cons:
Doesn’t drape as well
Can feel stiff or papery
Try this one: HeatnBond Fusible Interfacing
5. Knitted Interfacing
Soft and stretchy—great for knits.
✅ Pros:
Maintains stretch
Invisible support for lightweight knits
❌ Cons:
Can be hard to find
Not ideal for structured pieces
Try this one: Pellon EK130 Easy-Knit Fusible Interfacing
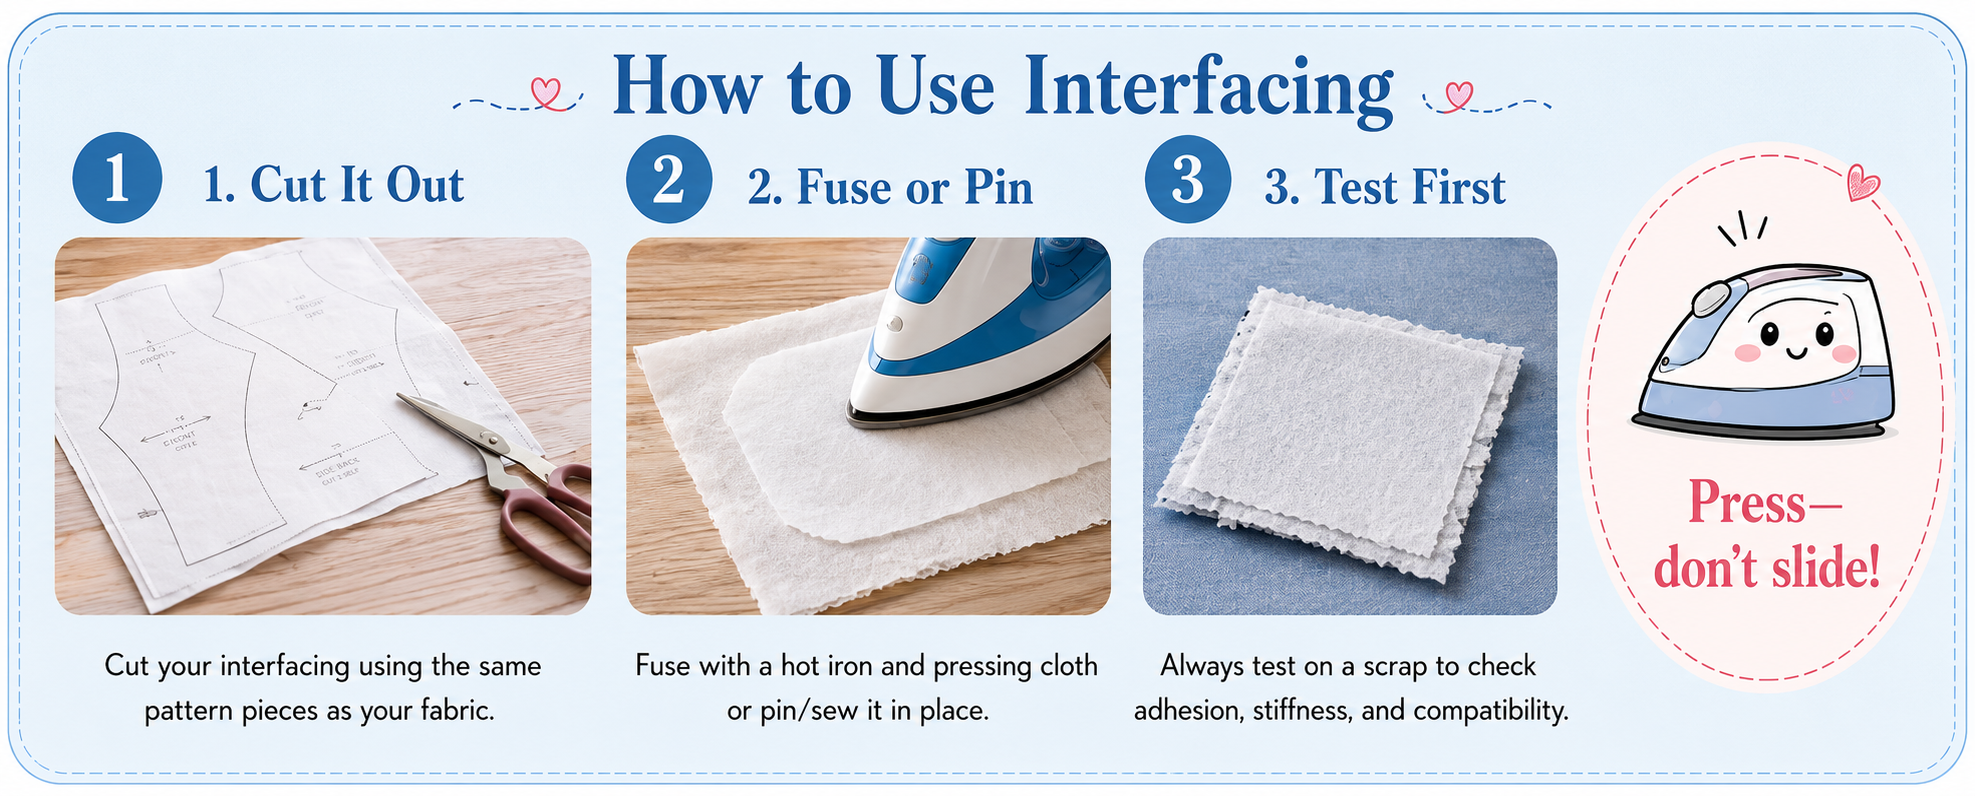
🛠️ How to Use Interfacing
Choosing the Right Thickness
Interfacing comes in lightweight, medium-weight, and heavyweight.
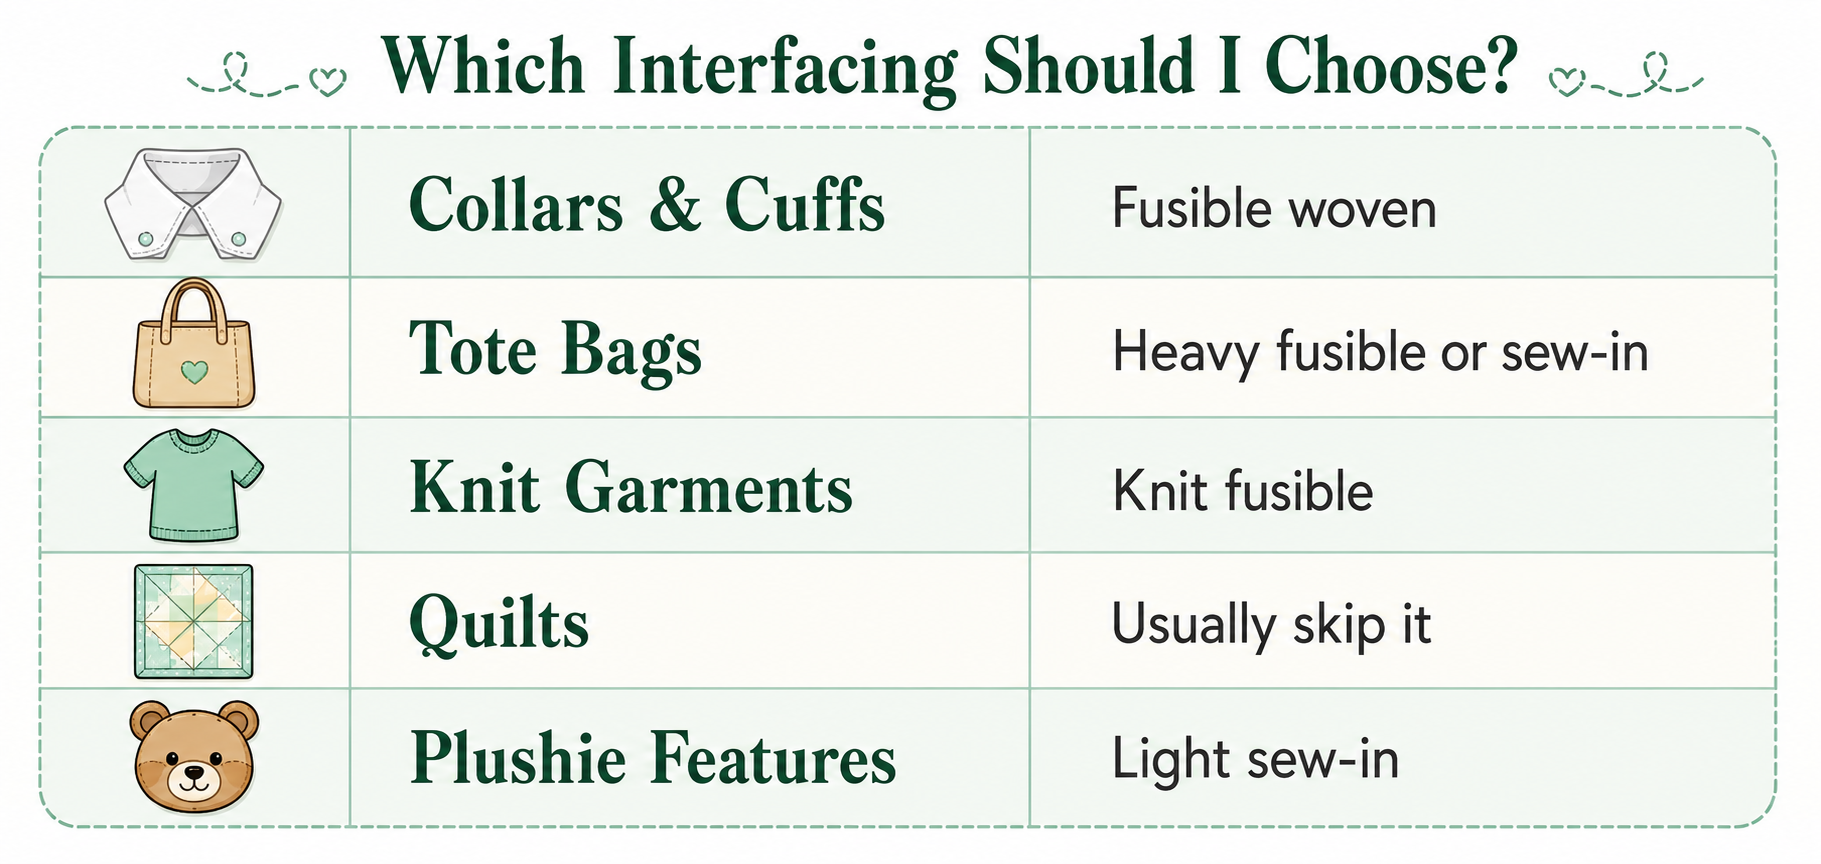
🪶 Lightweight: Best for delicate fabrics like cotton or flannel (perfect for plush books).
🧵 Medium-weight: Great for tote bags, hats, and structured plushes.
🧱 Heavyweight: Think belts, purses, or costume pieces that need to stand on their own.
If you’re unsure, start with a lightweight fusible option — it gives gentle stability without stiffness.
Tips & Tricks
Pre-wash your fabric AND interfacing (if the manufacturer recommends it)—no shrinking surprises!
Don’t forget your pressing cloth. A scrap of cotton fabric or a Teflon pressing sheet protects your iron from sticky accidents.
Keep it lightweight for delicate fabrics. You want support, not stiffness—unless you’re sewing armor. Then by all means, go wild.
FAQs
Q: Can I skip interfacing if my fabric is thick?
A: You can, but it depends on the look you’re going for. Even thick fabrics benefit from a little extra support in key areas!
Q: What’s the difference between interfacing and stabilizer?
A: Interfacing is used to shape fabric; stabilizer is typically used for embroidery to prevent puckering.
Q: My interfacing bubbled! Help!
A: That’s usually caused by too much steam or not enough pressure. Use a dry iron and press firmly—no sliding!
🛍️ Shop This Post
Here are the interfacing MVPs mentioned above:
(As an Amazon Associate, I earn from qualifying purchases. Thanks for supporting my studio! ❤️)
✂️ Wrap-Up
Whether you're stiffening up a tote, crisping a collar, or giving your knit tee a little backbone, interfacing is the secret sauce that takes your sewing from handmade to hand-wow. Now you can interface with confidence!
Shop Patterns | sewing tutorials | sewing blog | Shop sewing supplies