How to Fix Fraying Fabric: 10 Easy Methods That Actually Work
Nothing is more frustrating than cutting out a sewing project, only to watch the edges unravel before you even get it under the sewing machine.
Fabric fraying is one of the most common sewing problems, especially for beginners. The good news? There are several easy ways to stop fabric from fraying, whether you're sewing clothing, quilts, home décor projects, or stuffed animals.
In this guide, we'll cover the best methods for preventing frayed edges, which fabrics are most likely to fray, and which techniques work best for different projects.
Join creativebug to access thousands of sewing, art, craft, and needle art classes 
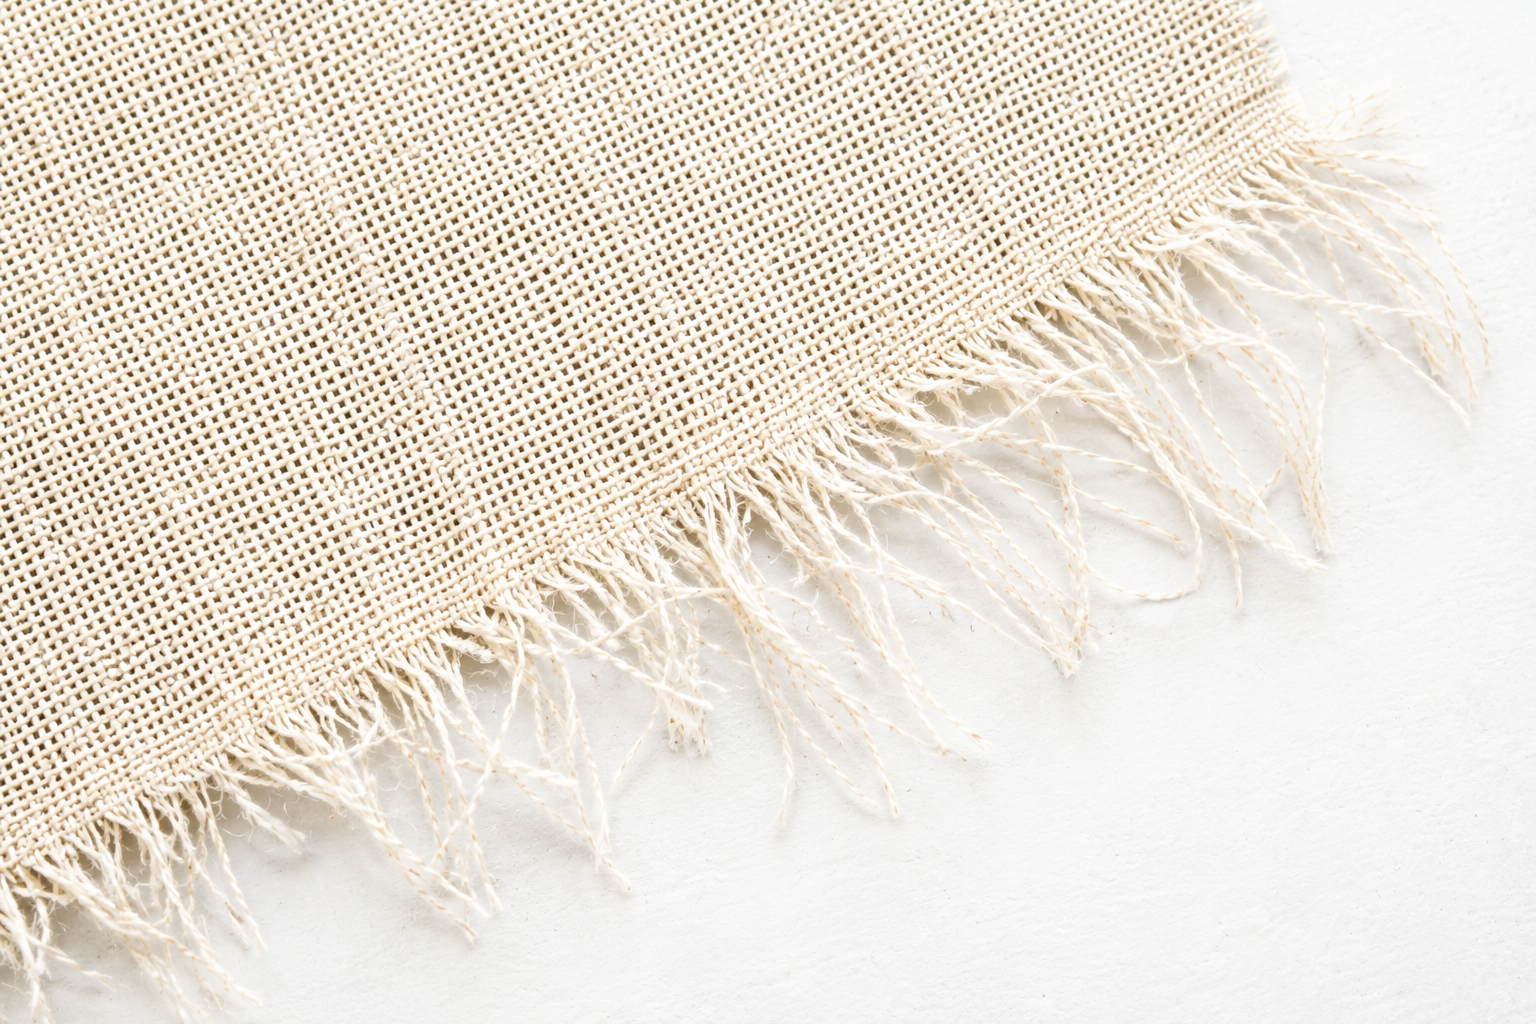
Why Does Fabric Fray?
Most woven fabrics are made from threads woven together in a grid pattern. When fabric is cut, those threads are exposed along the raw edge and can begin unraveling.
The looser the weave, the faster the fabric tends to fray.
Fabrics that commonly fray include:
Cotton
Linen
Denim
Canvas
Satin
Rayon
Fabrics that typically do not fray include:
Fleece
Felt
Minky
Sherpa
Most knit fabrics
10 Ways to Stop Fabric From Fraying
1. Use a Zigzag Stitch
A zigzag stitch wraps thread around the raw edge of the fabric, helping hold loose fibers in place. This is one of the easiest methods for beginners because almost every sewing machine includes a zigzag stitch setting.
Best for:
Cotton
Linen
Canvas
General sewing projects
2. Use a Serger
A serger trims the edge while wrapping it in thread at the same time. This creates the clean professional finish you often see inside store-bought clothing.
Best for:
Garments
Home décor
Frequently washed items
3. Cut With Pinking Shears
Pinking shears create a zigzag edge instead of a straight cut. The zigzag pattern reduces unraveling because the threads cannot easily pull free in a straight line.
Best for:
Quick projects
Cotton fabrics
Temporary edge protection
4. Apply Fray Check
Fray Check is a liquid seam sealant that dries clear and prevents fibers from unraveling. Simply apply a small amount along the cut edge and allow it to dry completely.
Best for:
Buttonholes
Ribbon ends
Delicate fabrics
Small repairs
5. Sew French Seams
French seams completely enclose the raw edge inside the seam itself. This creates a beautiful finish while eliminating visible fraying.
Best for:
Clothing
Lightweight fabrics
Linen
Cotton
6. Use Bias Tape
Bias tape covers and encloses raw edges. This method is commonly used for blankets, bags, and home décor projects.
Best for:
Decorative finishes
Heavy fabrics
Visible seams
7. Fold and Hem the Edge
Turning the edge under and sewing it down prevents fibers from escaping. This is one of the most durable solutions.
Best for:
Clothing
Curtains
Tablecloths
8. Use Fabric Glue
Fabric glue can help secure edges on projects that won't experience heavy wear.
Best for:
Crafts
Decorative projects
Quick fixes
9. Use a Rotary Cutter
A sharp rotary cutter produces cleaner cuts than dull scissors. Cleaner cuts often fray less initially.
Best for:
Quilting
Precision cutting
Large projects
10. Choose Fabrics That Don't Fray
Sometimes the easiest solution is choosing fabrics that naturally resist fraying.
Popular options include:
Fleece
Felt
Minky
Sherpa
Interlock knit
Many stuffed animal sewing patterns use these fabrics because they are beginner-friendly and require little to no edge finishing.
Do Plush Sewing Fabrics Fray?
If you sew stuffed animals, pillows, plush food, or soft toys, you'll be happy to know that many popular plush fabrics fray very little.
Fleece
Fleece rarely frays and usually does not require any edge finishing.
Felt
Felt does not fray because it is made from compressed fibers rather than woven threads.
Minky
Minky generally does not fray, though it can shed during cutting.
Sherpa
Sherpa may shed fibers but rarely unravels.
Faux Fur
Faux fur can shed when cut, but the backing usually remains stable and resists fraying.
For many plush sewing projects, you can simply sew the pieces together without worrying about finishing raw edges.
Best Tools for Preventing Fraying
Here are a few sewing room favorites that help keep fabric edges neat and tidy:
Pinking shears
Rotary cutter
Self-healing cutting mat
Fray Check
Wonder Clips
Serger
These tools can save time and make your finished projects look more professional.
Frequently Asked Questions
Can I stop fabric from fraying without a sewing machine?
Yes. Pinking shears, Fray Check, fabric glue, and hand-sewn hems are all effective options.
What fabric frays the most?
Loosely woven fabrics such as linen, rayon, and some lightweight cottons tend to fray the fastest.
Does fleece need edge finishing?
Usually no. Fleece is one of the easiest fabrics to sew because it rarely frays.
Do pinking shears completely stop fraying?
Not completely. They slow fraying significantly but may not provide enough protection for heavily used items.
Is a serger necessary?
No. A standard sewing machine with a zigzag stitch can prevent fraying successfully for most projects.
Final Thoughts
Fabric fraying is a normal part of sewing, but it doesn't have to ruin your project. Whether you choose a zigzag stitch, pinking shears, a serger, or Fray Check, there is a solution for every fabric type and skill level.
If you sew plushies and stuffed animals, you're already ahead of the game because many plush fabrics naturally resist fraying.